
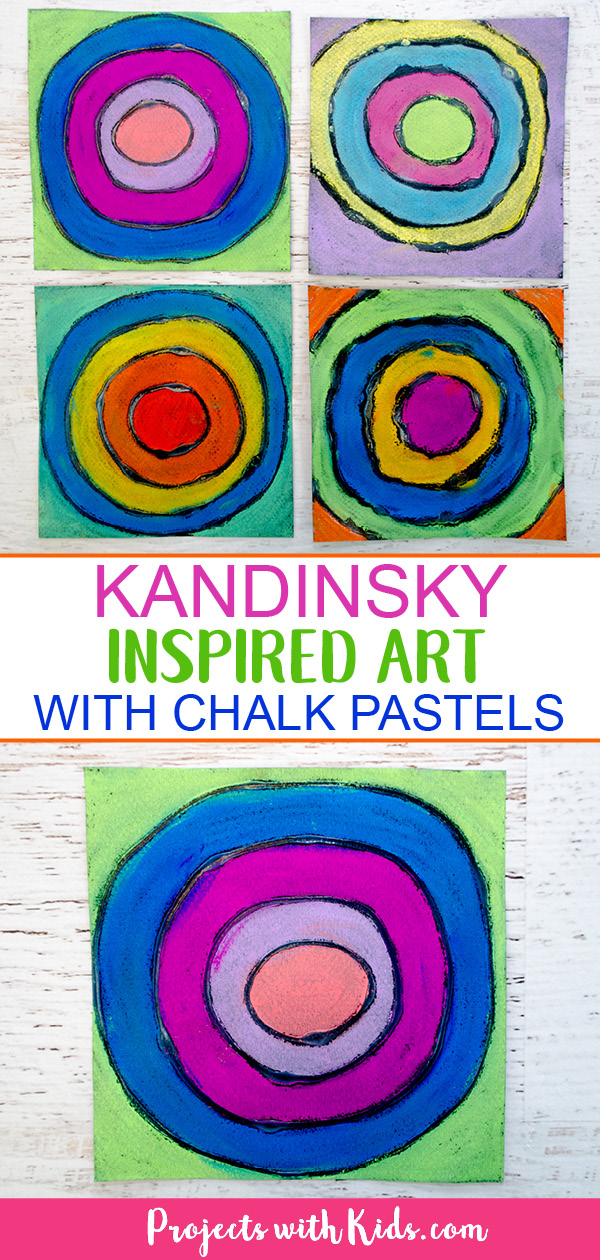
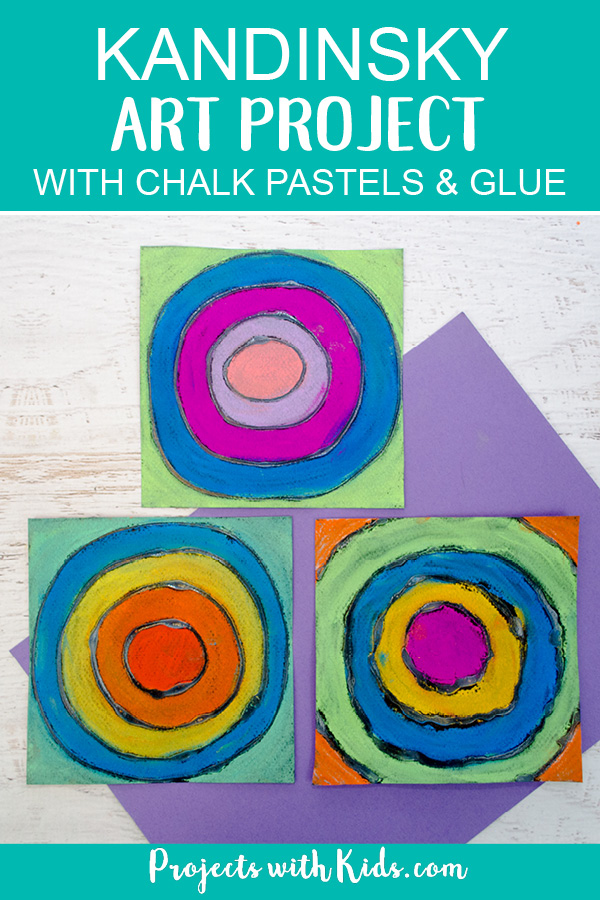
We created this Kandinsky art for kids using chalk pastels and glue and they turned out fantastic! This is a super easy and fun art project that kids will love to make.
Wassily Kandinsky was a famous artist that used bright, bold colors in his art. Kandinsky was a “synaesthete” which means he could “hear colors” and “see sounds”. He thought about how the colors made him feel and used different color combinations to evoke emotions.
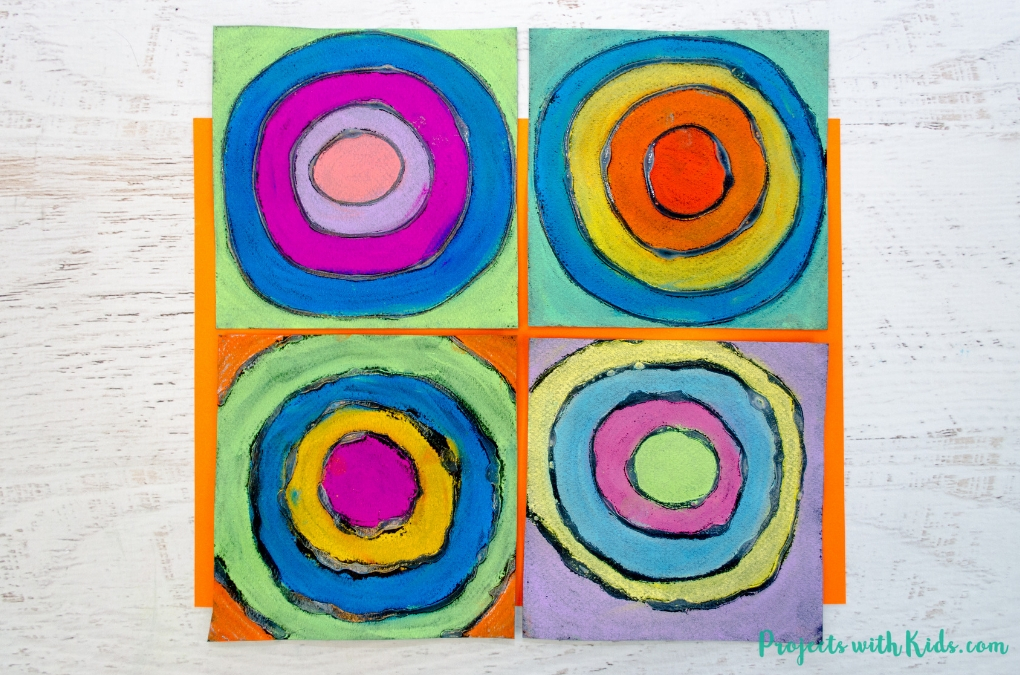
This art project is a great opportunity for kids to learn about the use of color in art and how certain colors make us feel. It’s also a great project to explore using chalk pastel art! I love how the chalk pastels look on black paper, it really makes the colors pop.
There is actually a really cool book about Kandinksy and how he can hear colors called “The Noisy Paint Box”!
Using glue with the chalk pastels acts as a type of resist and keeps the pastels from blending into each other, which makes it super easy for younger kids to try. Plus squeezing out the glue onto paper is super fun for kids to do!
We love to learn about famous artists and get inspired to create art projects in the same style. Take a look at this fun Jackson Pollock inspired splatter painting and these gorgeous chalk pastel poppies inspired by Georgia O’Keefe!
Kandinsky Study Pack
I made a Wassily Kandinsky printable study pack for kids to learn more about Kandinsky’s life and art! This easy to use printable pack contains a biography about Kandinsky’s life and art, a writing response sheet, drawing prompts, a coloring sheet, and more!
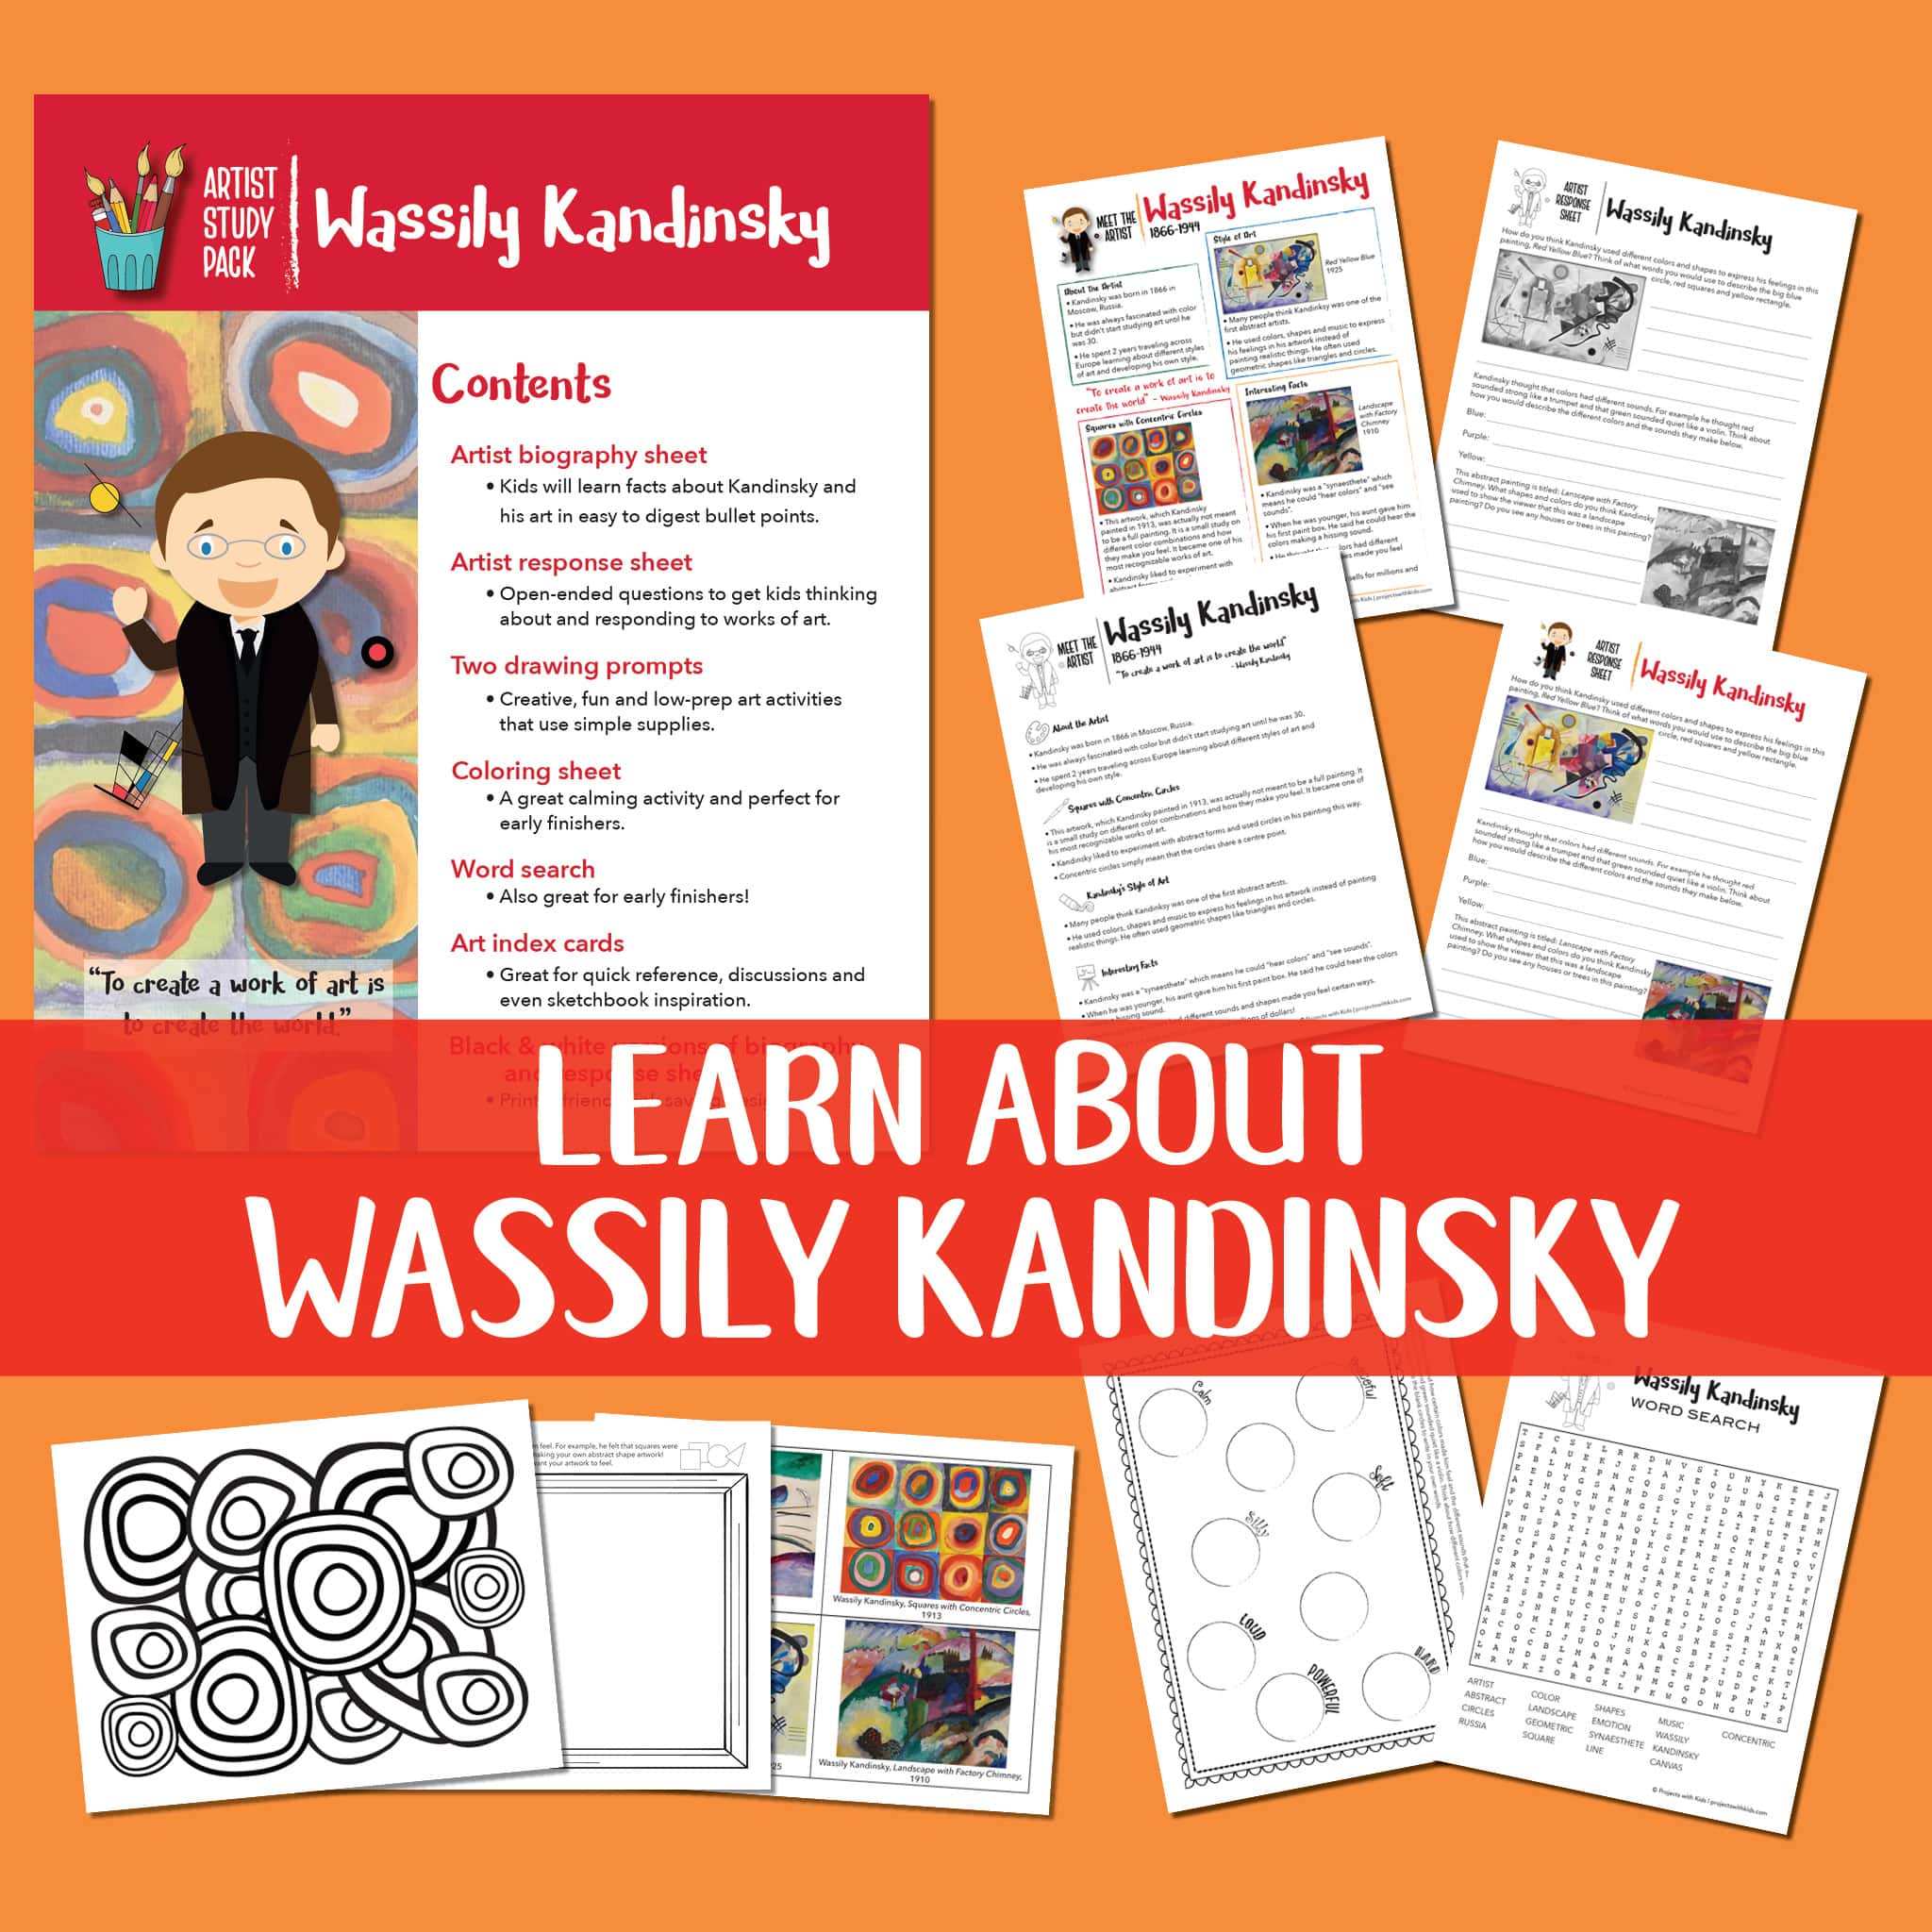
>>> CLICK HERE TO TAKE A LOOK AT THE KANDINSKY STUDY PACK!
Create your own Kandinsky art for kids
This post contains affiliate links. As an Amazon Associate, I earn from qualifying purchases. If you would like more information please review my privacy & disclosure policy.
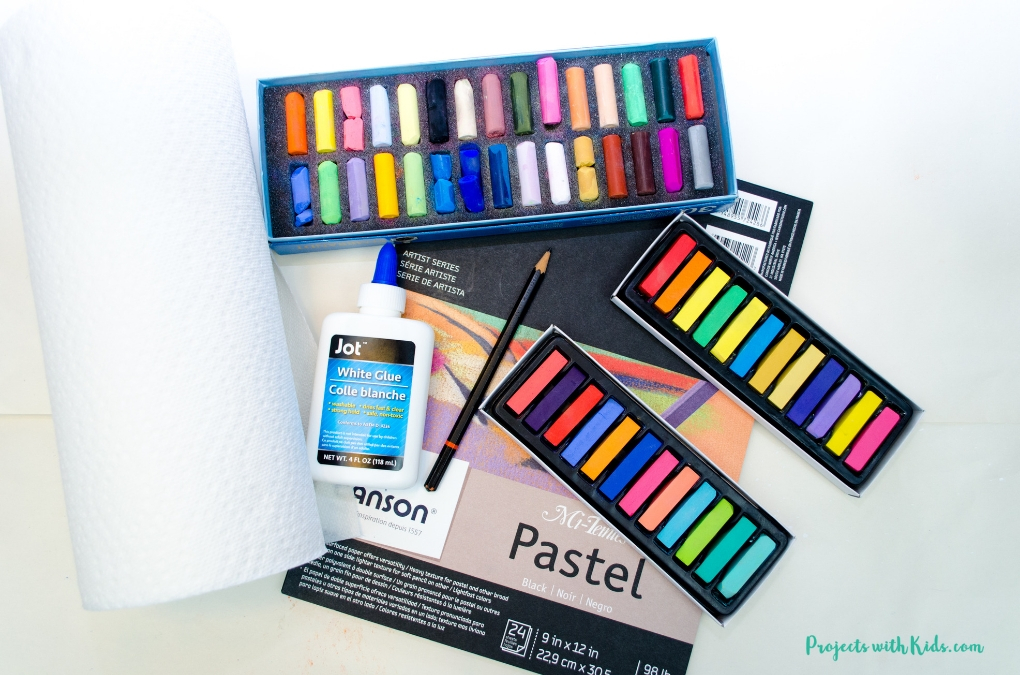
Supplies
- Black pastel paper or black cardstock, you can also try using black construction paper
- Chalk pastels
- White glue
- Pencil
- Paper towels
Instructions
Related: Brightly Colored Bunny Art with Chalk Pastels
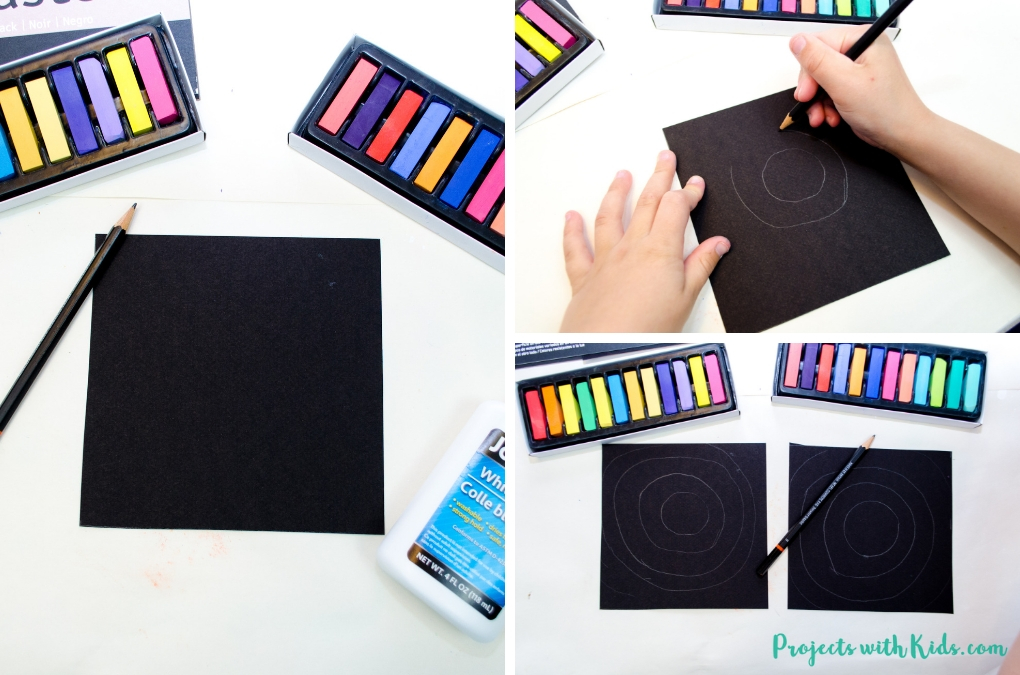
1. First, you want to cut your paper to size. I cut our squares to 5.5 x 5.5 inches. You can make them larger if you like, but I wouldn’t make them any smaller.
We used pastel paper for our project, I love pastel paper and how the pastels just glide across the surface. One side has a bit of a texture to it that really grabs the chalk pastels and helps to make the colors brighter.
But if you don’t have any pastel paper you can use cardstock. I have used cardstock in place of pastel paper before and it still works great. You can even experiment with using construction paper, although your colors may not be as bright depending on the brand of construction paper you have.
Related: Dazzling Shooting Star Paintings with Chalk Pastels
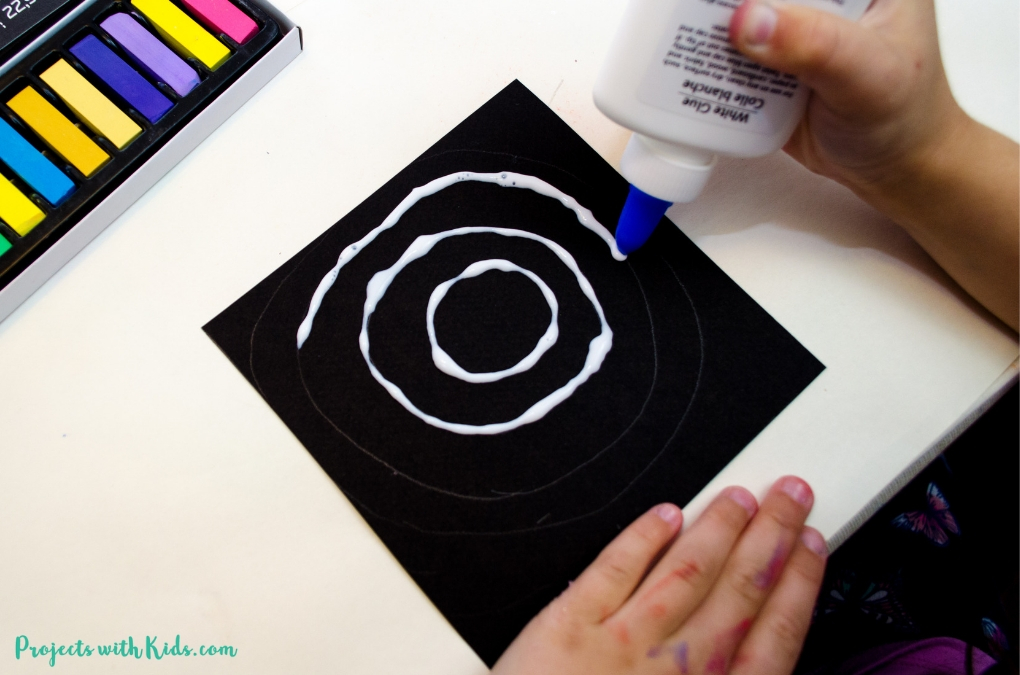
2. Now it’s time to draw the concentric circles. Concentric circles simply mean that the circles share a center point. Kandinsky liked to experiment with abstract forms and used circles in his painting this way.
Have kids start by making a circle in the center of their square. To make it easier for younger kids, they can use a small lid or a cardboard template to help get them started. Aim for at least 4 circles per square.
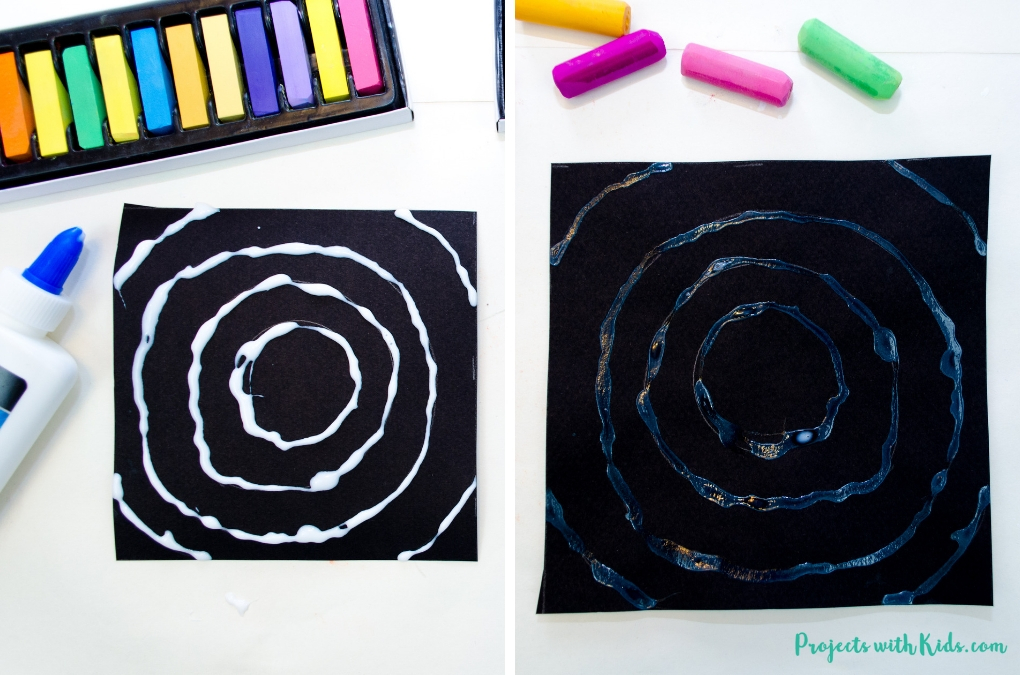
3. When they are done drawing, kids can trace their circles with white glue. Once they start to trace with the glue, it’s important that their paper stays laying flat. If they pick it up and tilt the paper, the glue lines will run into each other. Also, remind kids that glue spreads as it dries, so not to make the glue lines too thick.
I recommend letting the glue dry overnight if possible. You can also try placing your paper near a sunny window to see if that speeds up the drying time.
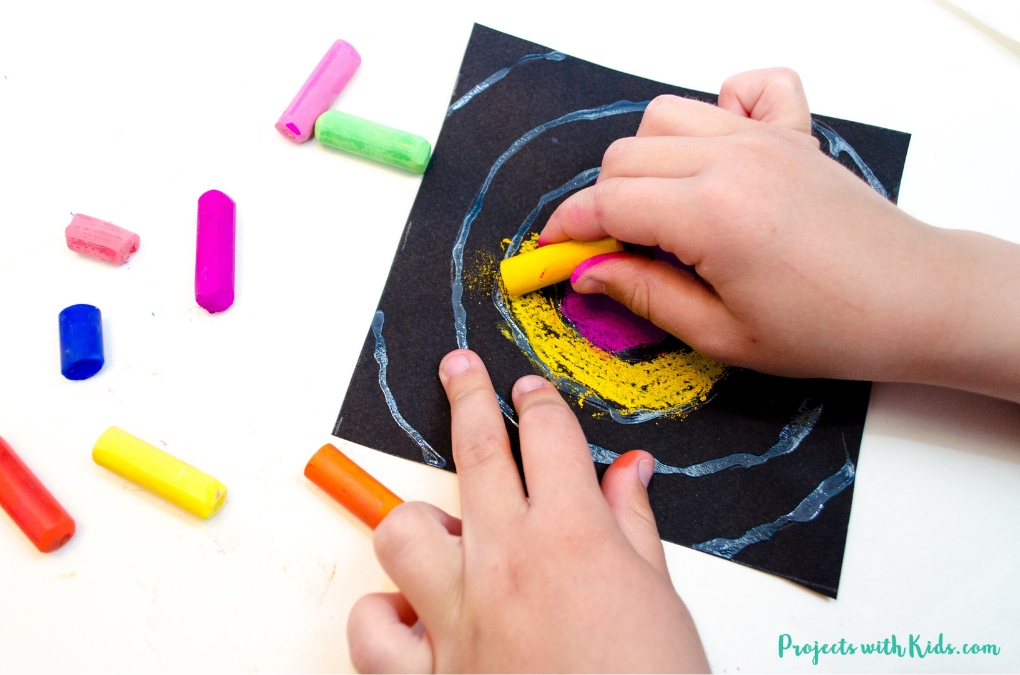
4. After the glue has had time to dry, it’s time to color in the circles with chalk pastels. Have kids plan out their colors before they start, this will help things go much more smoothly.
Chalk pastels can be messy (but so fun!). Here are a few things you can do to help contain the mess:
- Put newspaper down on desks or tables
- Put your project on a tray which will keep most of the mess inside the tray
- Do your project outside
- Have lots of paper towels handy
- Once you are done with your project, take it outside to gently blow or shake off the excess dust
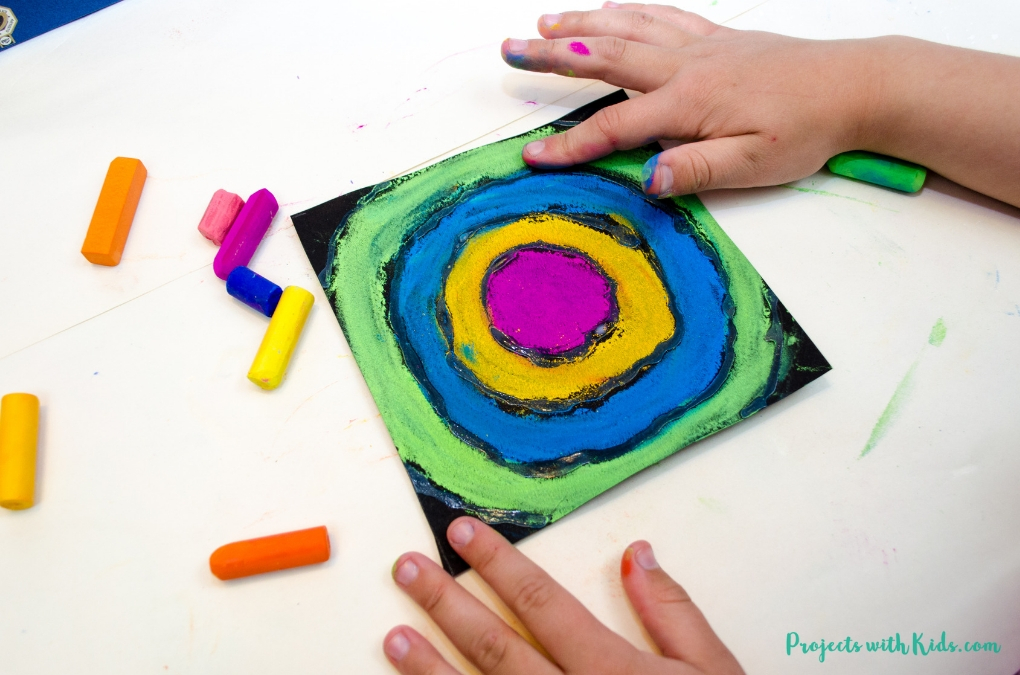
Start by coloring in the center circle first. Using your finger, smudge the color around the circle staying in the glue lines. The glue acts as a barrier so there is no worry about the pastel running into the other areas, which makes the smudging process easier.
Some kids might not like to get their hands dirty or like the feel of the pastel on their fingers. You could also use a q-tip or a cotton ball to do the smudging.
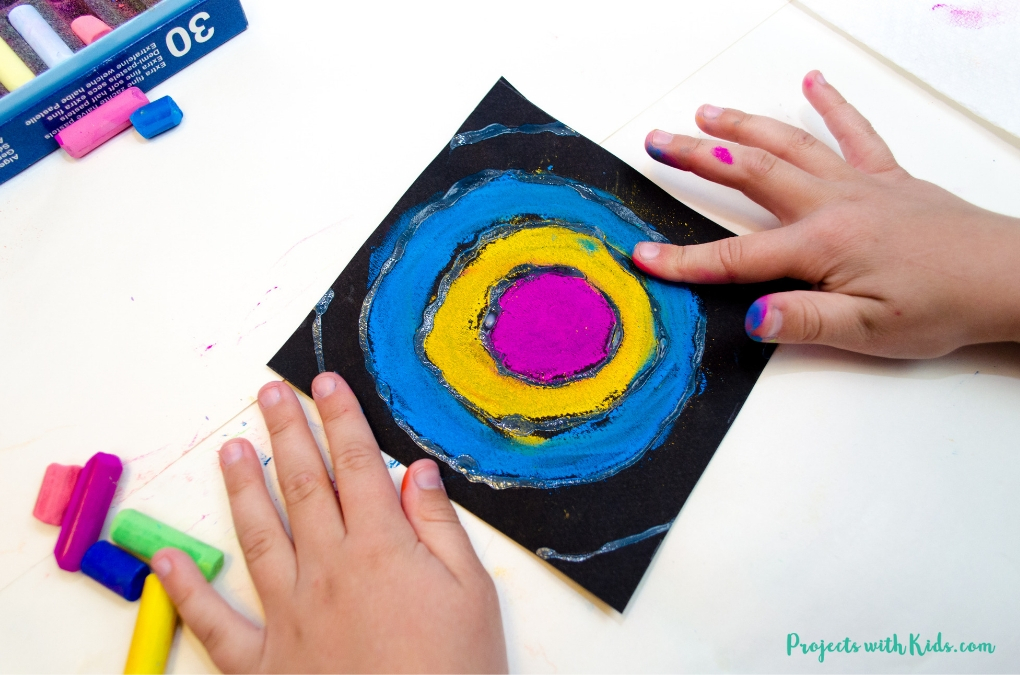
Continue coloring in your circles and smudging until your square is filled in with bright beautiful colors!
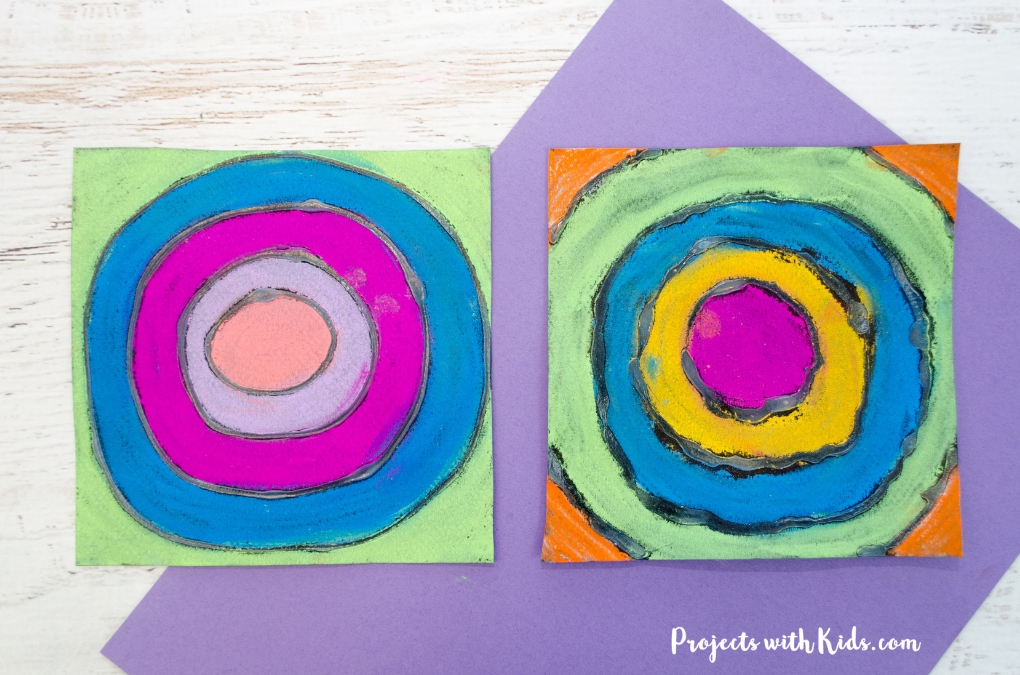
I love how our Kandinsky art for kids project turned out! Using the white glue with pastels was a really fun technique that was super easy to do. We loved learning more about Kandinsky and how different colors can make you feel different emotions.
Using chalk pastels and glue is always a fun art activity for kids! Take a look at these beautiful chalk pastel sunflowers for another fun idea.
We love creating and exploring different art supplies and techniques. If you are looking for more art projects to try, take a look at our ultimate collection of amazing art projects for kids!
More art projects kids will love
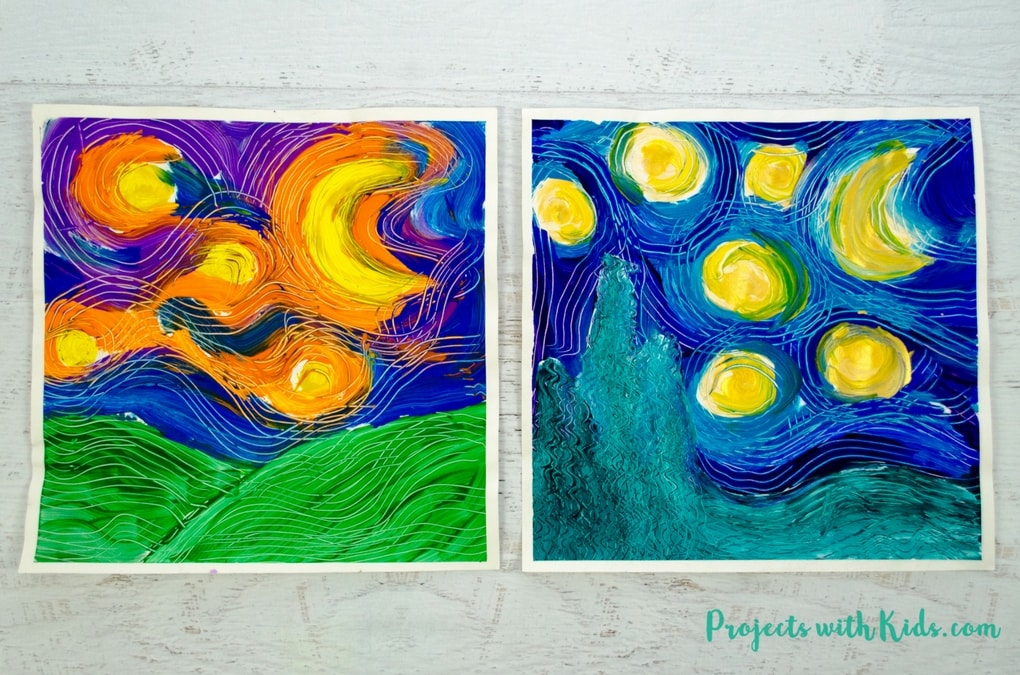
Paint a Stunning Van Gogh Masterpiece Using Forks
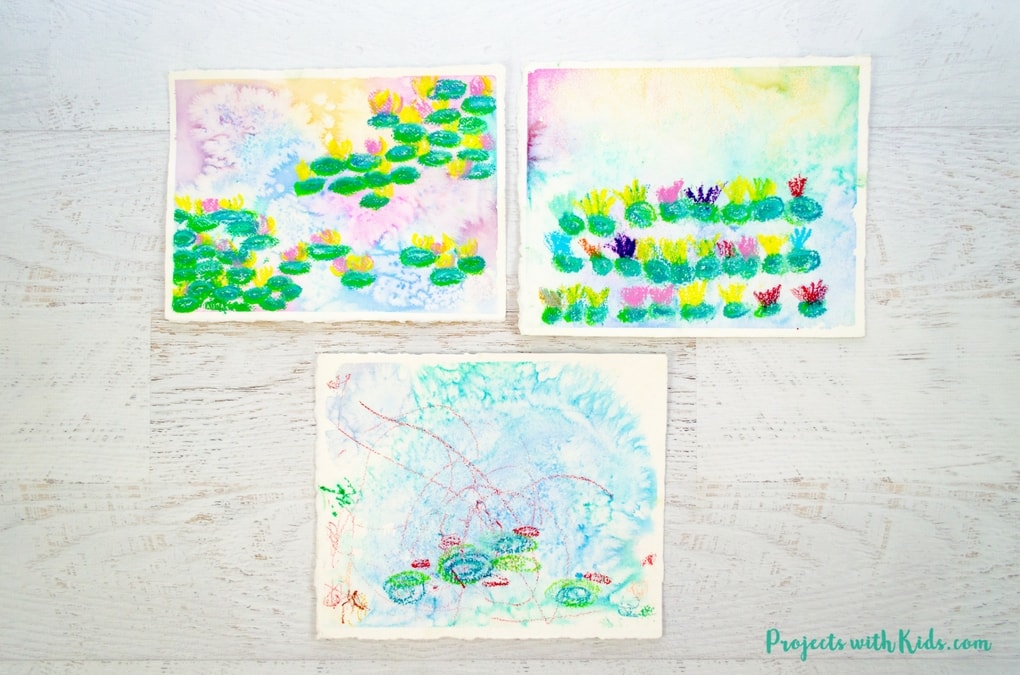
Monet Waterlilies Art Project for Kids
Follow me on Pinterest for more amazing project ideas!
Pin this pastel art project for later


[…] If you are looking more painting projects that are inspired by famous artists check out this Monet Water Lilies Art Project for Kids. and this Easy Kandinsky Art for Kids with Chalk Pastels. […]