
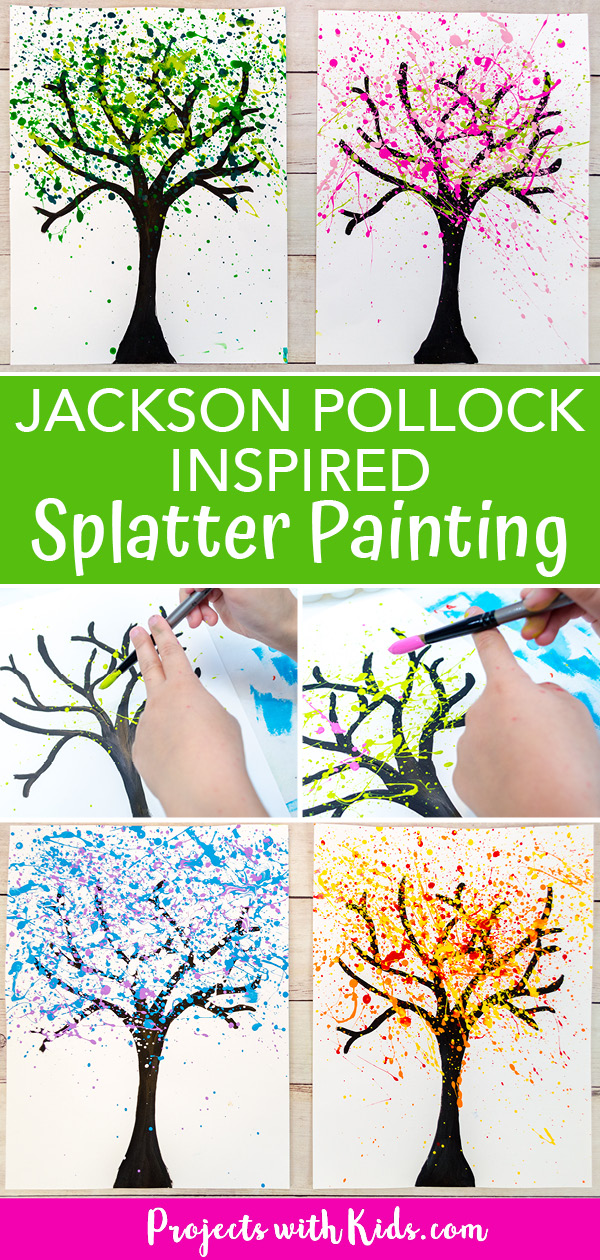
Splatter painting is a super fun and easy process art technique that kids of all ages love! This Pollock inspired splatter painting art project will have kids learning about the famous artist and doing some action art of their own.
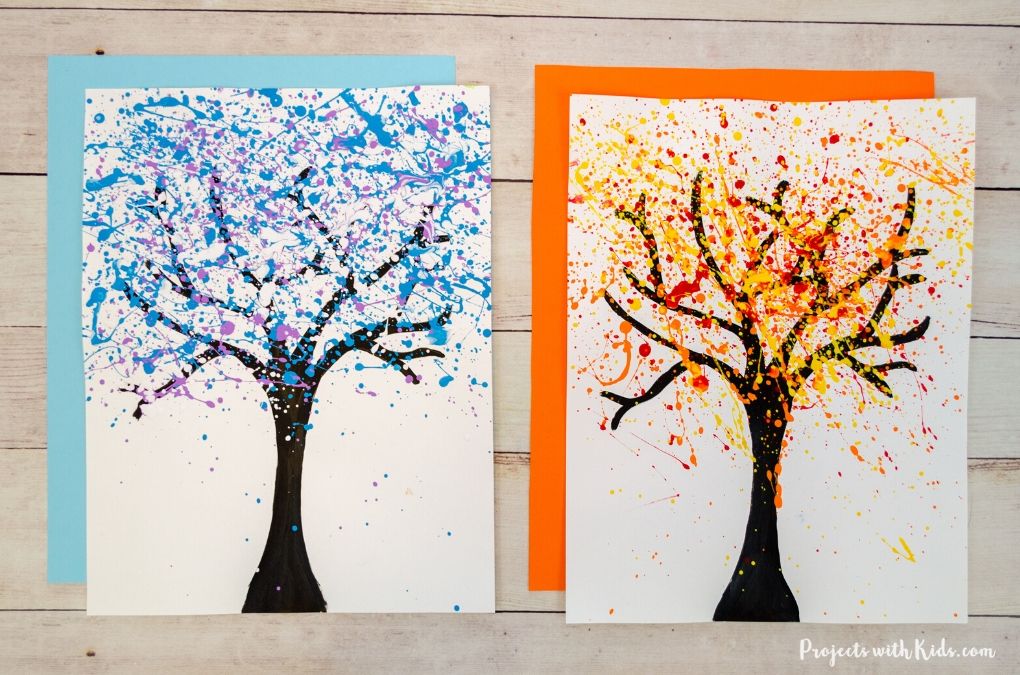
We made splatter paint trees to represent each season and they turned out beautifully!
We love exploring different painting techniques. Take a look at my collection of painting ideas for kids for more fun and creative art projects to try!

For this project, I created a free printable template to make this art project even easier for you. This template is available to my email subscribers. Fill out the form below to get the free template.
After signing up you will receive a welcome email with your download link.
We love to learn about famous artists and get inspired to create art projects in the same style. Take a look at this Van Gogh inspired art using forks and this beautiful Monet water lilies art project for more fun ideas.
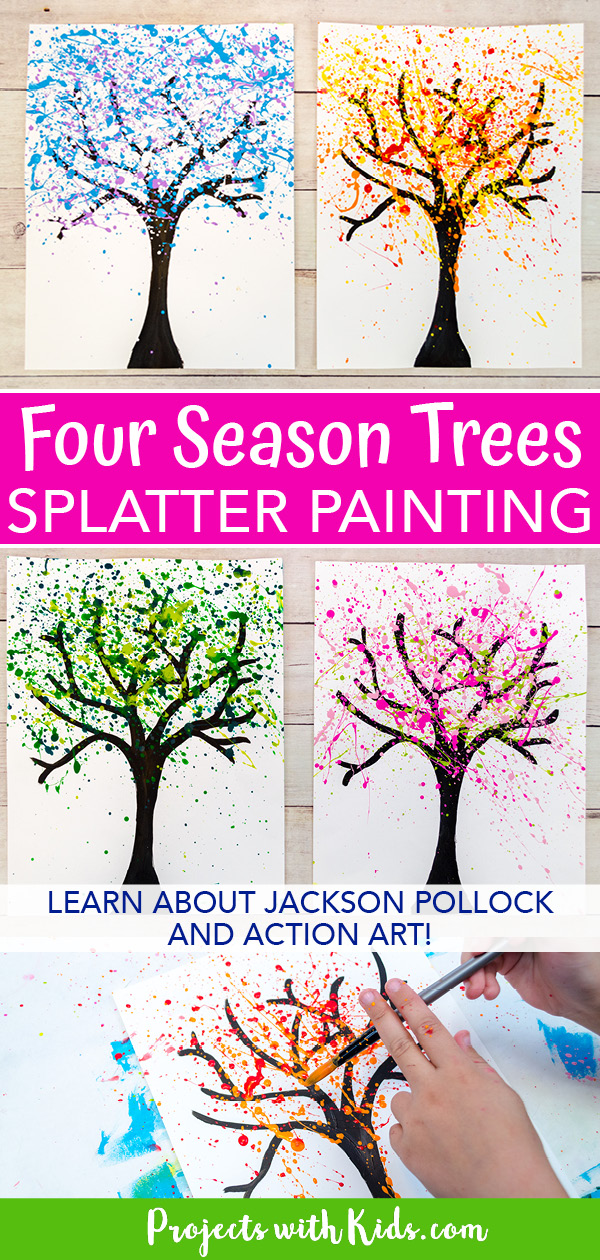
Learn about Jackson Pollock
Jackson Pollock is best known for his paintings that he created by splattering, throwing, layering, and dripping paint onto an oversized canvas.
He called his style of painting Action Art because of the way he would move around while he created. His paintings are filled with movement and rhythm as a way of expressing himself through his art.
Helpful links to learn more about Jackson Pollock
This video from Art with Mati and Dada is great for explaining Action Art to younger kids.
This video is great for older kids and takes you to Pollock’s house and studio where he created his art.
For more information about Jackson Pollock and his way of painting, take a look at this page from Tate Kids.
Here is another great site that has some more Jackson Pollock facts and images.
As kids create their own Jackson Pollock inspired splatter paintings, have them think about bringing movement and rhythm into the way they create their artwork. They can also think about how the different colors of the seasons make them feel, does the cherry blossom splatter painting have a different feeling than the winter painting?
Create your own Pollock inspired splatter painting
This post contains affiliate links. As an Amazon Associate, I earn from qualifying purchases. If you would like more information please review my privacy & disclosure policy.
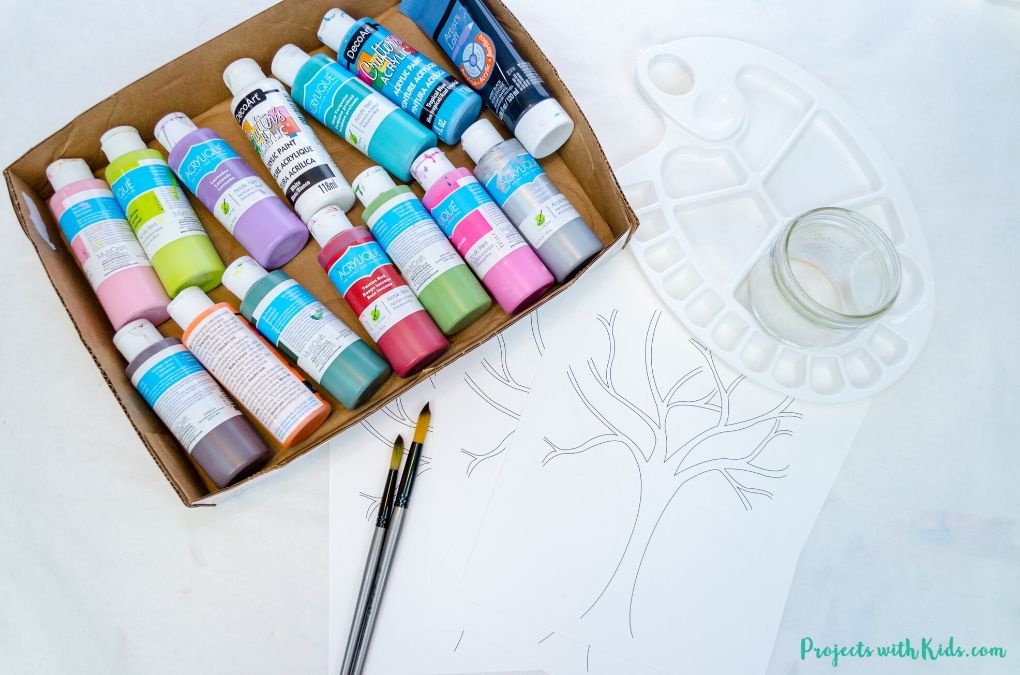
Supplies
- Tree printable available below (optional)
- White cardstock
- Acrylic paint in various colors
- Paintbrushes
- Paint palette
Instructions to create your own splatter paintings
1. If you are using the printable provided, print it out onto white cardstock. If kids want to draw their own tree, have them draw with a pencil onto white cardstock.
2. Paint the tree with black acrylic paint and let it dry completely. Using a smaller round brush makes this easier for kids, especially as they paint the thinner branches.

Splatter painting can be quite messy, I was surprised at the different places I found some paint splatters when I was cleaning up! To help keep the mess down, kids can splatter paint in a cardboard box. Or if you are able to paint outside, that is also a good option.
We have a fairly big table to do our projects on, so I just spread out some paper and made sure to clear the table to keep the splatter paint off anything important.
3. Decide on which tree you will be painting, or try all four! I used acrylic paint that comes in a squeeze bottle, this paint is a lot thinner than the artist-grade acrylic paint that comes in a tube.
The paint needs to be thin enough to splatter, so if you find your paint too thick, try mixing in a small amount of water. There were a couple of colors that I needed to add water to.
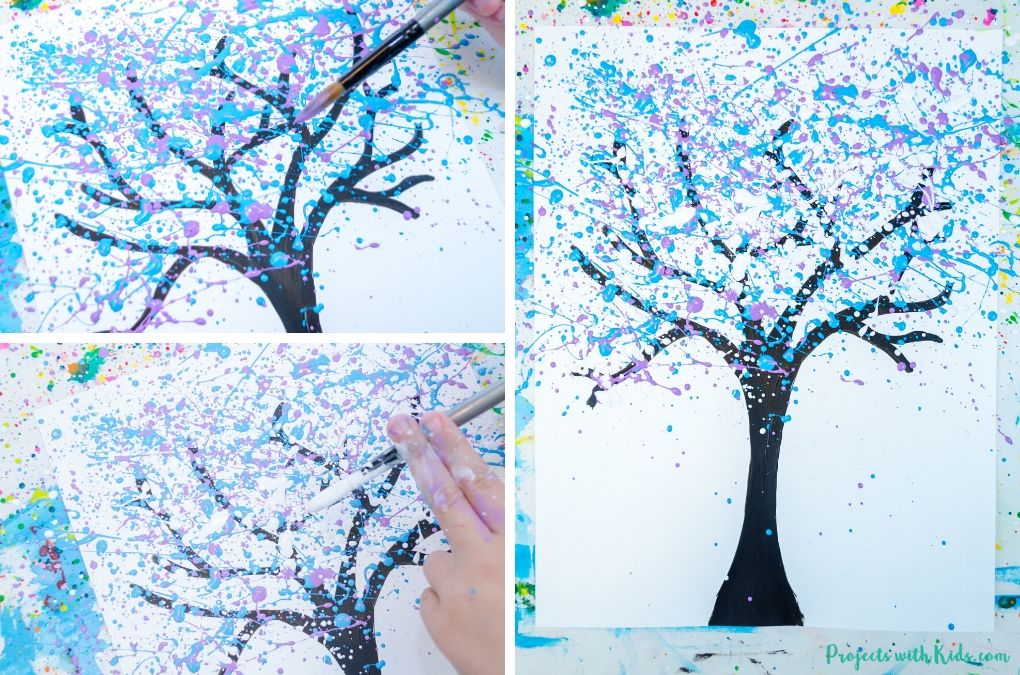
Start with your lightest color and have kids dip a medium-sized brush into the paint color and splatter the color onto the tree. There are a couple of ways to splatter paint.
If you are looking for more spring projects, take a look at this colorful collection of spring art for kids!
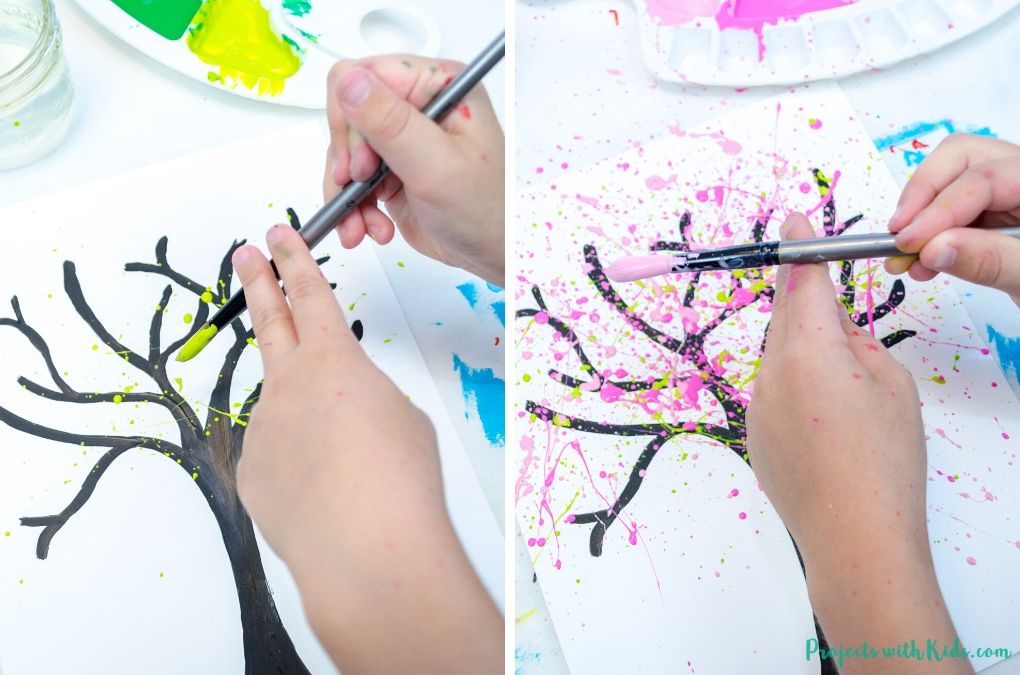
One way is to use your first two fingers, hold the paintbrush above your paper, and tap the paintbrush, splattering the paint onto your paper. The second technique is to tap the paintbrush onto your first two fingers.
You can see both techniques in the photo examples. Both of these techniques work great! Make sure kids load their brush up with lots of paint for the best results.
You want to remind kids that since they are layering a few colors on each tree that they don’t completely cover the tree with the first color they splatter on.
When splattering the paint on, think about splattering towards the top of the tree where the leaves would typically be to create a tree shape. Leave the bottom part of your paper mostly empty, with just the tree trunk.
Spring cherry blossom tree
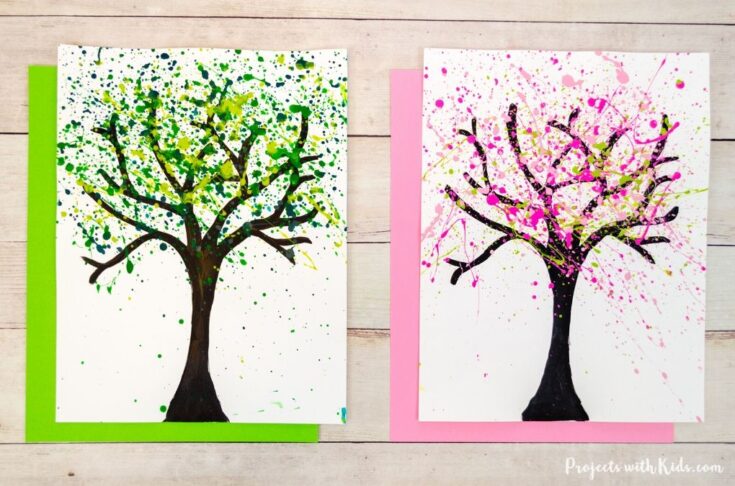
For the spring cherry blossom tree, we used a light spring green, dark pink, and light pink acrylic paint. Splatter the light green first, then the dark pink and the light pink on top. This spring tree looks so pretty with the pink cherry blossom splatters!
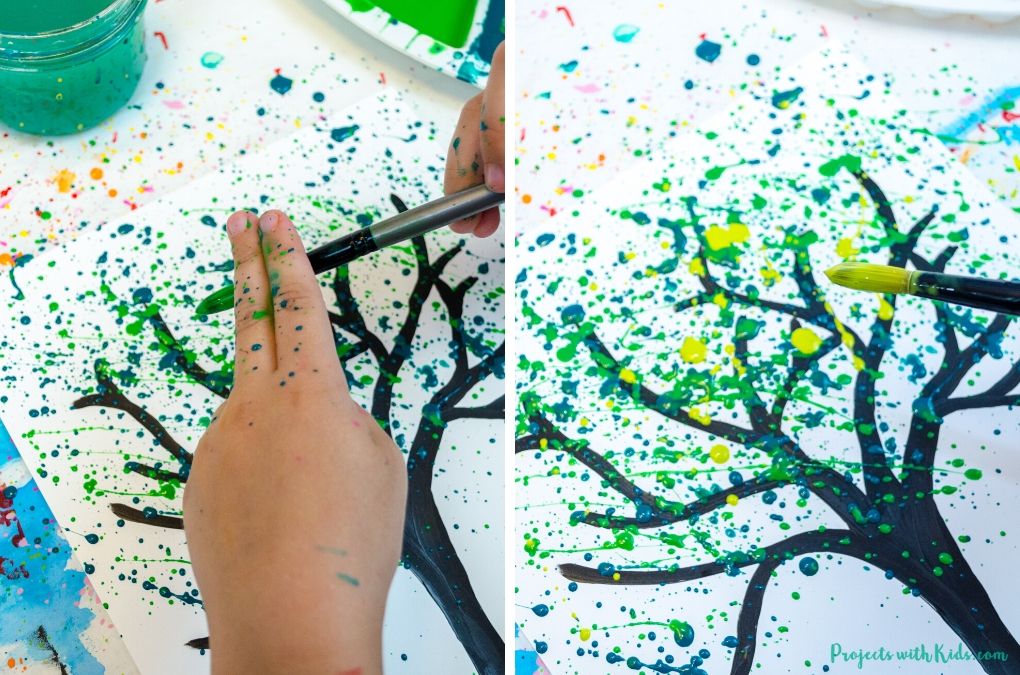
Summer tree
For the summer tree, we used a dark bluish-green, a bright green, and a light green. Splatter on the dark green first, followed by the bright green and the light green on top. I love how these three different greens look together!
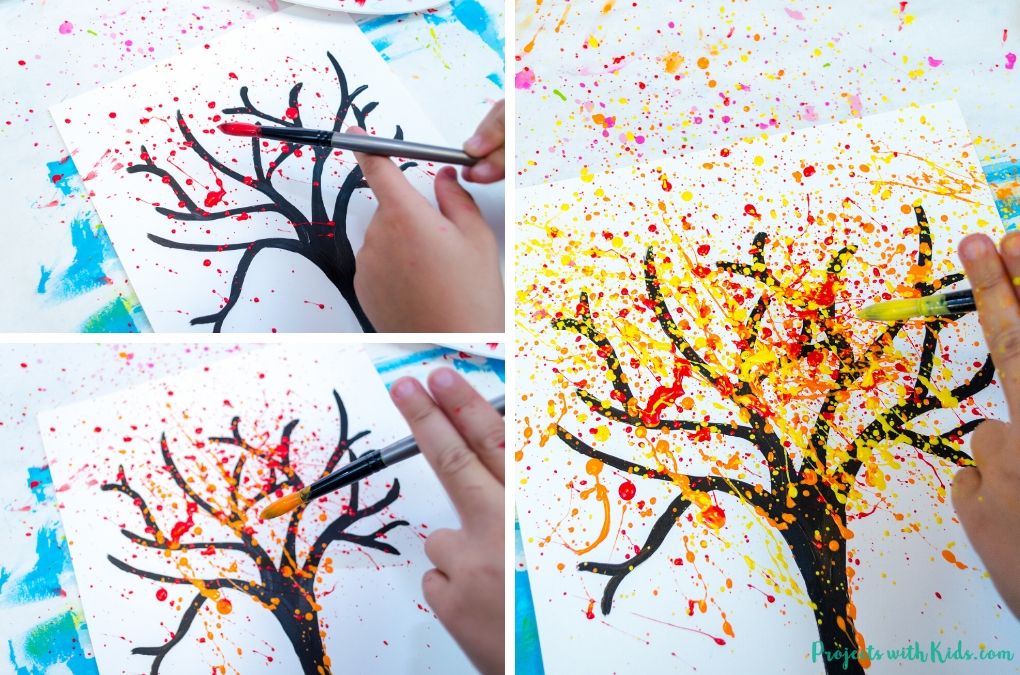
Autumn tree
We used red, orange, and yellow for our autumn tree colors. Start with the red first, then splatter the orange paint, and finally add the yellow on top. The bright fall colors really work nicely together for this tree.
If you are looking for more fall art projects take a look at my collection of creative fall painting ideas for kids! There are ideas for kids of all ages that use different types of art materials and techniques.
Winter tree
I love how the winter tree turned out with the icy blue and purple underneath the snowy white. Start by splattering on a lighter blue color, then add in a pastel purple and finally the white on top.
If you are looking for more winter project ideas take a look at my collection of beautiful winter art for kids to make!
Kids will love making their own Action Art with this Pollock inspired splatter painting to create beautiful four season tree art.
For another artist inspired project take a look at this simple pointillism art for kids this is fun and easy for all ages!
Fill in the form below to get your free printable template!
After signing up you will receive a welcome email with your download link.
More art projects kids will love
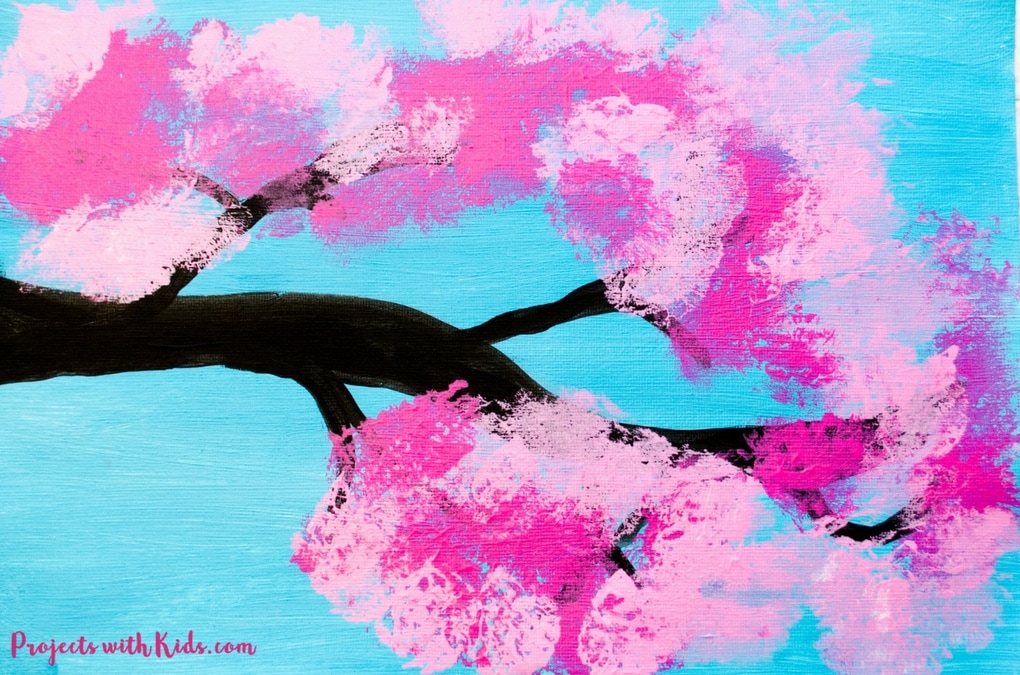
Cherry Blossom Painting with Cotton Balls
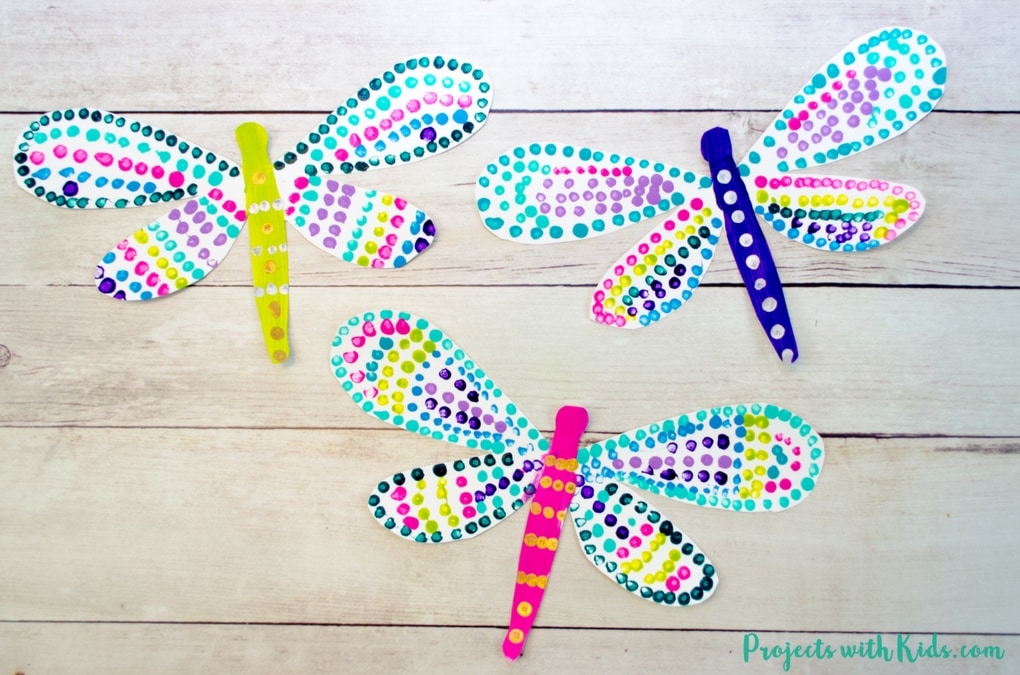
Colorful Q-tip Painted Dragonfly Craft
Follow me on Pinterest for more amazing project ideas.
Pin this art project for later
Jackson Pollock Inspired Splatter Painting for Kids
Learn about Jackson Pollock and Action Art with this fun Pollock inspired splatter painting for kids! Make four season tree art with this super easy painting technique.
Materials
- Tree printable (optional)
- White cardstock
- Acrylic paint in various colors
Tools
- Paintbrushes
- Paint palette
Instructions
- Print out the tree template onto white cardstock or have kids draw their own tree.
- Paint the tree with black acrylic paint and let it dry completely before moving on to the next step.
- Decide on which tree you will be painting first and collect the acrylic paint colors that you need. Depending on the type of paint you have, you might need to thin it out a bit with water. This will make it easier to splatter paint with.
- Start with the lightest color, load up a medium-sized round brush with paint, and start splattering. You want the paint to splatter towards the top of the tree so it starts to look like leaves.
Remind kids that they will be layering more than one color for each season, so not to cover the tree too much with their first color.
For the splattering technique, try tapping the paintbrush onto your first two fingers or tapping your first finger or first two fingers onto the paintbrush. - When you are done splattering on your different colors, let the painting dry flat.


olivia
love your site