

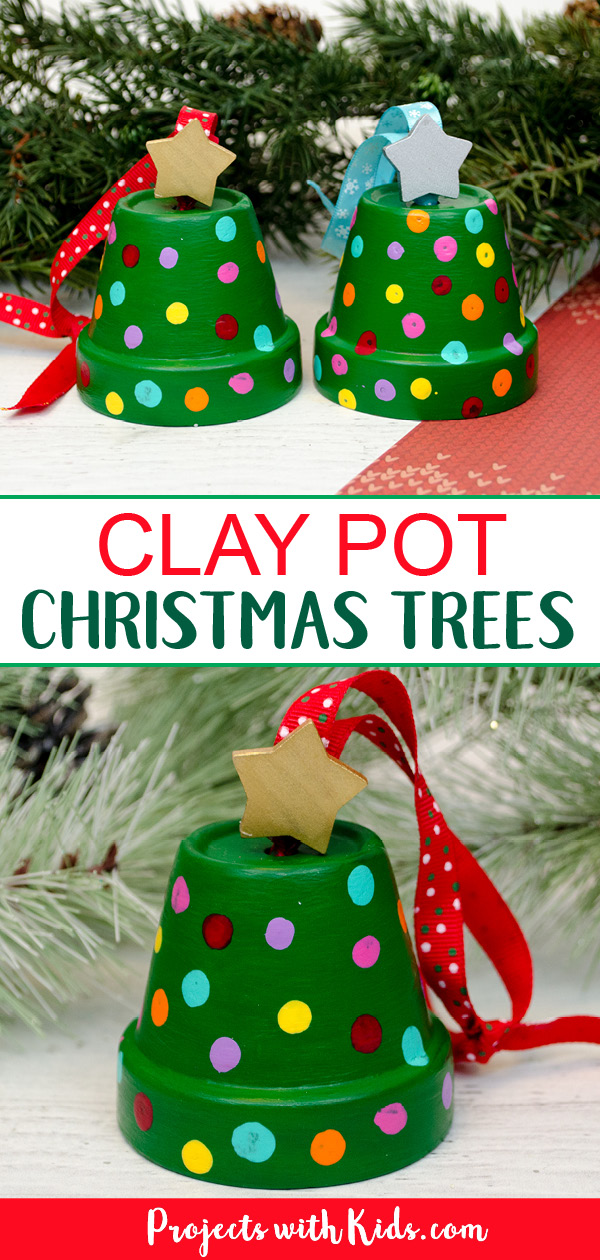
These clay pot Christmas tree ornaments are just the cutest! They make a perfect Christmas craft for kids of all ages. They are easy enough for younger kids to make and older kids will also enjoy making them.
We used six different paint colors for our dot decorations but kids can choose any colors they like. White dots would make a pretty winter tree ornament! Or you could even add in some silver and gold paint colors.
If you are looking for more Christmas projects to make take a look at our collection of creative Christmas arts and crafts for more fun ideas!

The dot decorations are made using q-tips which is one of our favorite painting techniques to use. You can see another example of how we used q-tip painting in this q-tip painted dragonfly craft.
We love exploring different painting techniques. Take a look at my collection of painting ideas for kids for more fun and creative art projects to try!
We love making Christmas ornaments to hang on our tree! Take a look at these gingerbread house ornaments that we also made using mini clay pots.
Create your own clay pot Christmas tree ornaments
This post contains affiliate links. As an Amazon Associate I earn from qualifying purchases. If you would like more information please review my privacy & disclosure policy.
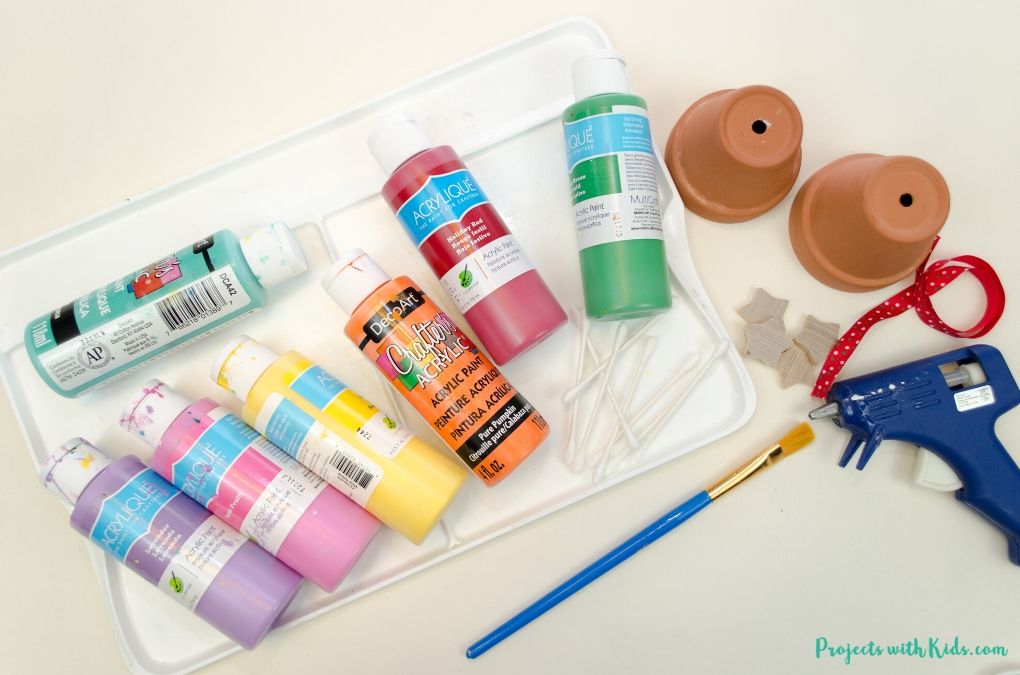
Supplies
- Acrylic paint
- Q-tips
- Paint palette
- Paintbrush
- Mini clay pots (our pots were the 2inch size)
- 1-inch Wooden stars
- Glue gun
- Ribbon
- Mod Podge
Instructions to make your Christmas tree ornament craft
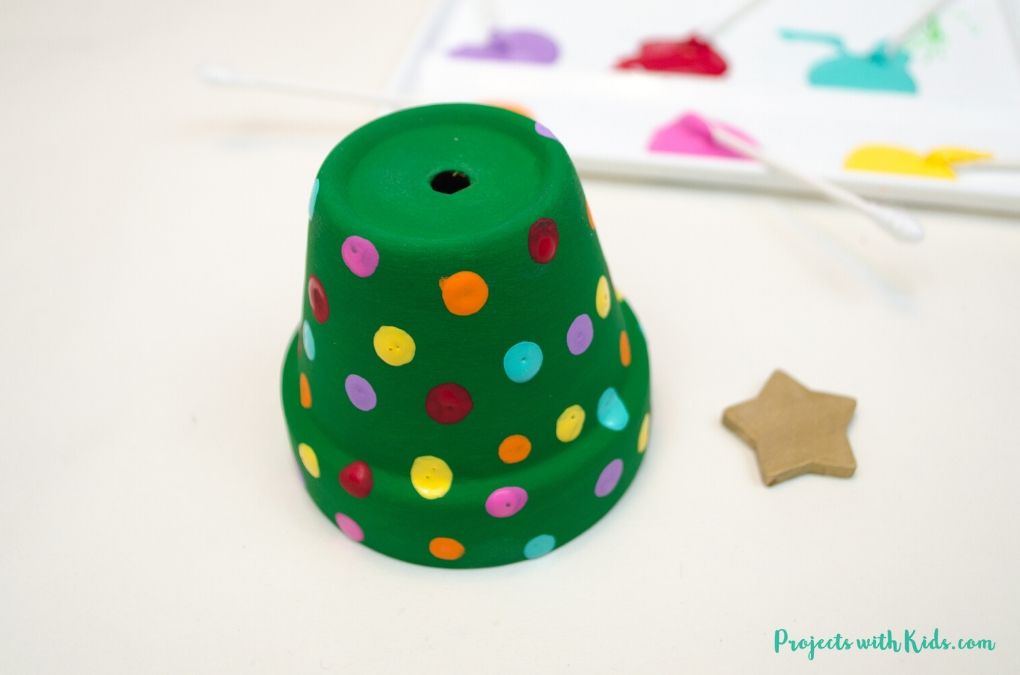
1. First, start by painting your mini clay pot with green acrylic paint. Depending on the type of paint you use, you will need 2-3 coats. Make sure to turn your pot over and paint the bottom as well.
Let the paint dry completely between coats. You can use a hairdryer to speed this process up if you like.
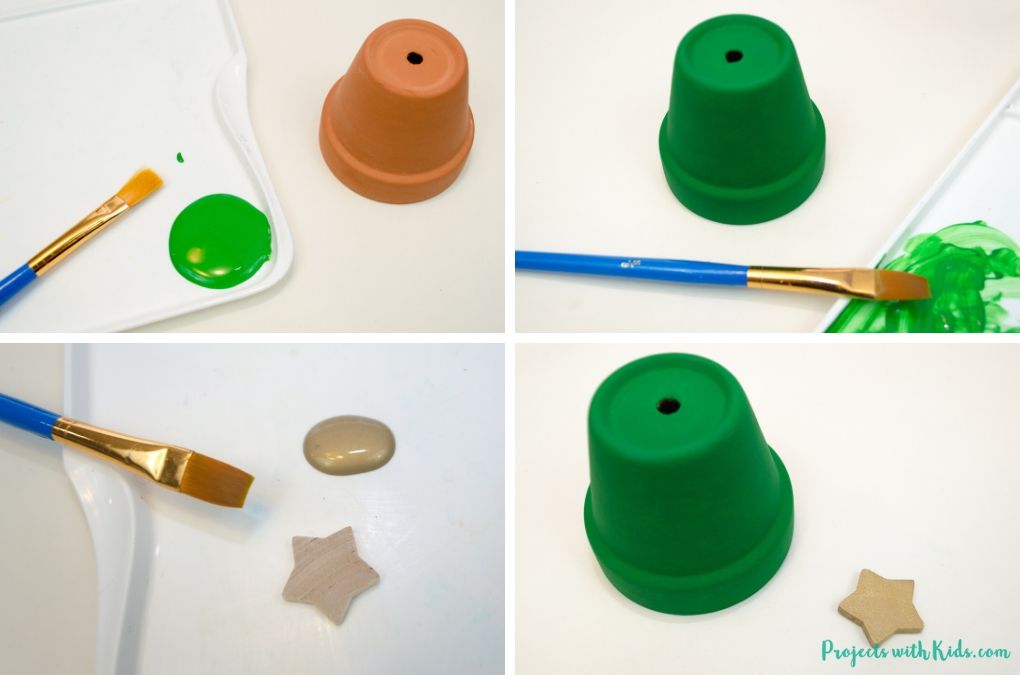
2. Paint your wooden star with gold or silver acrylic paint. Our star only needed 1 coat of paint, but we painted both sides so we had to let each side dry first.
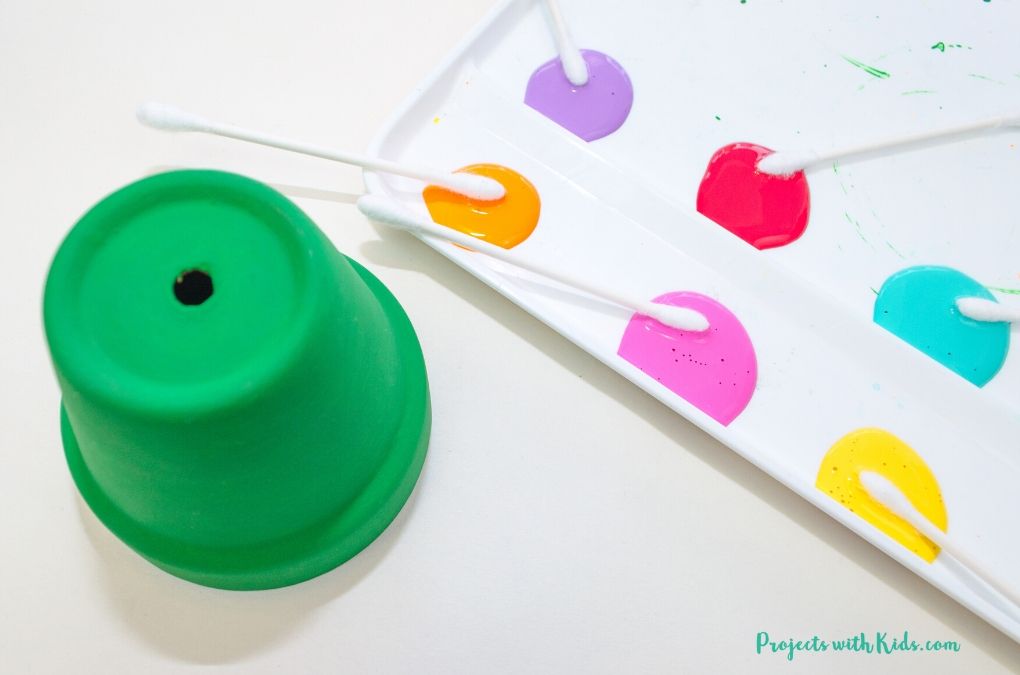
3. Get your paint colors ready for the q-tips. Squeeze out small amounts of paint onto a paint palette.
We used six colors of acrylic paint, I wanted a colorful and festive feel to the ornaments. But you can do all white dots for a winter tree (I think we might try this as well!) or add in some gold and silver if you like.
Let kids be creative here and choose their own colors they would like to use to decorate their tree.
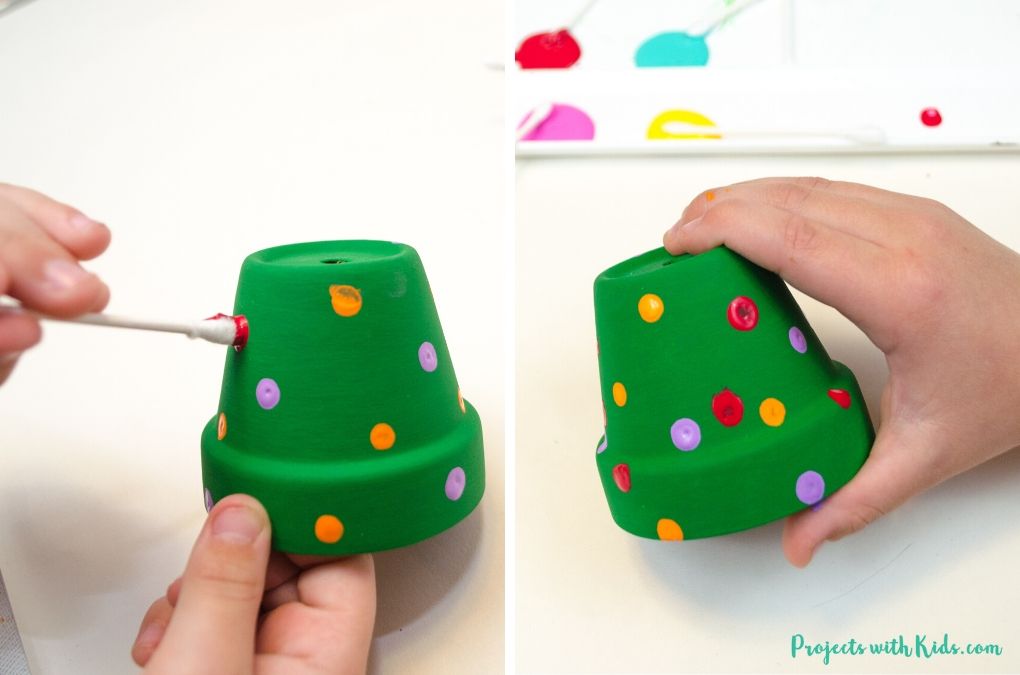
Use 1 q-tip per paint color. Paint your clay pot with q-tips to add the colorful decorations to your ornament.
Depending on the age of the child, it might be easier to do one color at a time and let it dry before moving on to the next color.
4. Once you’ve painted on your dot decorations with q-tips, let everything dry completely.
Paint a thin coat of Mod Podge around your entire ornament. This will help to protect the paint from rubbing off. Let this dry before moving on.
5. Now it’s time to add on your star and ribbon. Take your ribbon, fold it in half and tie a knot on the folded end.
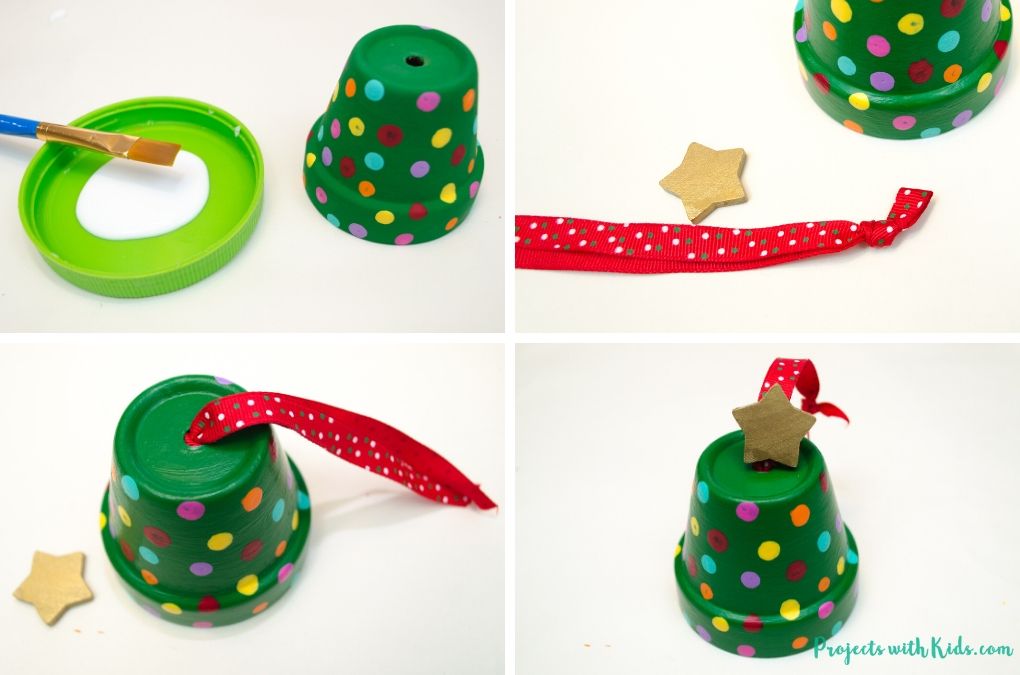
Thread this through the hole at the top of your clay pot. If your knot slips through easily, you can double knot or add some hot glue on the inside to secure your ribbon.
6. Tie a knot at the other end of your ribbon. Using hot glue, glue on the star to the front of your ribbon.
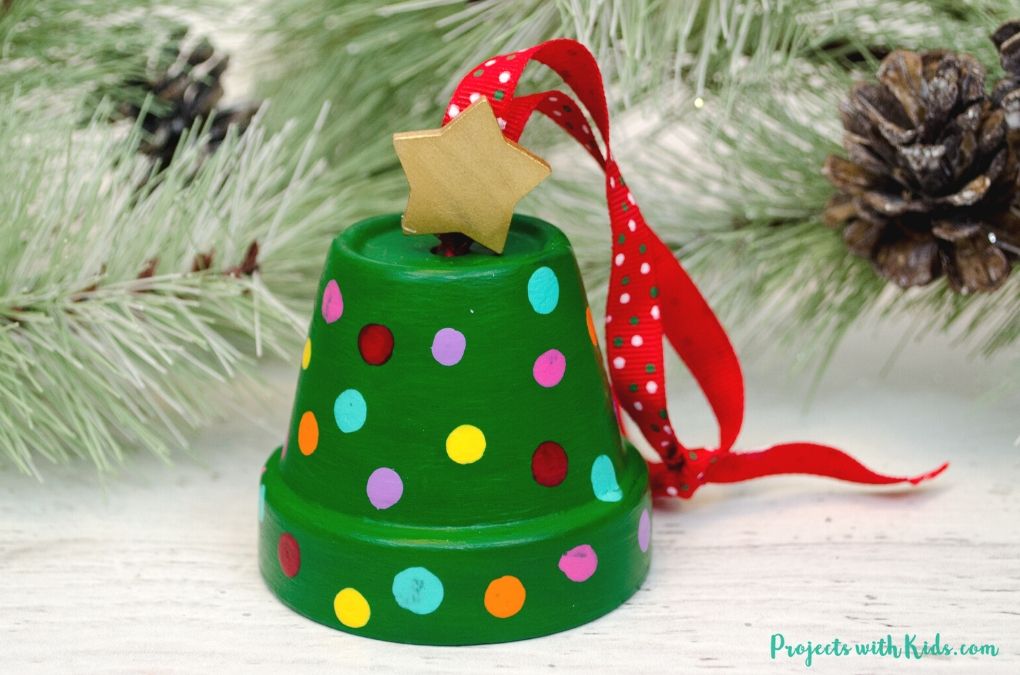
I love how these clay pot Christmas tree ornaments turned out! They were so fun and easy to make and I can’t wait to put them on our tree this year.
Letting kids choose their own colors for the dot decorations will make each ornament unique!
Take a look at these adorable wood slice DIY penguin ornaments for another fun Christmas project idea!
More Christmas crafts kids will love
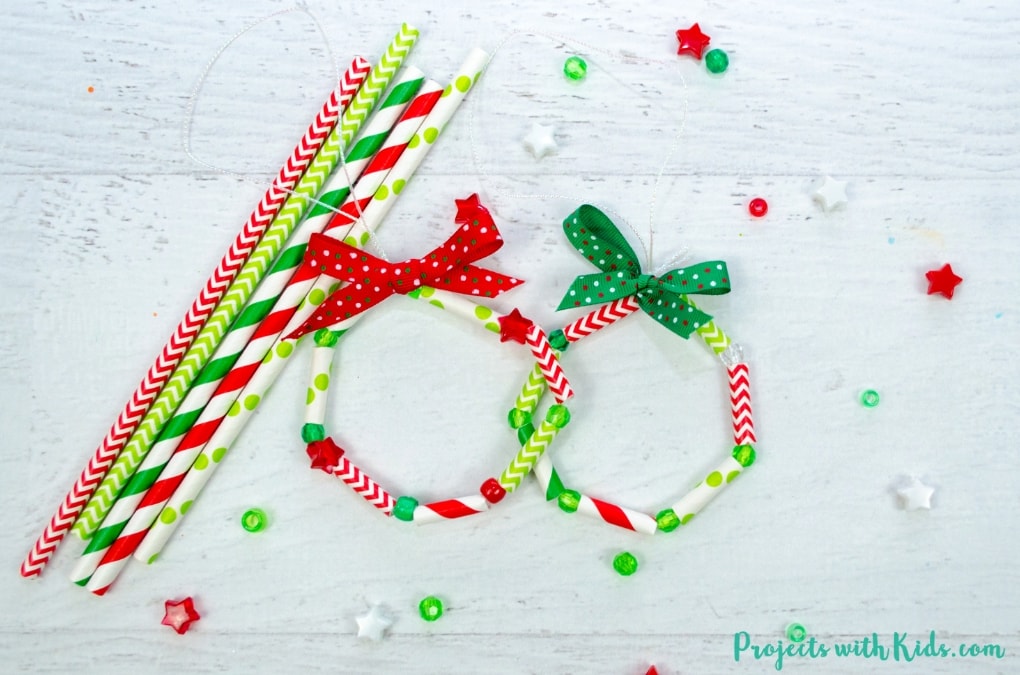
Easy Kid Made Wreath Ornament with Paper Straws
Mini Pallet Popsicle Stick Christmas Ornaments
Follow me on Pinterest for more amazing project ideas.
Pin this Christmas craft for later
How to Make Adorable Clay Pot Christmas Tree Ornaments

These clay pot Christmas tree ornaments are so cute and fun for kids to make! They are an easy Christmas ornament craft that kids of all ages will be able to create.
Materials
- Mini clay pots (ours were the 2inch size)
- Acrylic paint, including gold or silver
- Ribbon
- Q-tips
- Wooden stars
Tools
- Paint palette
- Paintbrush
- Glue gun
Instructions
- Paint your clay pot with green acrylic paint. Depending on the paint you use, the pots will need 2-3 coats.
Let the paint dry between coats. - Paint both sides of your wooden star with gold or silver paint.
- Time to start painting with q-tips! Squeeze out your paint colors onto a paint palette. Use 1 q-tip per color. Paint dots of color on your clay pot, one color at a time.
If you are doing this craft with younger kids, letting each color dry in between will make things easier. - Paint a thin layer of Mod Podge on your ornament to help protect the paint from rubbing off.
Let the Mod Podge dry. - Take your ribbon and fold it in half. Tie a knot in the folded end and thread it through the hole in the clay pot.
You can double knot it or add some hot glue on the inside to make it more secure. - Tie a knot on the other end.
- Use a hot glue gun to glue the wooden star to the ribbon to finish off your ornament.


