
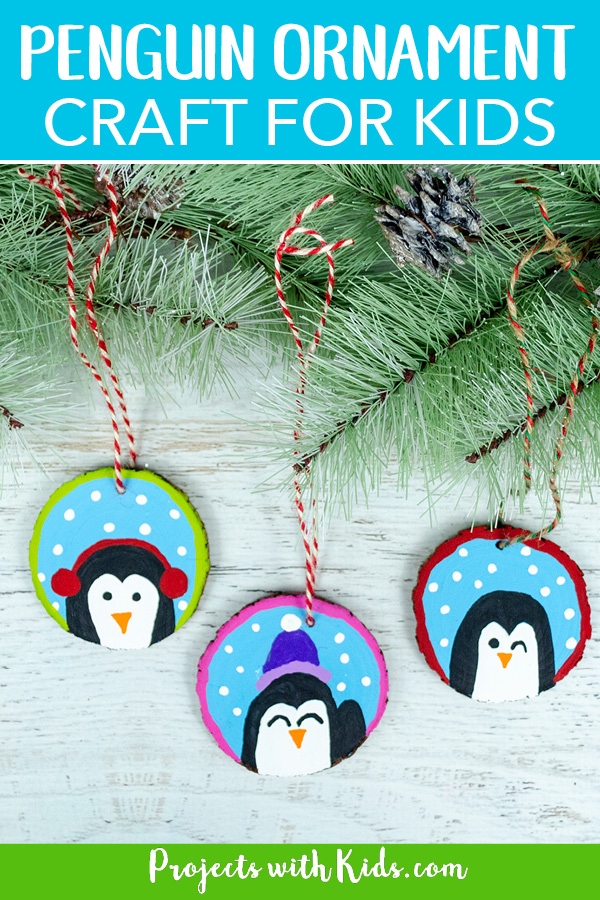
These DIY penguin ornaments are bright and colorful and so cute! They make unique handmade gifts kids can give to family and friends this holiday season that will be treasured for years to come.
If you are looking for more Christmas projects for kids to make take a look at our collection of creative Christmas arts and crafts for more fun ideas!
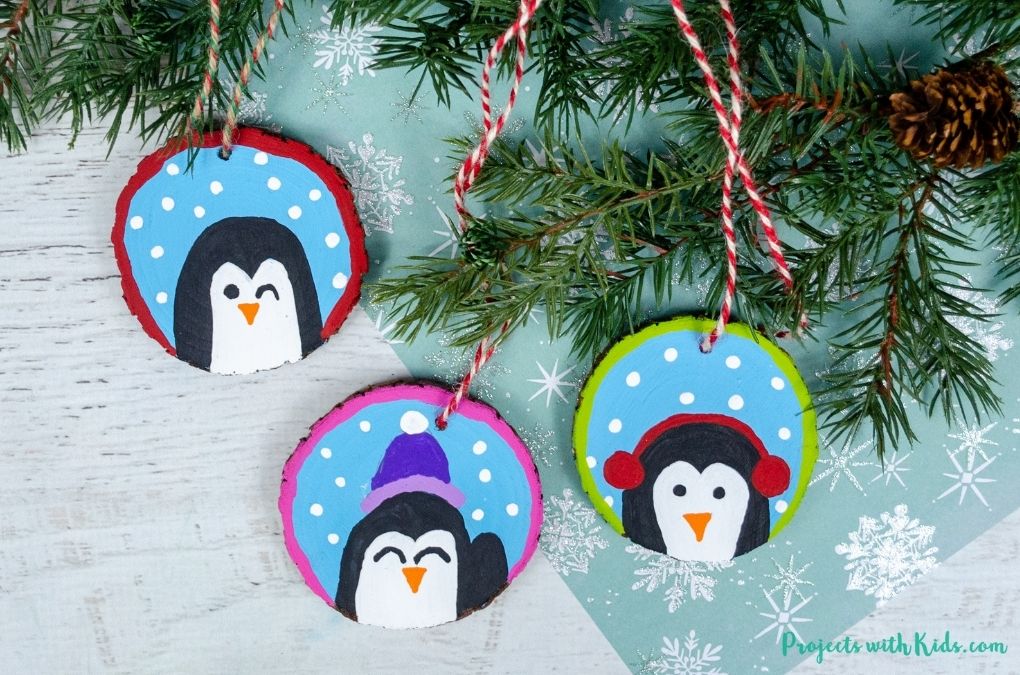
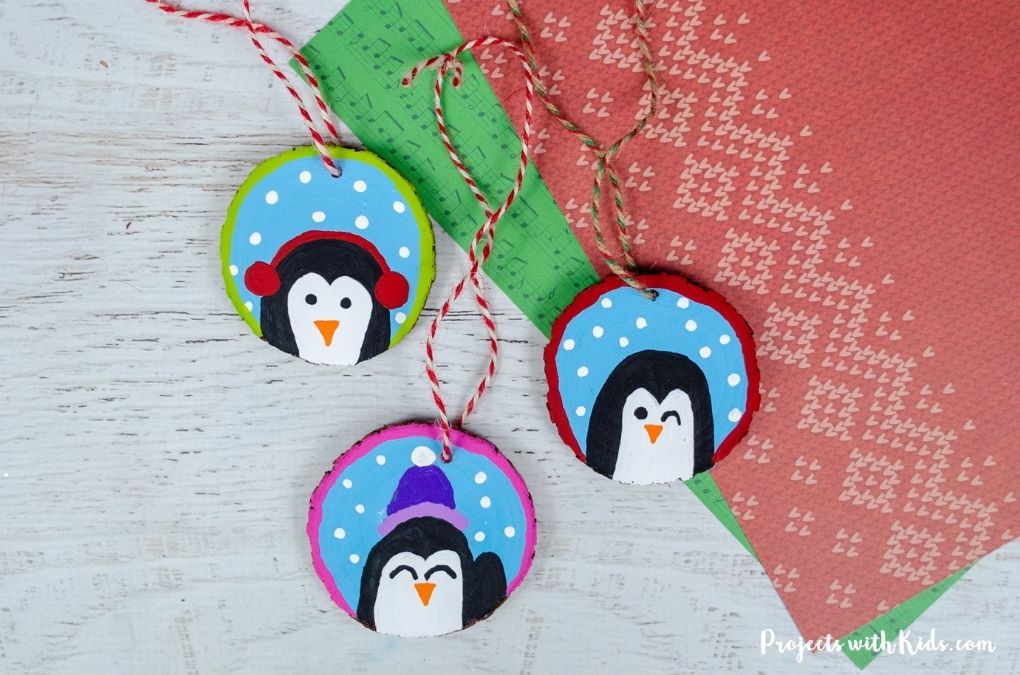
Kids can choose to add a hat or earmuffs to their penguins. They can make their penguin wave and customize the face and colors, making each ornament truly unique!
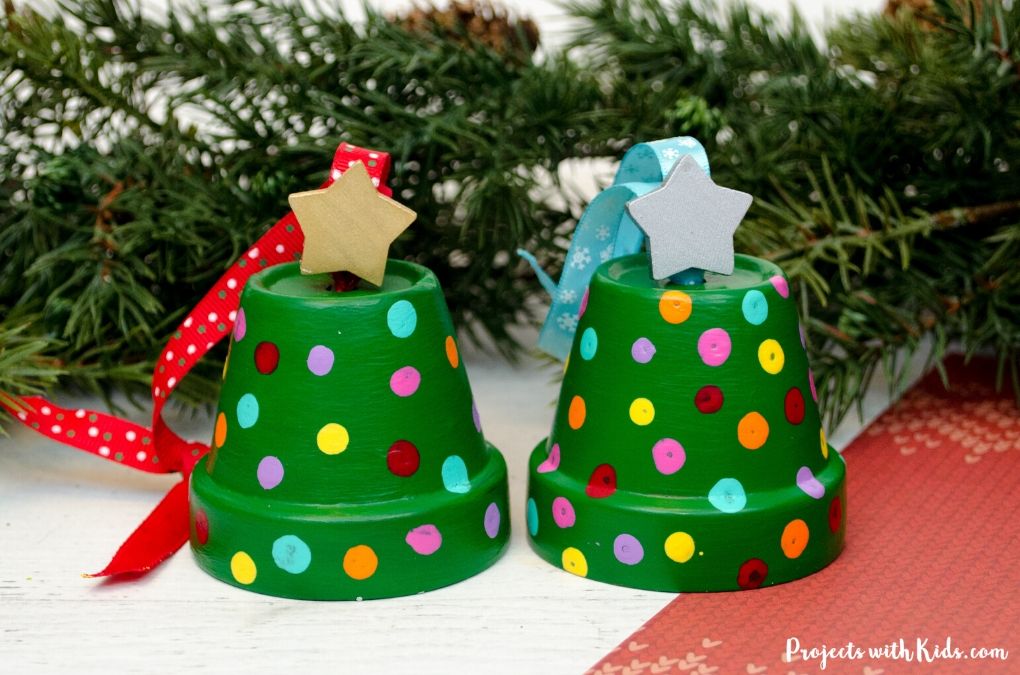
Take a look at these cute gingerbread house ornaments made with clay pots or these easy beaded icicle ornaments for more fun Christmas craft ideas!
Create your own penguin ornament
This post contains affiliate links. As an Amazon Associate, I earn from qualifying purchases. If you would like more information please review my privacy & disclosure policy.
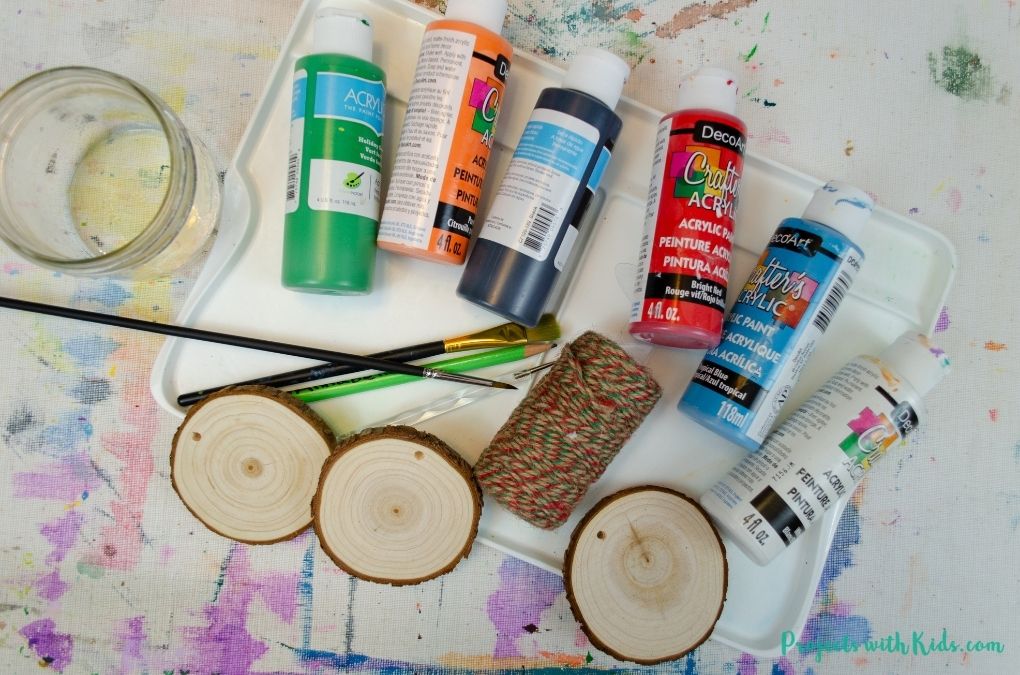
Supplies
- Wood slice ornaments
- Acrylic paint
- Paintbrushes
- Paint palette and water dish
- Pencil and eraser
- String or ribbon
- Dotting tools (optional)
Instructions for your wood slice DIY penguin ornaments
1. Make sure your ornament is clean and free of dust before painting. Take a dry cloth or paper towel and give it a wipe. The paint will have a hard time sticking to the wood if there is any type of dust on it.
Paint your ornament with light blue acrylic paint. Depending on the type of paint you are using you may need to paint two coats.

2. Once your paint is dry, use a pencil to lightly draw in the penguin. Use the photos above and below to help with your drawing.
Kids can choose to add earmuffs or a hat to their penguin if they like and make their penguin wave. They can also customize their penguin’s face by changing the eyes like in the finished photo above.
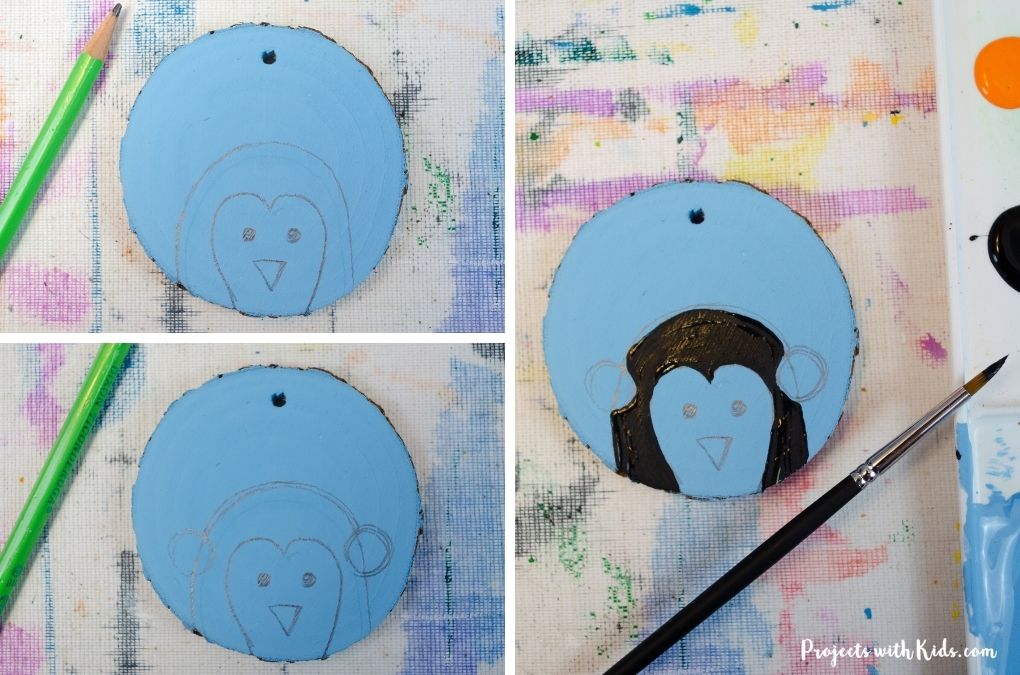
3. Using a small brush, paint the black part of the penguin with acrylic paint. Let this dry completely before moving on.
4. Paint in the white part of the penguin. You may have to paint two coats of white for this part.
This will probably cover up the face drawing, simply draw the face again with a pencil once the paint has dried.
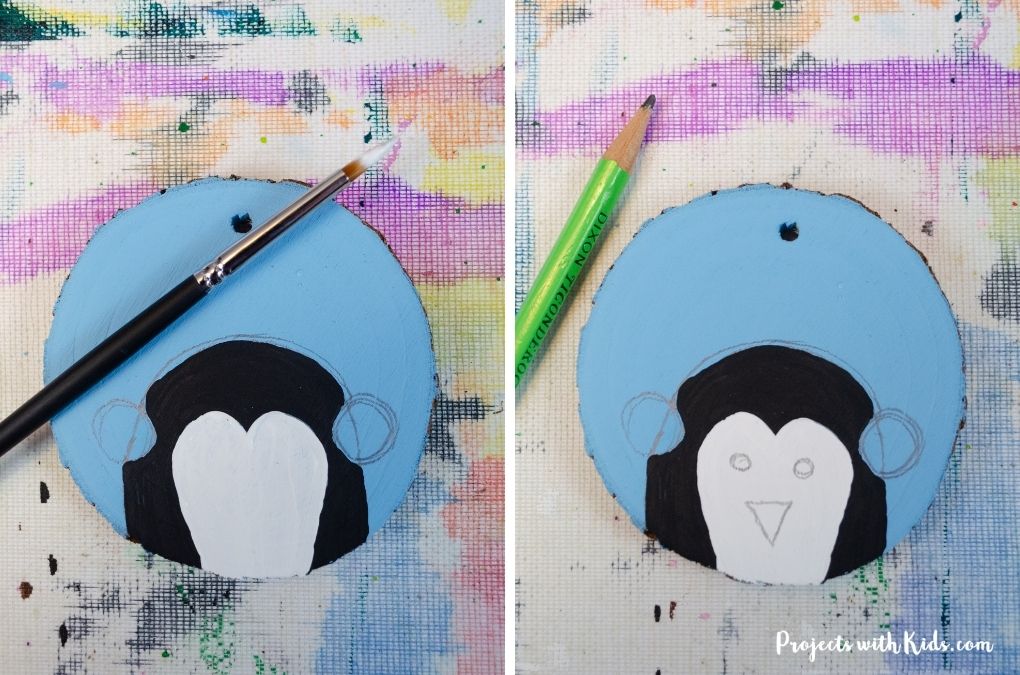
5. Now it’s time to paint in the face. I used a dotting tool for this part which worked really well and was much easier than using a paintbrush! My 10-year-old also found this to be an easy way to paint in the face details.
If you don’t have a dotting tool, then you can use the end of a small paintbrush. Paint in the eyes with black paint and the beak with orange paint.
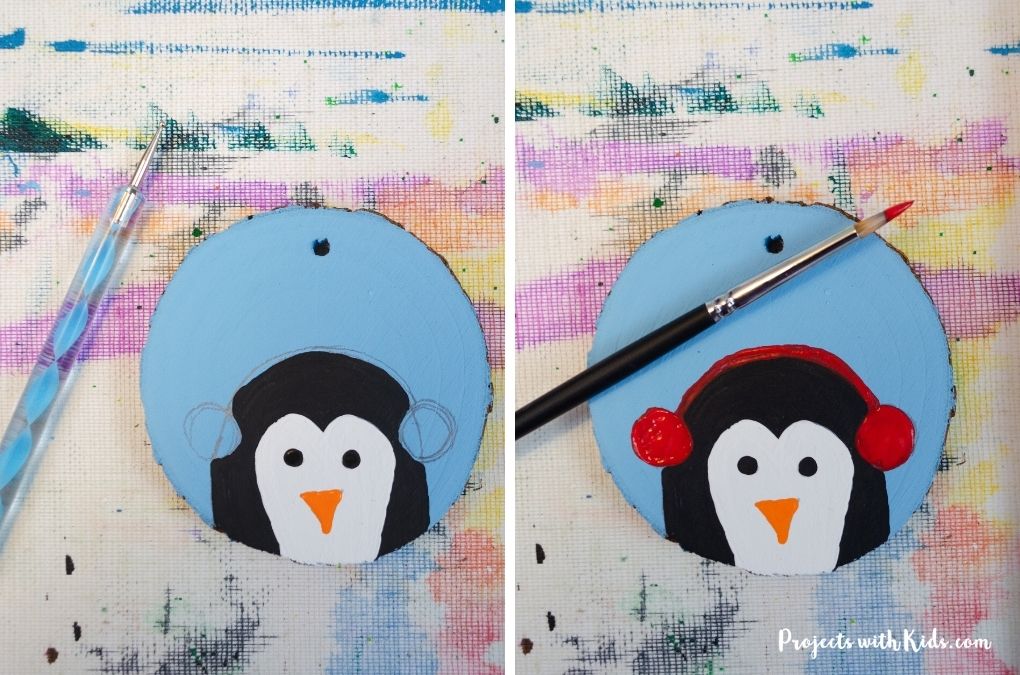
6. Using a small brush, paint in the earmuffs, or hat on the penguin. Let everything dry before moving on.
7. To paint in the snow, use a dotting tool or the end of a paintbrush and white paint.
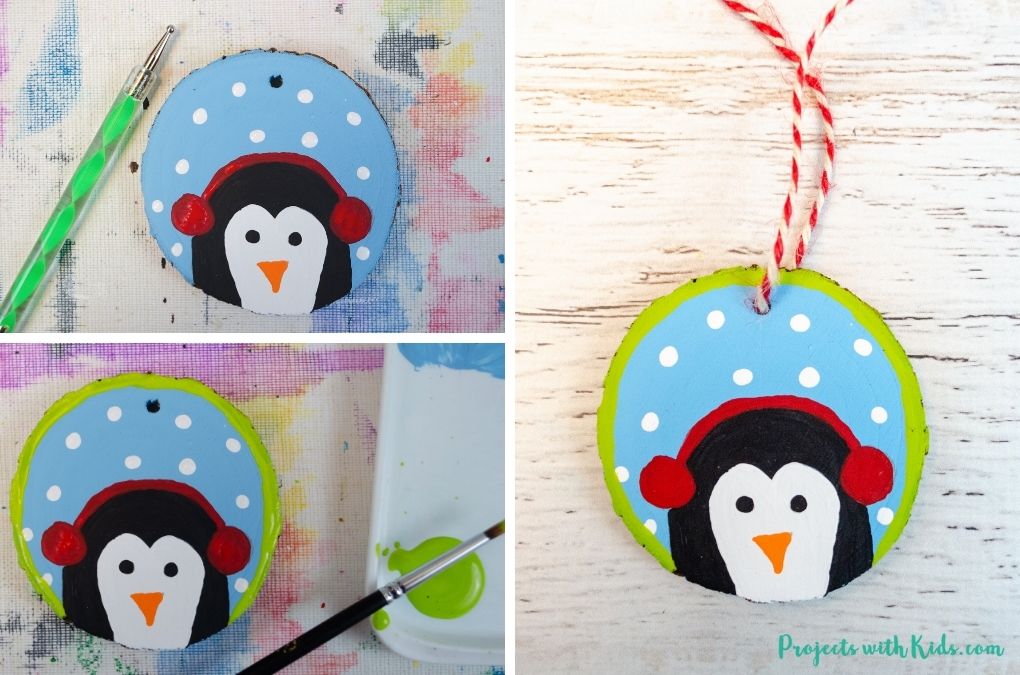
8. Paint a border around the wood slice with a small paintbrush and a bright color. The border might need two coats depending on the color that kids choose.
Have kids write their names and the year on the back of the ornament with a permanent marker.
9. Use string or ribbon to finish off the ornament.
These DIY penguin ornaments are so fun and colorful! Kids will love making these to hang on the tree and give as gifts.
Take a look at this sparkly gold Christmas garland with paper straws for another fun craft idea!
More Christmas ornament crafts kids will love
How to make Adorable Clay Pot Christmas Tree Ornaments
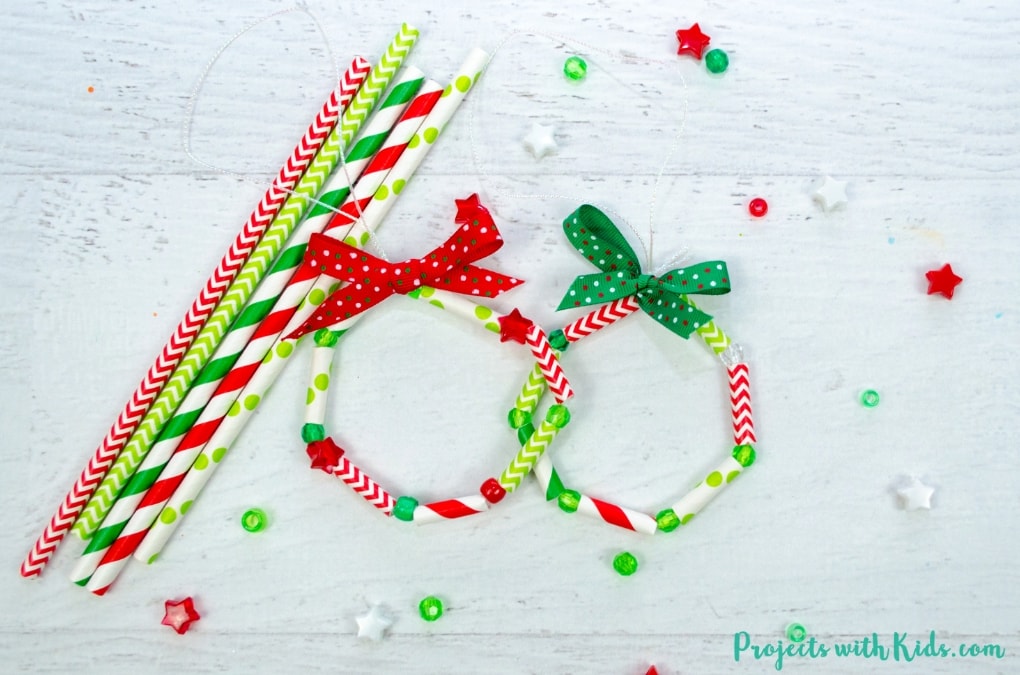
Easy Kid Made Wreath Ornaments with Paper Straws
Follow me on Pinterest for more amazing project ideas.
Pin this penguin craft for later
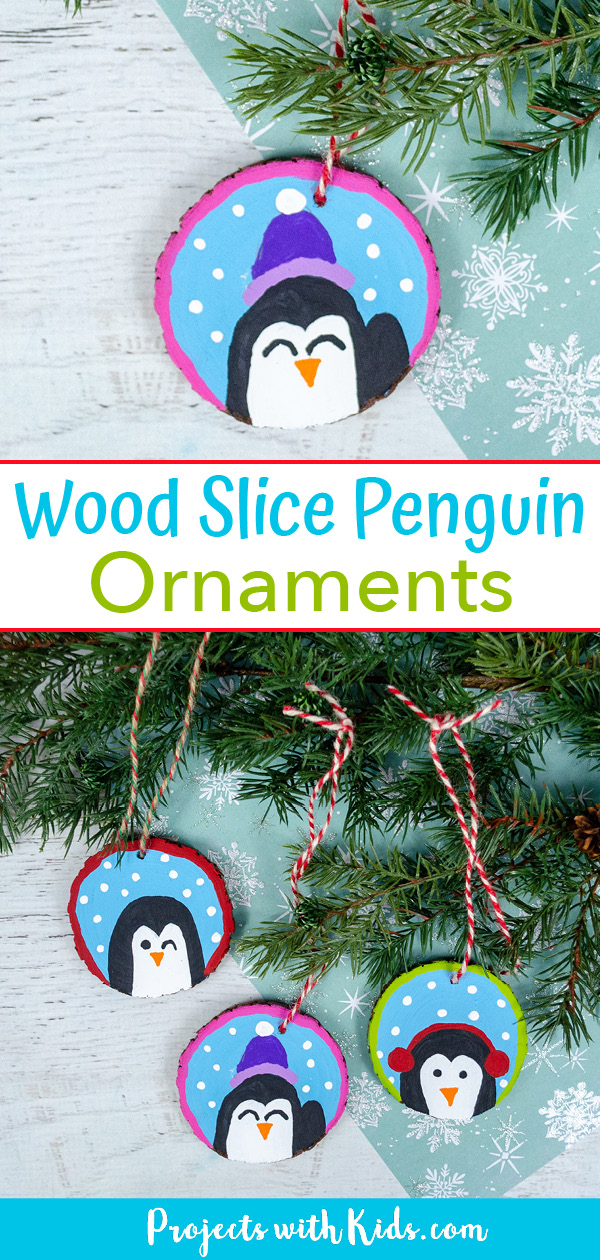
Wood Slice DIY Penguin Ornaments

Kids will love making these wood slice DIY penguin ornaments to hang on the tree! A fun Christmas craft and handmade gift idea.
Materials
- Wood slice ornaments
- Acrylic paint
- Pencil and eraser
- String or ribbon
Tools
- Paintbrushes
- Paint palette and water dish
- Dotting tools (optional)
Instructions
- Before you paint your wood slice, make sure it is clean and free of dust.
Paint a wood slice with light blue acrylic paint. Let it dry completely. - Draw in your penguin using the photo tutorial above. Kids can choose to draw ear muffs, a hat, make their penguin wave, and customize the eyes.
- Paint in the black part of the penguin.
- Paint the white area of the penguin, you may need to paint two coats of white. This will probably cover up the drawing of the face so once the paint is dry, draw in the penguin's face again.
- Paint in the face, using black paint for the eyes and orange for the beak. We used a dotting tool for this part which made painting in the small details a lot easier than using a paintbrush. If you don't have a dotting tool you can use the end of a small paintbrush instead.
- Use a small brush to paint in the earmuffs or hat. Let everything dry before moving on.
- Use a dotting tool or the end of a paintbrush to dot on the snow with white paint.
- Paint a border around the ornament with a small brush. You may need to paint two coats of the border.
Have kids write their name and year on the back of the ornament. - Use string or ribbon to finish off the ornament.


