
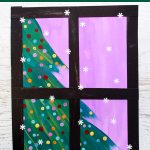
This Christmas tree art project was so fun! I love how colorful the tree and background are and really contrast with the black paper for the window.
This is a wonderful art project for kids to create and explore blending colors and using some fun techniques, like painting with q-tips, which both my kids love to do (and so do I!).
We love exploring different painting techniques. Take a look at my collection of painting ideas for kids for more fun and creative art projects to try!
We used watercolor, acrylic paint, and paper for this tree craft making it a truly mixed media art project. I got some new liquid watercolor paints I wanted to try out for the background and they are awesome! Super bright colors and go on the paper really well.
If you are looking for more Christmas tree art ideas, take a look at this beautiful chalk pastel Christmas tree and this adorable watercolor Christmas tree that kids will also love to create!
Create Your Own Christmas Tree Art Project
This post contains affiliate links, which come at no cost to you. If you would like more information please review my privacy & disclosure policy.
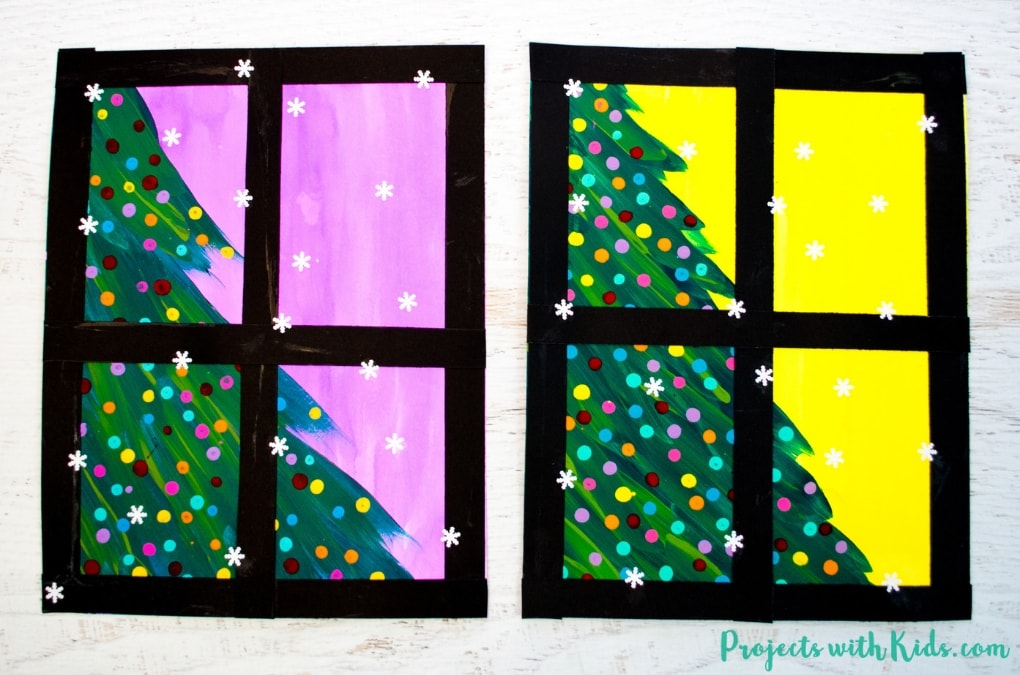
Supplies
- White & black cardstock
- Watercolor paints, we used these liquid watercolors and they are great!
- Acrylic paint
- Small Snowflake punch
- White printer paper
- Glue
- Ruler
- Scissors or paper cutter
- Paint palette
- Q-tips
- Paintbrushes
Instructions to make your Christmas tree art
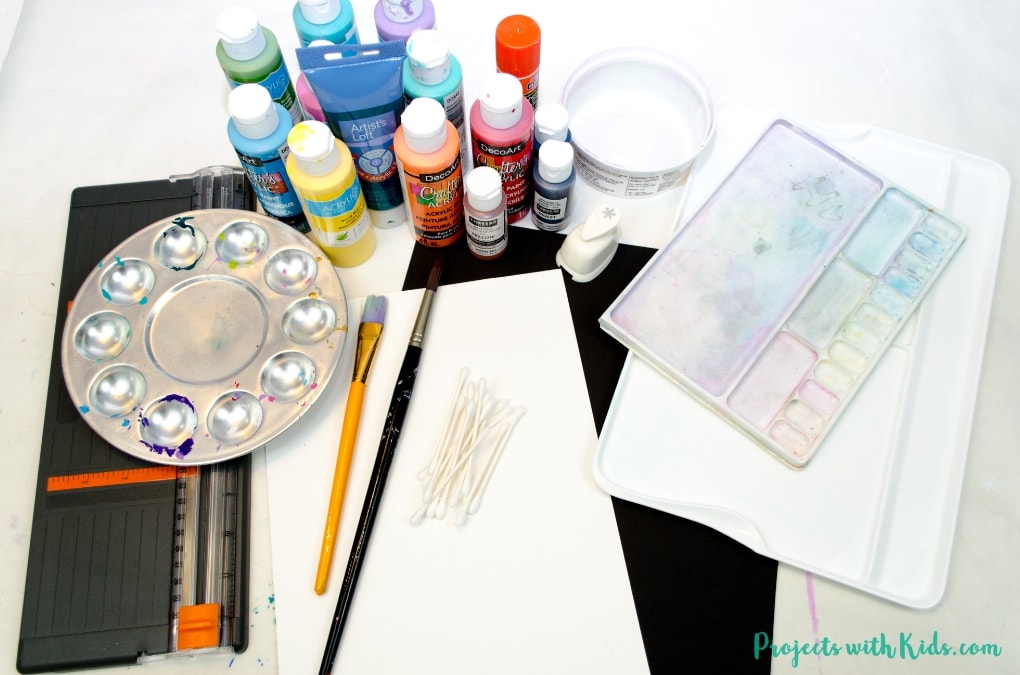
1. First, paint your background. Kids can use any color they like, we used purple, blue and yellow for our examples. We used some new liquid watercolor paints that I got (and they are awesome!).
If you don’t have liquid watercolors, you can easily use any type of watercolor paint that you have on hand.
Related: Colorful Kid-Made Christmas Cards with Coffee Filters
Make sure to test out your color on some scrap paper before painting your background. I actually added a bit of water to the purple and blue colors to make them lighter. Using a bigger flat brush will make this step easier for kids.

2. Once the background has dried, take a ruler and pencil and draw in a tree guideline. This will help kids to keep the shape of their Christmas tree and make it easier for them to paint.
Starting at the top left corner, move the ruler out from the corner just a bit and have it go all the way down the paper in a diagonal line. Just like in the picture example. Trace the line with a pencil.
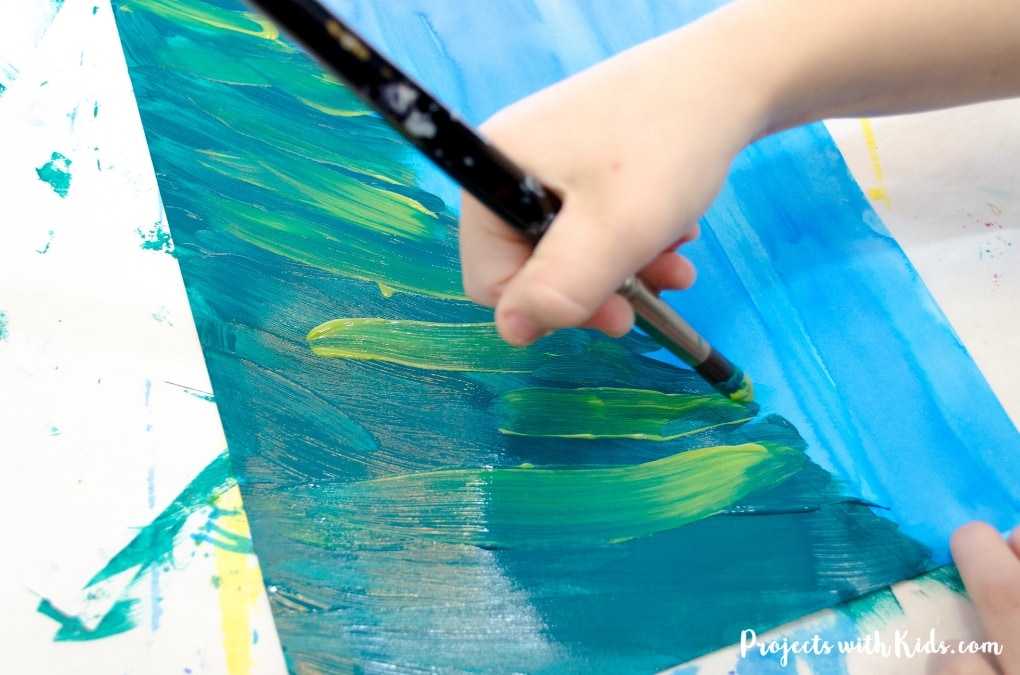
3. Get your 2 shades of green ready. We used a dark green and a light green. You will use the dark color first. You want to make sure the brush is on the bigger side and not too small.
Starting at the top have kids make sweeping brushstrokes down their paper, following their pencil guideline. My 8-year-old daughter did great at this and painted her tree all by herself. Every tree will have a slightly different shape that’s what will make them unique!
Kids will also love: Snowflake Watercolor Winter Art
Have kids continue to paint with the dark green all the way down in big brushstrokes until they finish their tree.
4. Before the tree has a chance to dry, have them add in the light green color. They can put as much or as little light green as they like, and experiment with blending the 2 colors together. Once they are happy with how their tree looks, let it dry completely before moving on to the next step.
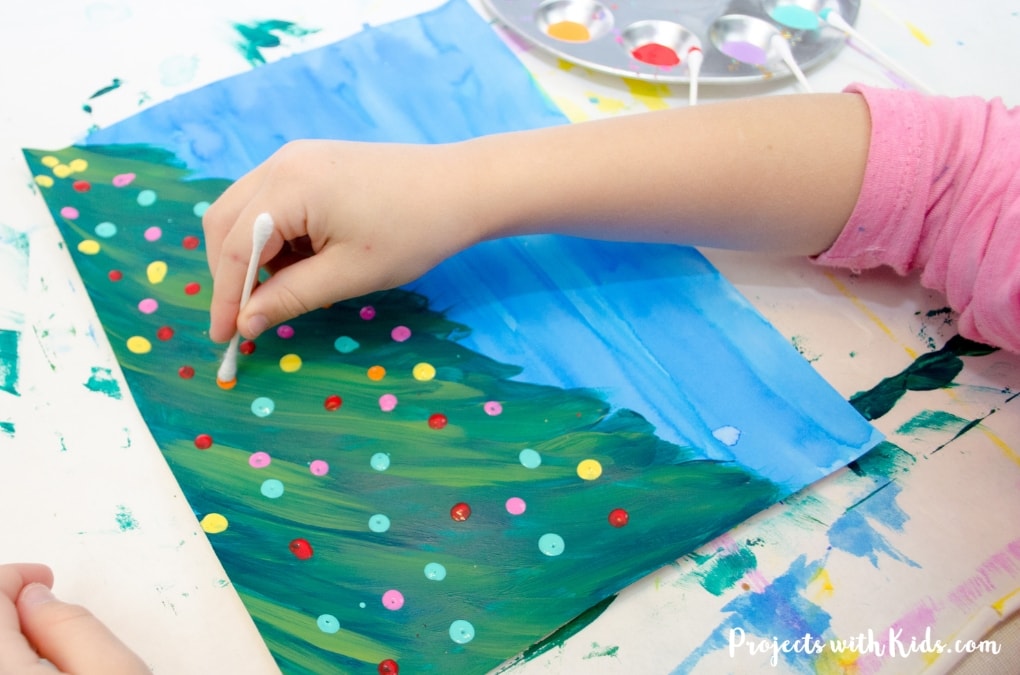
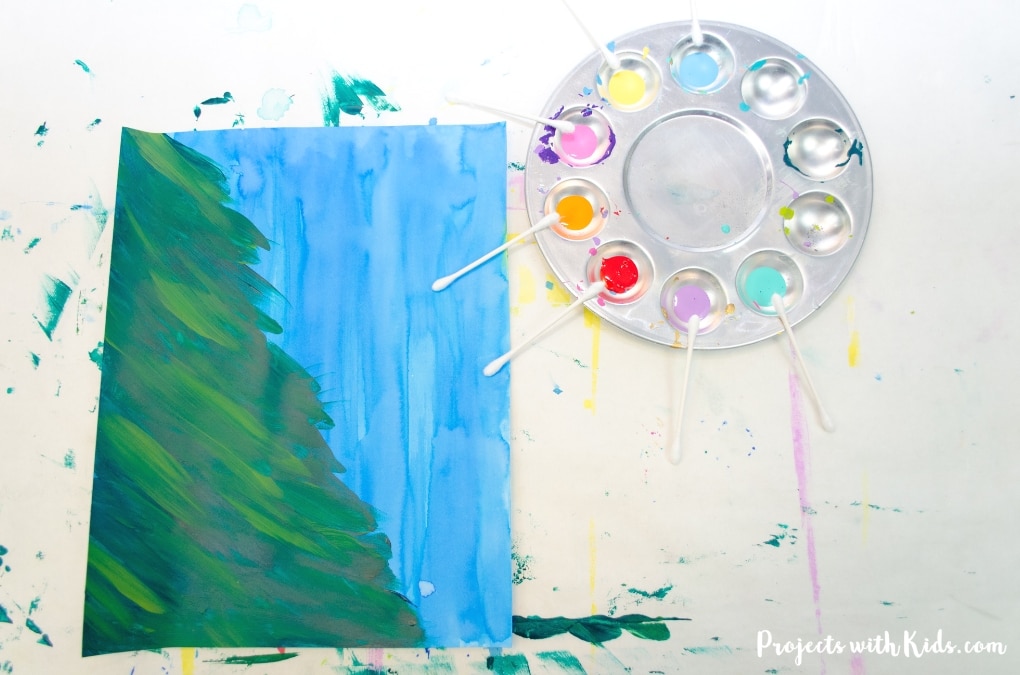
5. Time to decorate the tree! Put a variety of colors into your paint palette and using 1 q-tip per color, have kids decorate their Christmas tree. We used 7 different colors and I love how fun and colorful our trees turned out.
6. While the q-tip painted decorations are drying, you can cut the black paper for the window. You will need 6 strips of paper per painting. I found that cutting them to 3/4 inch thick was a good size.
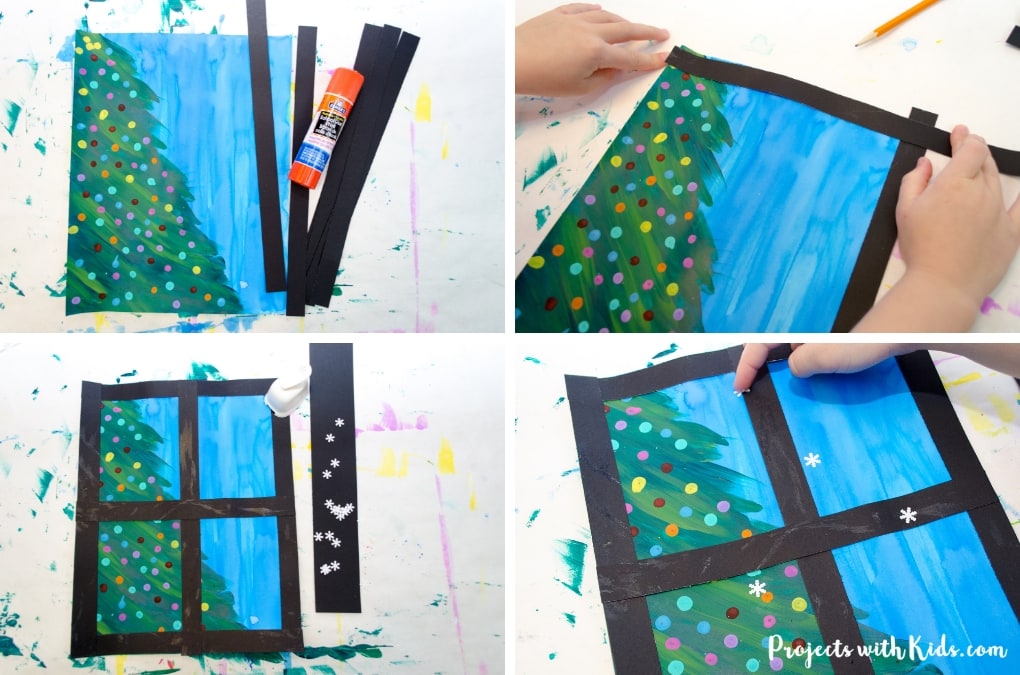
Glue the paper strips around all sides of the painting and through the middle to create a window effect.
7. For the final touch, add in the snowflakes. Using a paper punch, punch out your snowflakes on regular white printer paper. Have kids glue down the snowflakes to their painting.
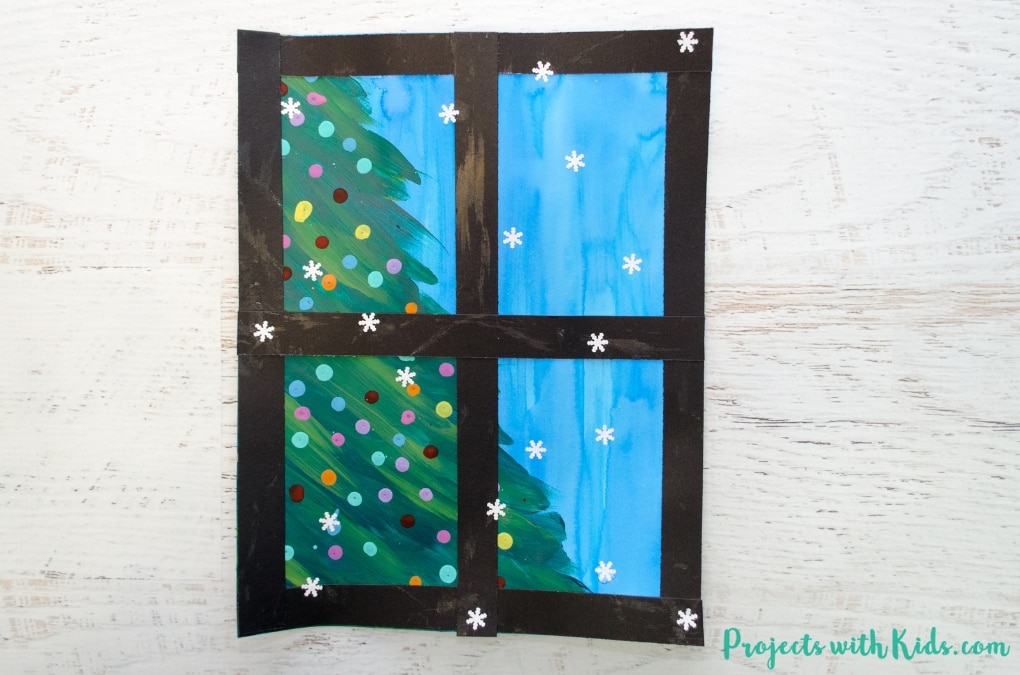
This Christmas tree art project turned out so great, both my daughter and I had a lot of fun making them. I love how these paintings make it seem like you are looking through a window on a snowy day to see a beautiful, colorful Christmas tree.
If you are looking for more Christmas projects to make take a look at our collection of creative Christmas arts and crafts for more fun ideas!
We love creating and exploring with different art supplies and techniques. Take a look at our ultimate collection of amazing art projects for kids for more great ideas!
More Christmas arts and crafts kids will love
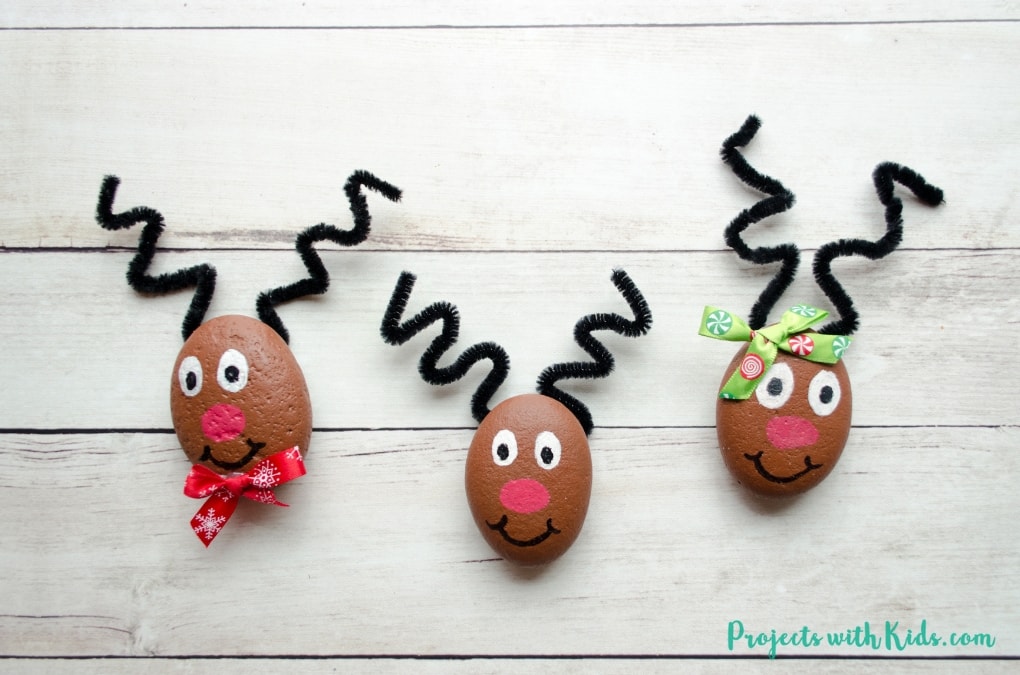
The Cutest Reindeer Painted Rocks for Kids to Make
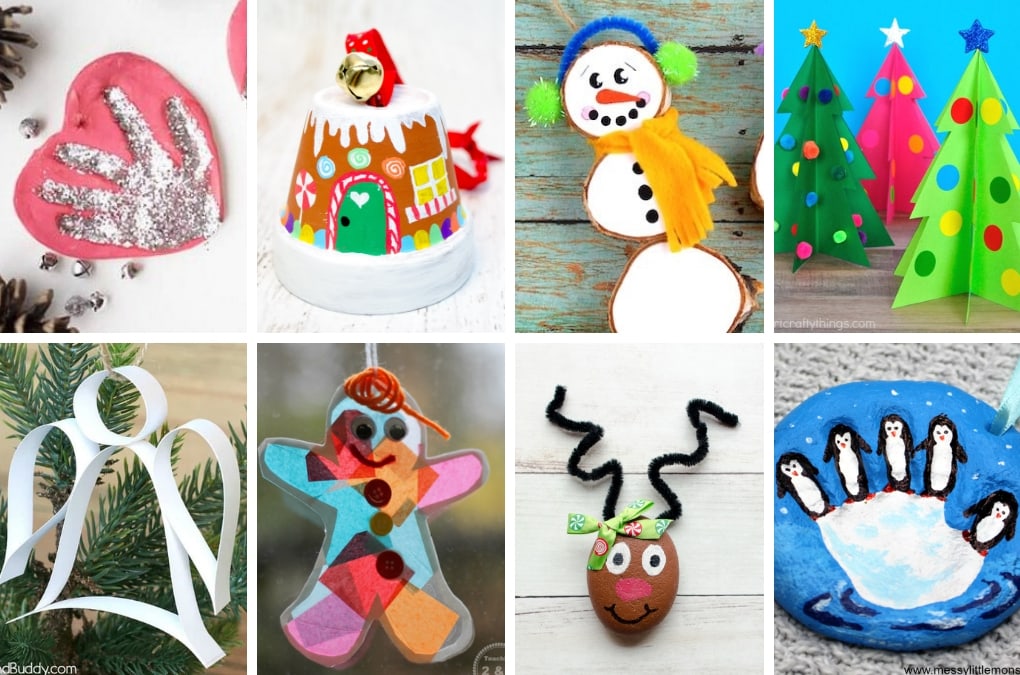
70+ Creative Christmas Projects for Kids
The Sweetest Gingerbread House Ornaments Kids Can Make

Follow me on Pinterest for more amazing project ideas
Pin this Christmas tree art project for later
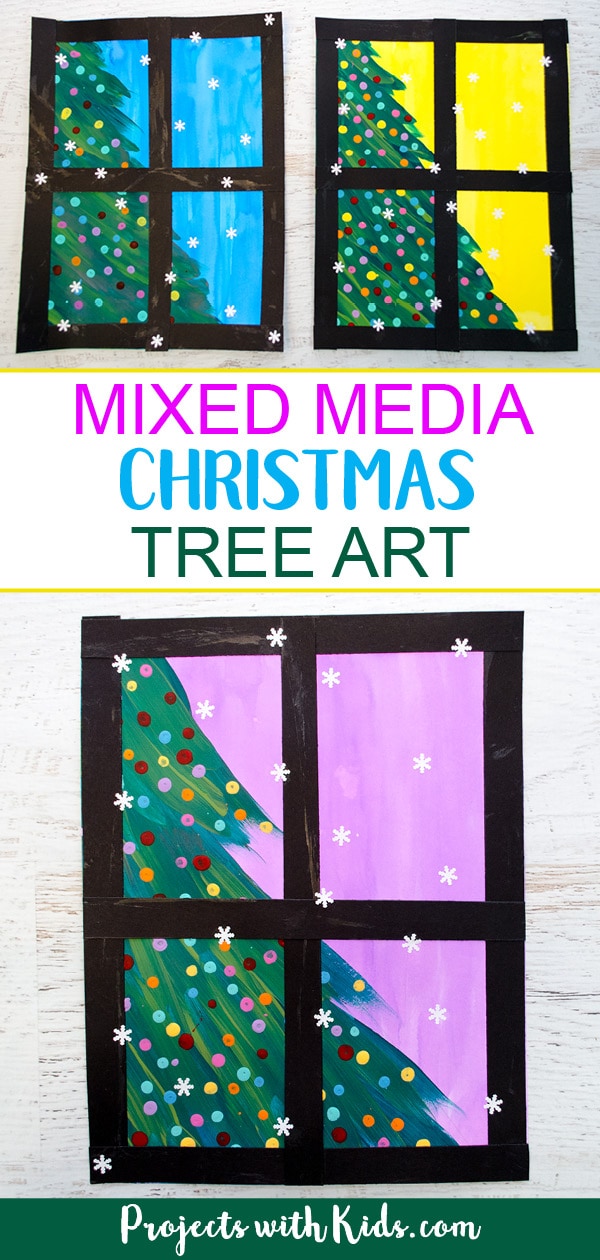
Mixed Media Christmas Tree Art Project

Kids will love creating this beautiful Christmas tree art project using a mixed media approach. Fun and easy techniques make this a wonderful Christmas craft activity!
Materials
- White & black cardstock
- Watercolor paints
- Acrylic paint
- White printer paper
- Glue
- Q-tips
Tools
- Small Snowflake punch
- Ruler
- Scissors or paper cutter
- Paint palette
- Paintbrushes
Instructions
- First, paint your background with watercolor paint. We used liquid watercolors for this step.
Let the background dry. - Draw a tree guideline with a pencil. Start in the top left corner and draw a diagonal line down your paper to show where the tree will go.
- Paint your Christmas tree with two shades of green. Start with the darker green and using a round brush, paint sweeping brush strokes down your paper following the pencil guideline.
Add in the light green paint, while the dark green color is still wet. Kids can blend the two colors together a bit, but still leave some lighter brushstrokes unblended on the tree. - Get the tree decoration colors ready, we used seven colors to decorate our Christmas trees. Use one q-tip per color and have kids dot on their decorations.
- As your tree is drying, cut out the paper strips from black cardstock. You will need six strips of paper cut to 3/4 of an inch thick.
Glue the paper strips around all sides of the painting and through the middle to create a window effect. - Finally, add in the snowflakes. You can use white scrap paper to punch out your snowflakes with a snowflake paper punch. Glue them down to your painting.


[…] Mixed Media Christmas Tree Art Project from Projects with Kids […]