
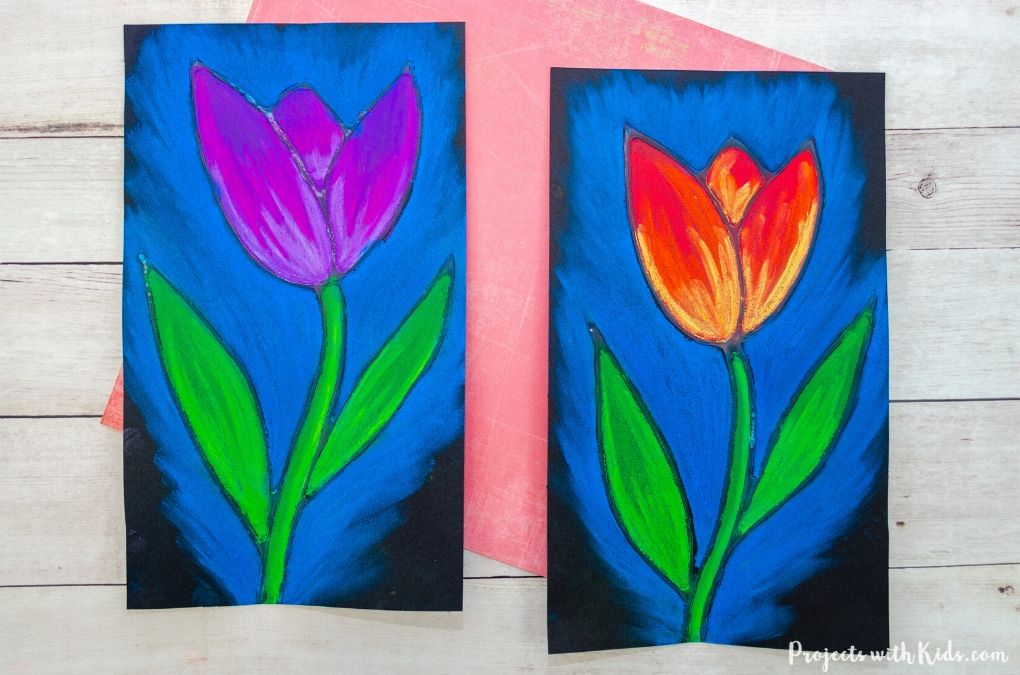
This chalk pastel tulip art project is stunning and a great way for kids to explore and have fun with chalk pastels! Kids will learn about layering and blending pastels and using glue as a resist technique.
We love creating pastel projects! Take a look at my collection of chalk pastel art for more creative ideas kids will love.
Using glue as a resist technique with pastels is always a fun technique for kids to try! Take a look at these chalk pastel sunflowers and this Kandinsky art for kids for more great ideas.
Tips for working with chalk pastels
Chalk pastels can be messy (but so fun!). There are a few things you can do to help keep some of the mess contained:
- Put newspaper down on desks or tables
- Put your project on a tray or a shallow cardboard box which will keep most of the mess inside the tray
- You can try doing your project outside
- Have lots of paper towels handy
- Once you are done with your project (or even halfway through if it gets really dusty), take it outside to gently blow or shake off the excess dust
- If you are using chalk pastels in the classroom and the kids are ready to take their artwork home, simply place the art between some newspaper to keep it from smudging and for easy transport.
Create your own chalk pastel tulip art project
This post contains affiliate links. As an Amazon Associate, I earn from qualifying purchases. If you would like more information please review my privacy & disclosure policy.
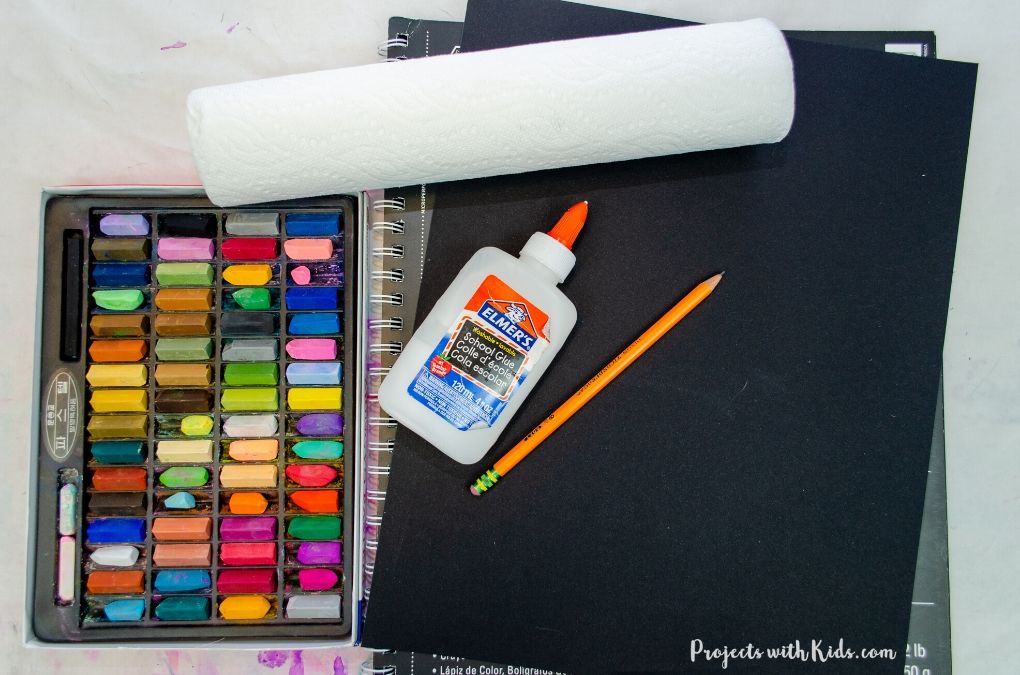
Supplies
- Chalk pastels
- White glue
- Black drawing paper or pastel paper
- White pencil crayon
- Paper towels
Instructions to make your tulip art
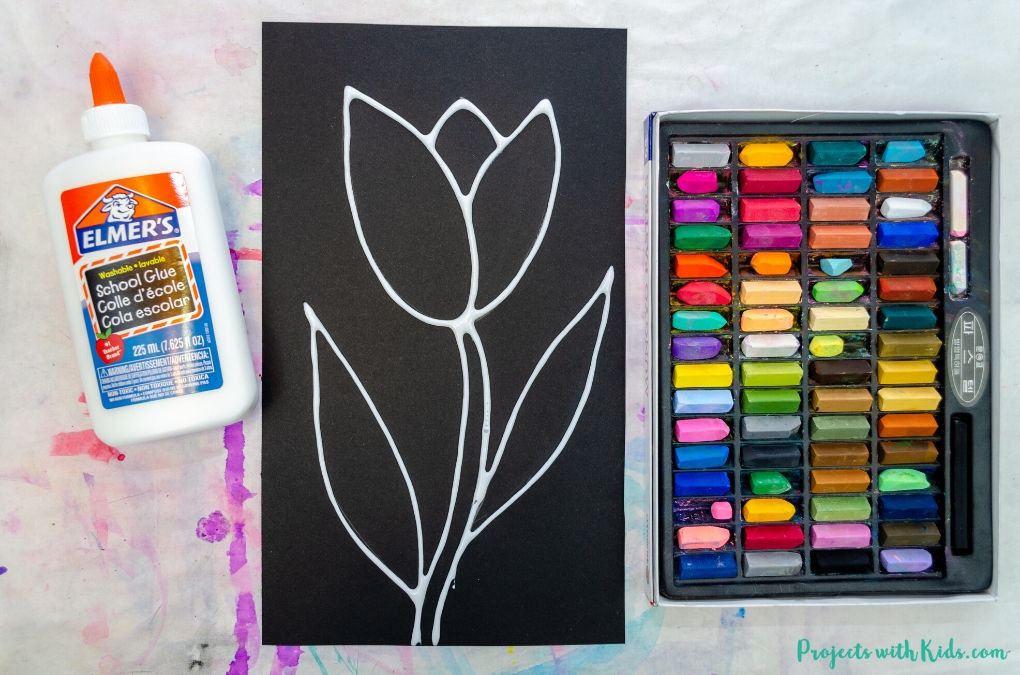
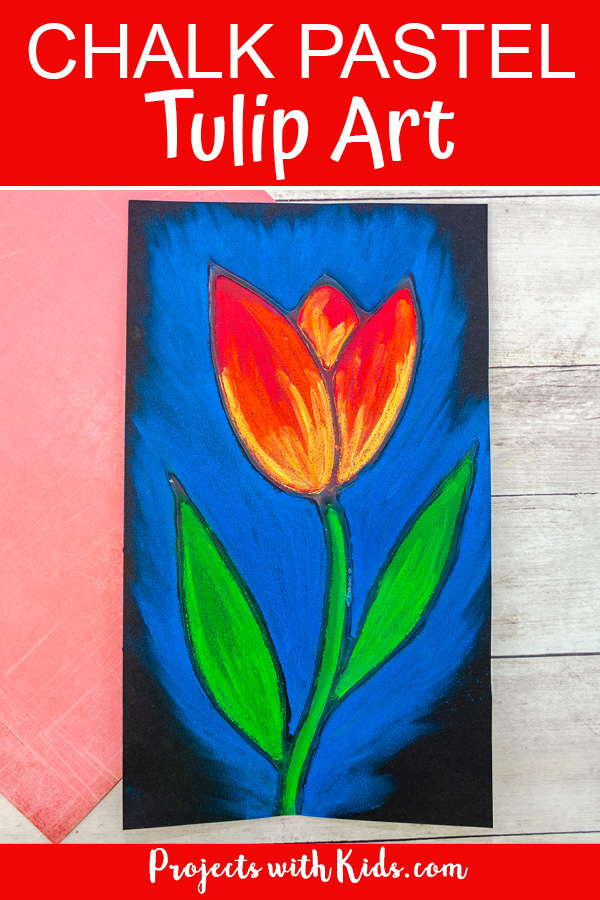
1. Cut your paper to your desired size, I cut our paper to 7 inches x 12 inches. We used black drawing paper for this project but you could also use black pastel paper.
Start by drawing your tulip with a white pencil crayon, this will help it to show up on the black paper. Drawing a tulip is easy when you start with a simple “U” shape!

Then draw a petal shape on one side and then the other. Finish your tulip petals by drawing in a smaller petal in the center.
Some kids might prefer to draw their tulip in pencil first so they can erase their drawing if they need to.
2. Draw a stem in the center of the petals and leaves on either side of the stem and your tulip drawing is complete!

3. Use white glue to trace the tulip drawing. Remind kids to go slowly and carefully with this step. Once kids have finished tracing their tulip, the glue will need to dry completely on a flat surface.
I recommend letting it dry overnight.
The white glue will act as a resist to the pastels and section off the different parts of the drawing. This will make it easier for kids to draw and color with the pastels. Using the glue as a resist reminds me of stained glass the way the drawing is in different sections.
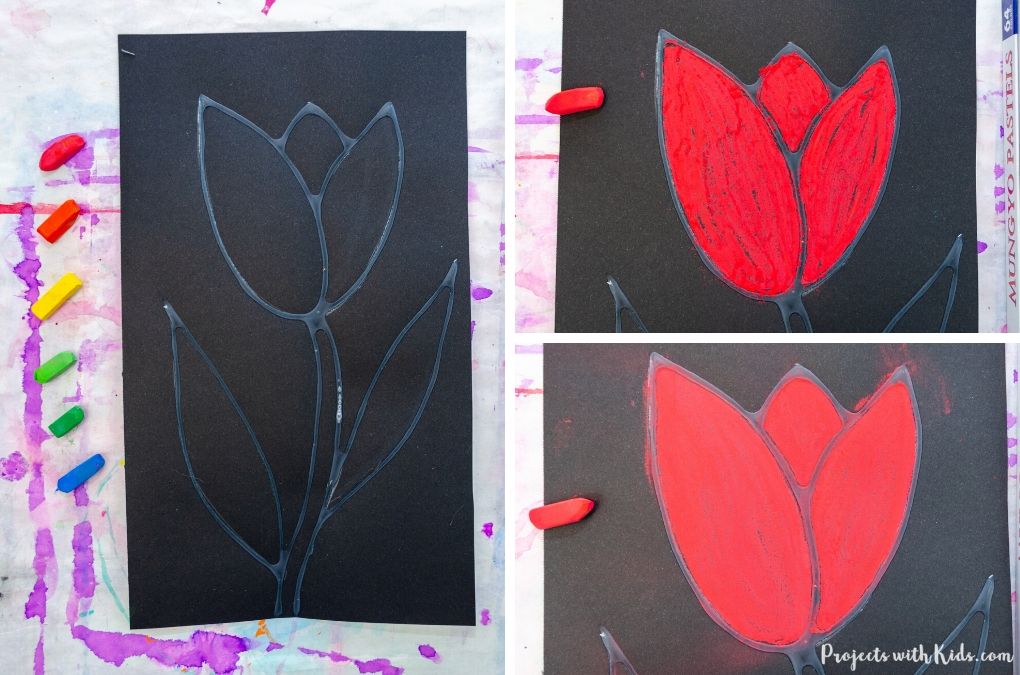
4. Once the glue is dry it’s time to color in your tulip with chalk pastels! You want to choose a main color for the tulip and then two lighter and brighter shades to go with it.
Layering on different shades of pastel will give your tulip depth and make it really stand out!
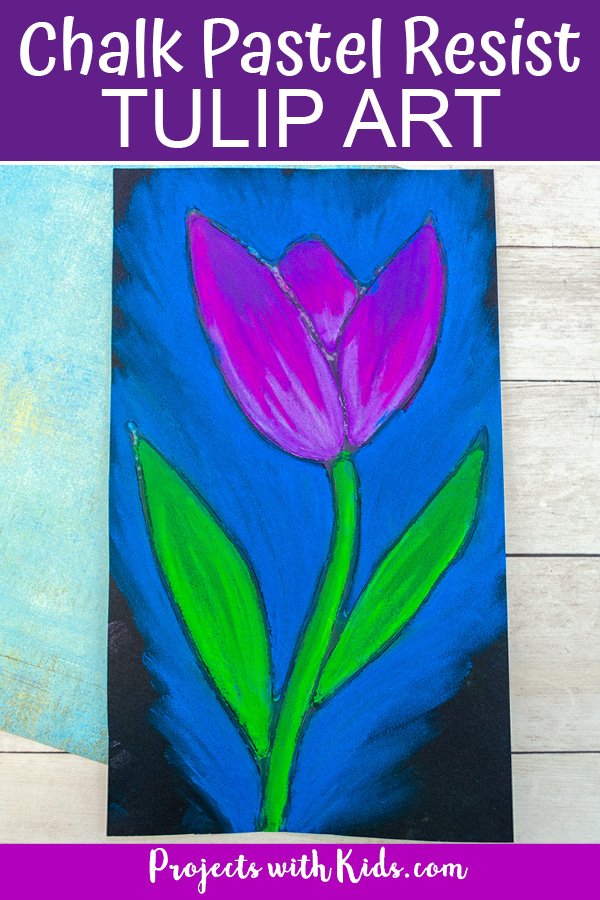
I did one tulip in red with orange and yellow colors and one in a dark purple with a pinky-purple shade and a lighter purple color. I will use the red tulip for this tutorial.
For more details about pastel techniques, take a look at these 5 essential chalk pastel techniques for beginners.
Using a red chalk pastel color in the tulip petals. Use your fingers to blend the pastel. Make sure to have paper towels handy!
5. Take your orange pastel and add some highlights to the petals. You don’t need to blend this in, but kids can experiment with blending if they like.
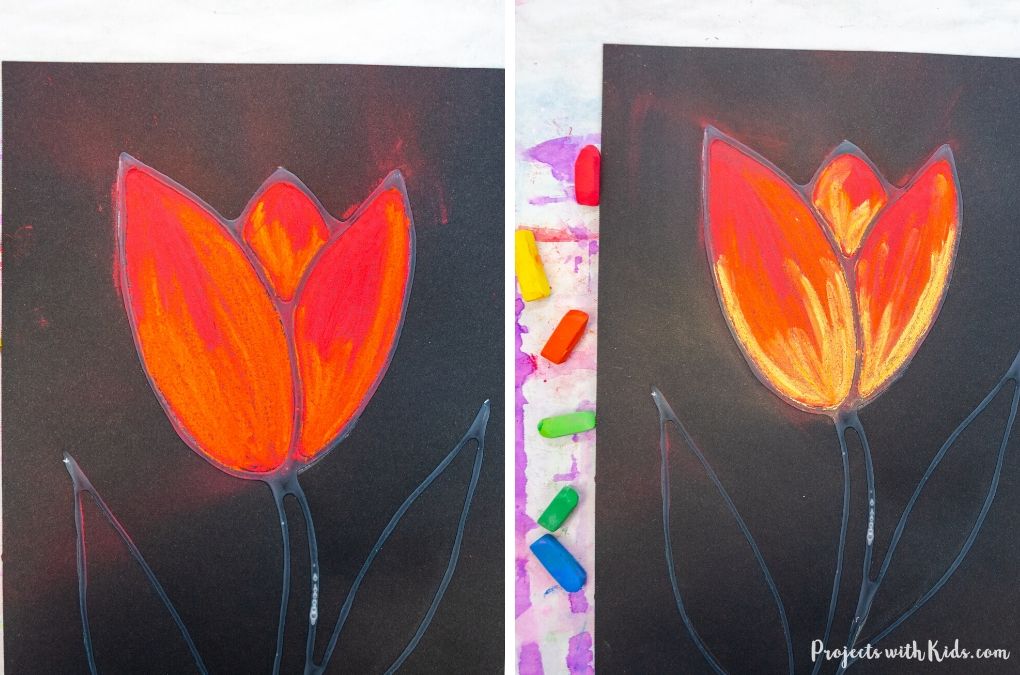
6. Finally, add in the yellow layer to finish off the tulip petals. The bright yellow really makes the whole tulip pop!
You want to only draw in a small amount of yellow so you don’t cover up the orange or red pastels.
7. Use two shades of green for the stem and leaves. Start with a darker green pastel and color in the stem and leaves, use your fingers to blend the green.
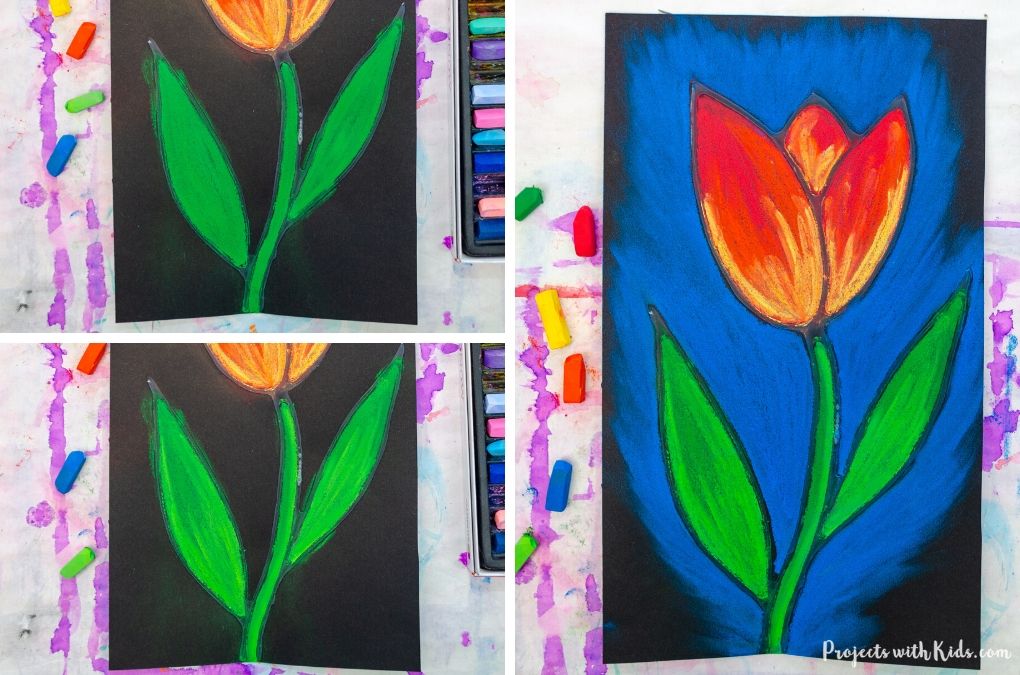
Draw in some highlights with a lighter green pastel on the leaves. For the stem, draw a line down one side of the stem with the lighter green.
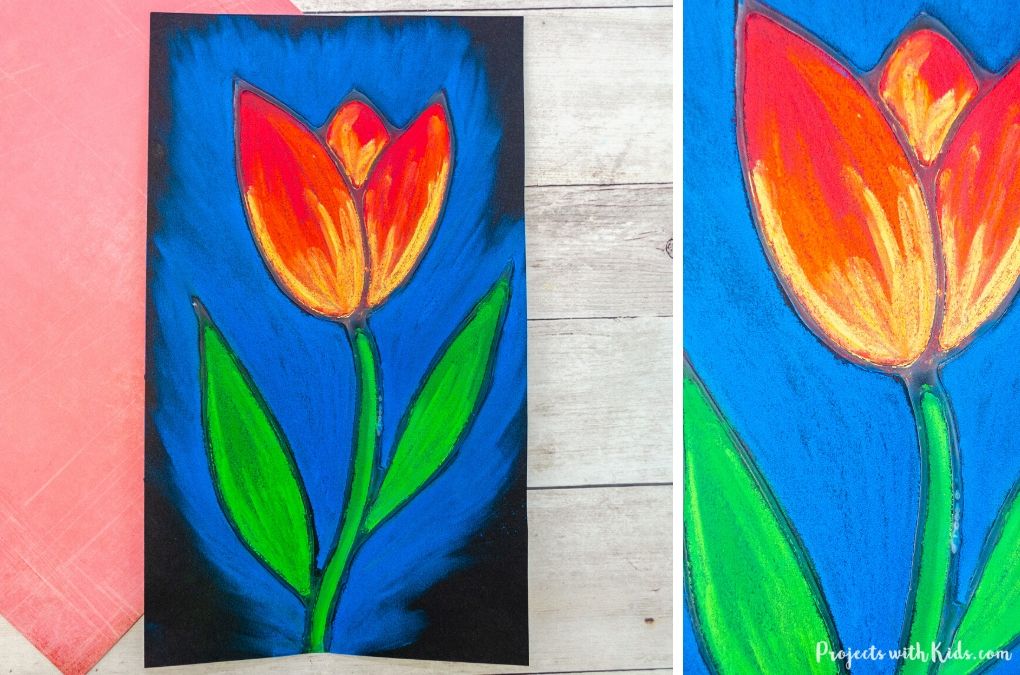
8. For the background, take a bright blue chalk pastel and draw around your tulip. Use your finger to smudge the blue pastel in an outward direction all around your tulip.
Leave some of the black paper showing through. The smudged blue background and black paper combined with the bright tulip really give this artwork a dramatic look!
Kids will have fun creating this gorgeous chalk pastel tulip art project for spring! If you are looking for more spring projects, take a look at this colorful collection of spring art for kids!
We love creating and exploring with different art supplies and techniques. If you are looking for more art projects to try, take a look at our ultimate collection of amazing art projects for kids!
More spring art projects kids will love
Field of Tulips Q-tip Painting
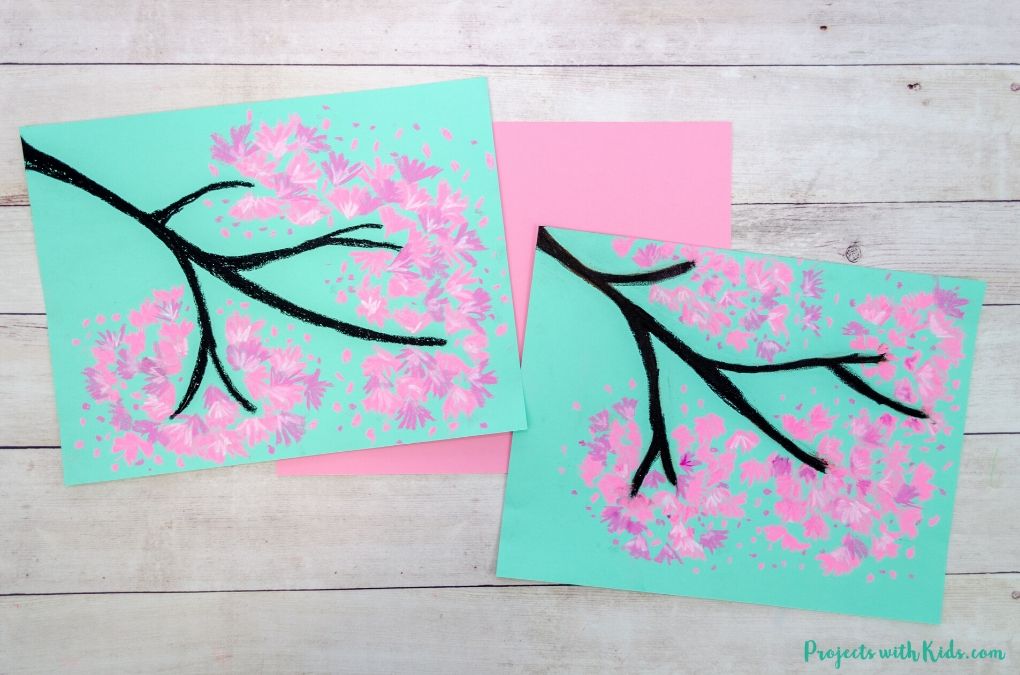
Chalk Pastel Cherry Blossom Art Project
Follow me on Pinterest for more amazing project ideas.
Pin this art project for later

Beautiful Chalk Pastel Tulip Art Project for Kids

This chalk pastel tulip art project is a great spring activity that kids will love to create! Kids will learn about using glue as a resist technique and layering and blending pastels to create a stunning piece of art.
Materials
- Chalk pastels
- White glue
- Black drawing paper or pastel paper
- Paper towels
Tools
- White pencil crayon
Instructions
- Cut your black drawing paper or pastel paper to size. I cut my paper to 7 inches X 12 inches.
- Use a white pencil crayon to draw your tulip. Start by drawing a simple "U" shape and follow along with the photo examples above to finish drawing the petals and the stem and leaves.
- Trace your tulip drawing with white glue. Remind kids to go slowly and carefully. Let this dry on a flat surface overnight.
- Use red chalk pastel to color in the tulip petals. Blend this color in with your fingers.
- Take an orange pastel and add some highlights. This doesn't need to be blended in, but kids can explore blending if they like. If the color gets blended in too much, you can always add in some more.
- Draw in more highlights with a bright yellow color. The bright yellow will really make the whole tulip stand out!
- Use a bright green pastel for the stem and leaves. Draw on some highlights with a lighter green color. This lighter color doesn't need to be blended, but kids can try blending if they like.
- For the background, color around the whole tulip with blue pastel. Smudge the pastel in an outward direction all around the tulip. Leave some of the black background showing through.


Clare Ivatt
Thank you for these Angela – they are absolutely stunning! I can’t wait to try these Tulips myself, never mind the kids!!!
ProjectswithKids
Thank you Clare! I loved making these as well, they also make a great adult art project!