
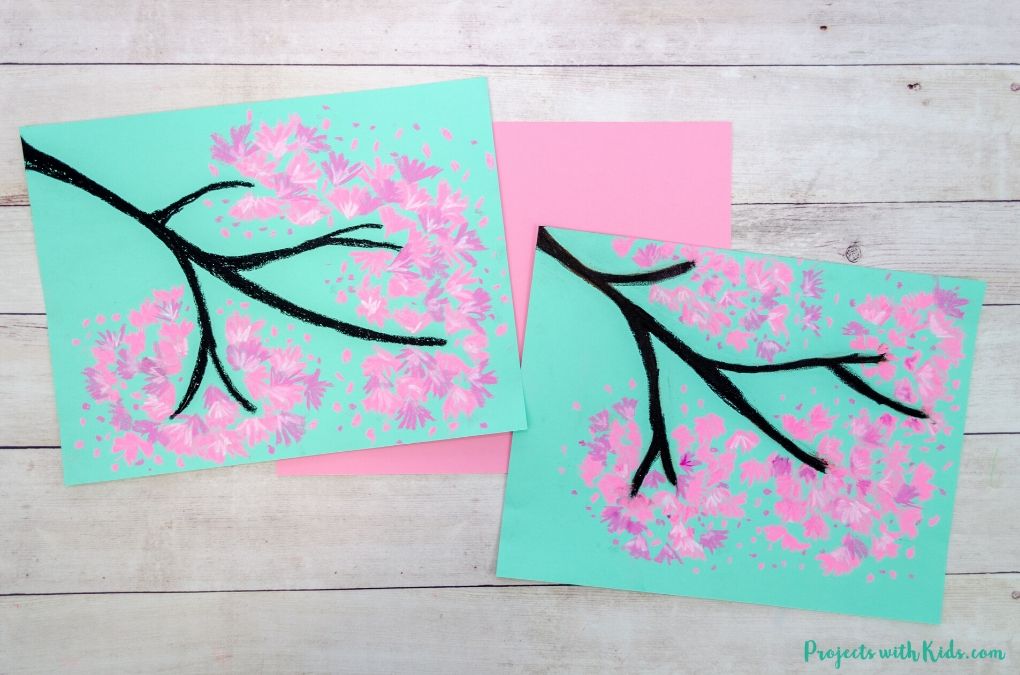
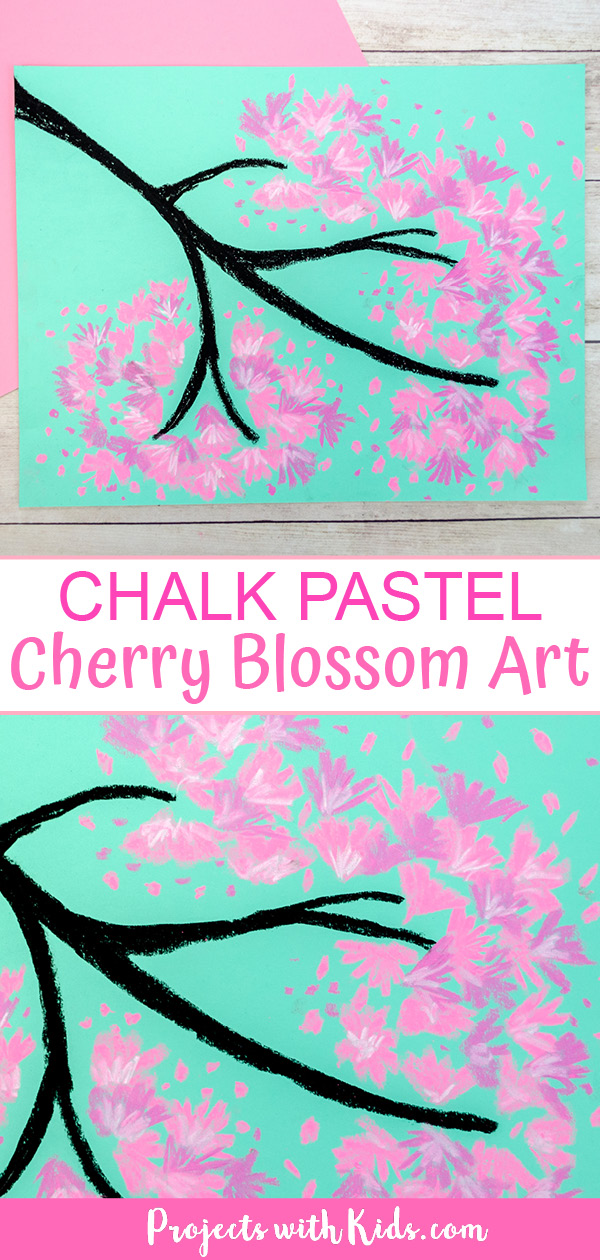
Welcome spring with this chalk pastel cherry blossom art project! This is an easy pastel project that kids will have fun creating. Kids will practice drawing and layering with chalk pastels to make this beautiful spring art.
This is a great project for kids to do as part of a spring unit and learn about cherry blossom festivals that are celebrated all over the world!
I love seeing all of the gorgeous cherry blossom trees in bloom in the springtime! It’s one of the first signs of spring that I look forward to. Take a look at this cherry blossom cotton ball painting for another fun idea!
Pastels are so fun for kids to explore! Take a look at my collection of chalk pastel art for more creative ideas kids will love.
Tips for working with chalk pastels
Chalk pastels can be messy (but so fun!). There are a few things you can do to help keep some of the mess contained:
- Put newspaper down on desks or tables
- Put your project on a tray or a shallow cardboard box which will keep most of the mess inside the tray
- You can try doing your project outside
- Have lots of paper towels handy
- Once you are done with your project (or even halfway through if it gets really dusty), take it outside to gently blow or shake off the excess dust
- If you are using chalk pastels in the classroom and the kids are ready to take their artwork home, simply place the art between some newspaper to keep it from smudging and for easy transport.
Create your own chalk pastel cherry blossom art
This post contains affiliate links. As an Amazon Associate, I earn from qualifying purchases. If you would like more information please review my privacy & disclosure policy.
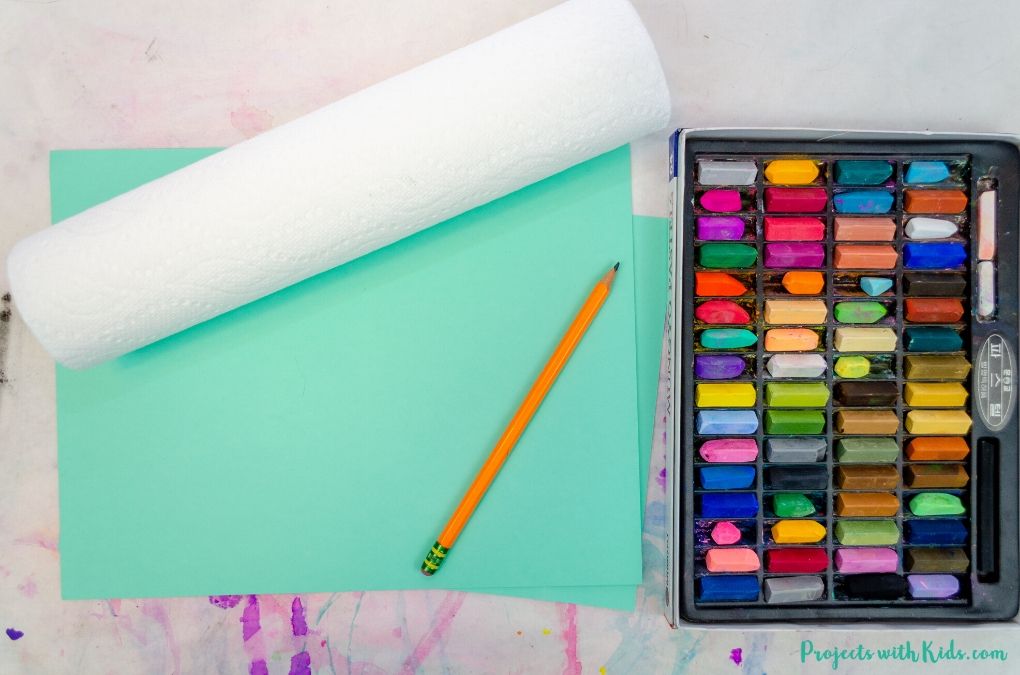
Supplies
- Blue cardstock or pastel paper
- Chalk pastels
- Pencil
- Paper towels
Instructions for your cherry blossom art project
We used regular cardstock for this project. Most of my chalk pastel projects are done on black drawing paper or black pastel paper but for this project, I wanted a bright blue background.
You can buy blue pastel paper but it can be hard to find so I decided to try using sky blue cardstock and it worked great!
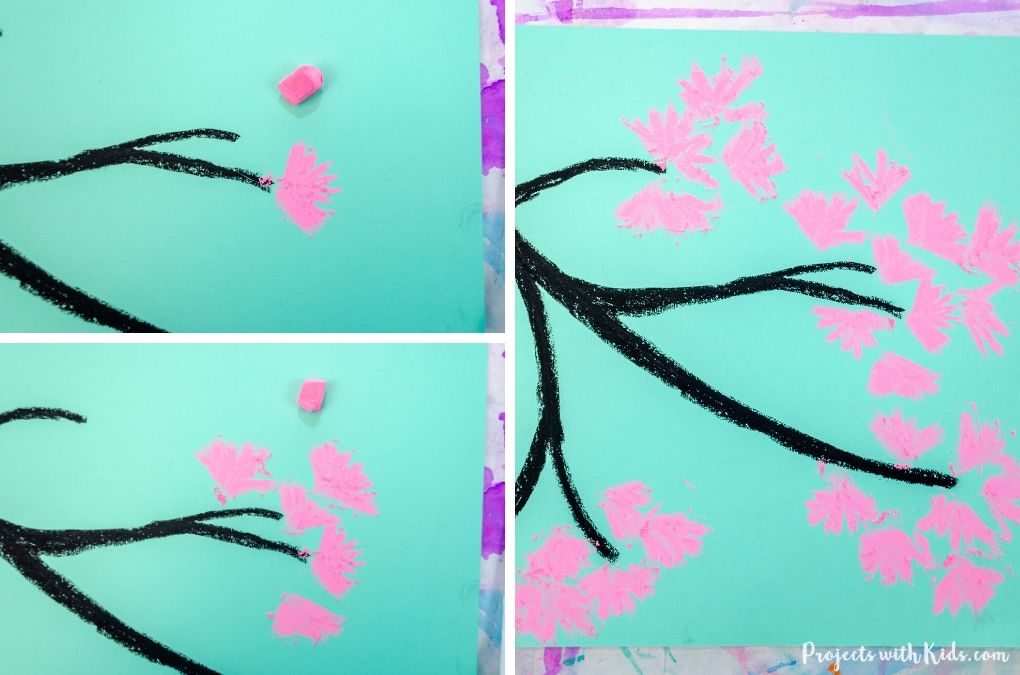
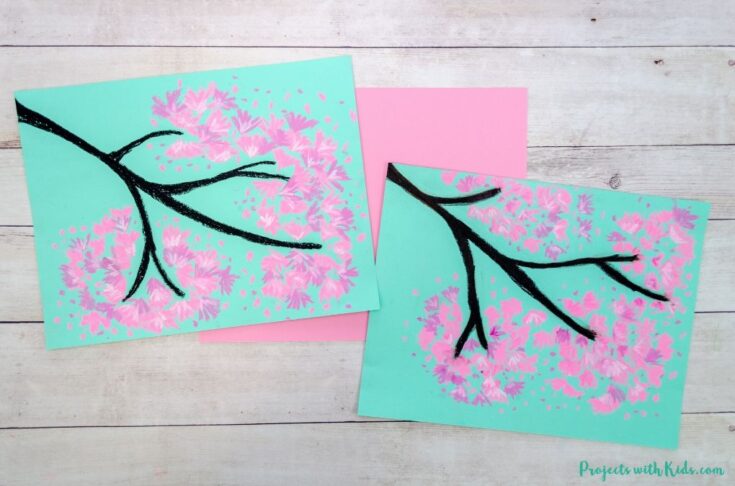
1. First, draw out your tree branch with a pencil. I drew mine starting in the top left corner of my paper. Remind kids to draw lightly so they can erase their lines if they need to.
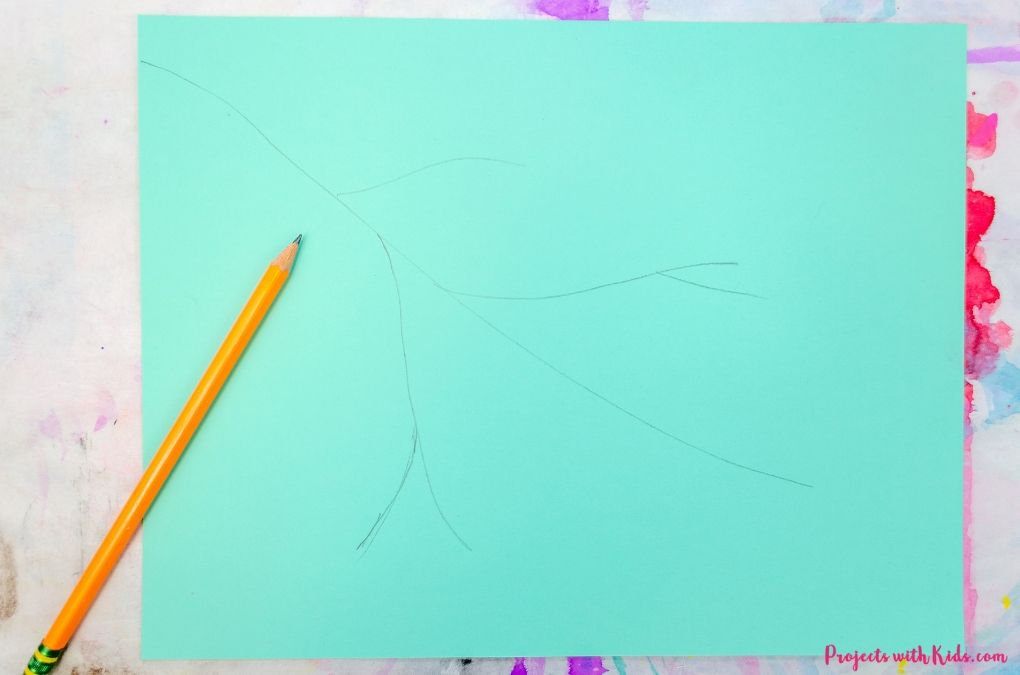
You want to keep the branch drawing simple so there is plenty of room for all of the gorgeous cherry blossoms.
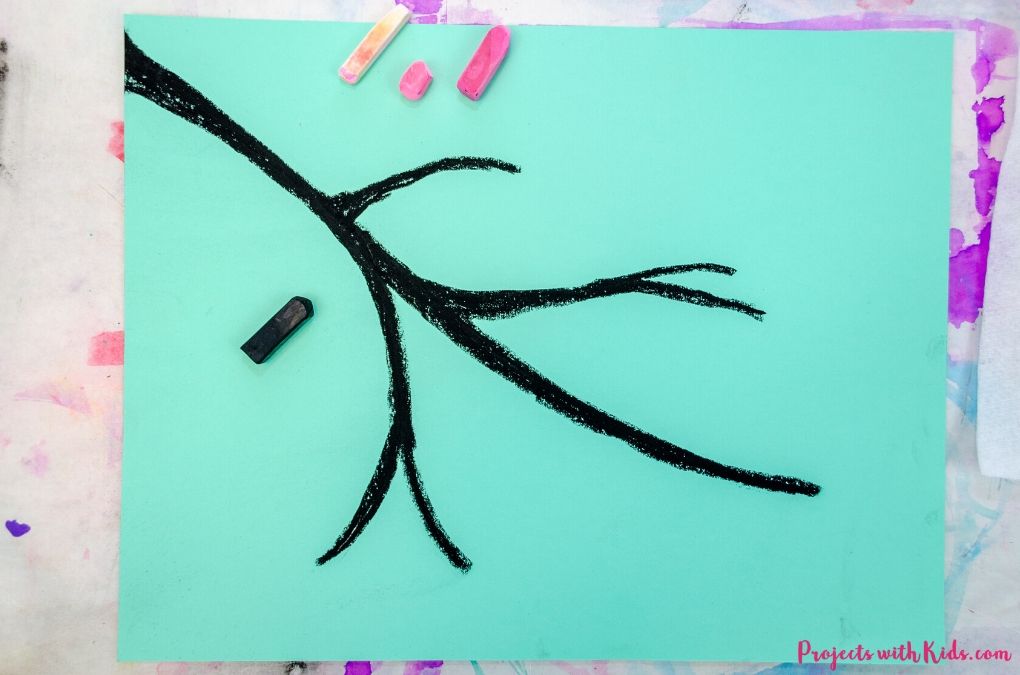
2. Use black chalk pastel to draw over your pencil drawing. Black chalk pastel can get really smudgy, so just remind kids to go slow and be careful not to smudge.
Try making the main branch a bit thicker than the smaller branches. Again, go slowly and carefully with this step. There is no need to blend the branch after you have finished drawing it, just leave it as is.
3. You will need three colors for the cherry blossoms, a bright pink, a darker pink, and white. Start with the bright pink and draw mini “fan” shapes for the blossoms like in the photo example below.
Continue drawing these “fan” shapes with bright pink pastel at the ends of all of your branches in little clusters.
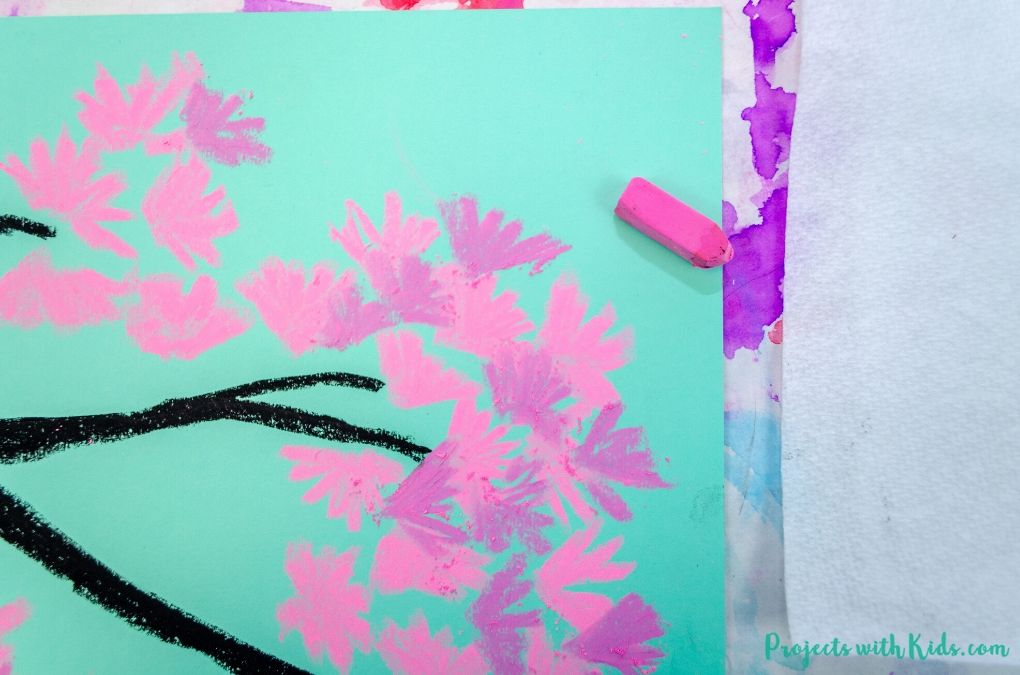
4. Once you are done with the bright pink color, add in some darker pink blossoms in the same “fan” shape. You can overlap this color onto the other blossoms to create some depth.
This might be a good point to take your paper outside to blow off any excess dust.
If you are looking for more spring projects, take a look at this colorful collection of spring art for kids!
For a more detailed look at using chalk pastels take a look at these 5 essential chalk pastel techniques for beginners.
5. Use both the bright pink and dark pink pastels to add small dots of cherry blossom petals around the clusters of flowers. Make sure to add these dots all around the blossoms.
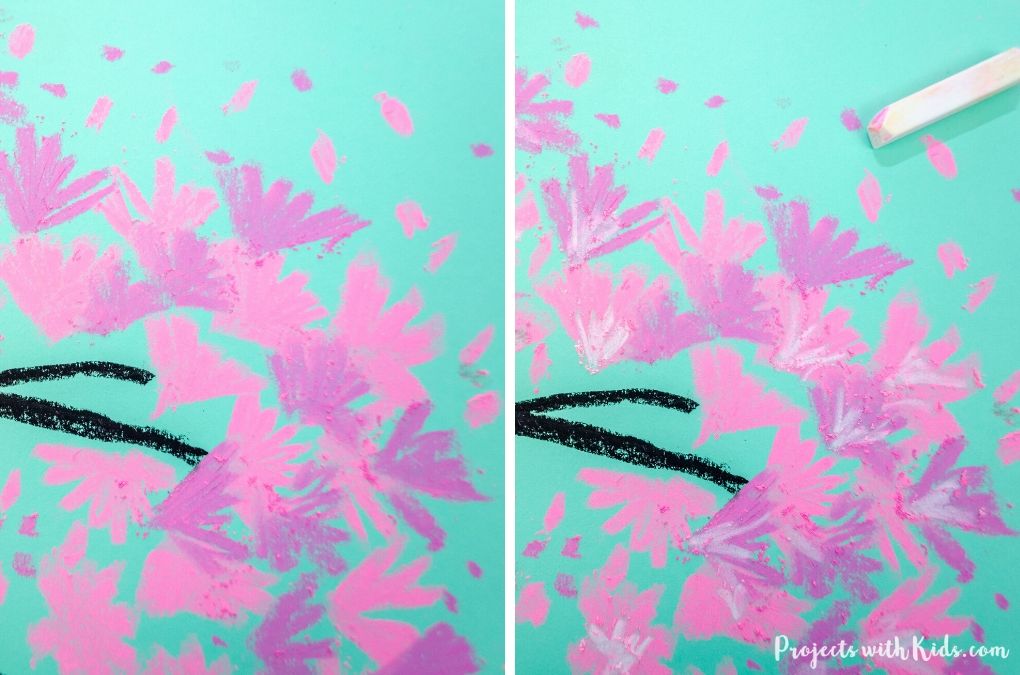
6. Finally, take your white pastel and draw in some highlights on some of the blossoms. Adding in the white adds another layer and really makes the whole artwork pop!
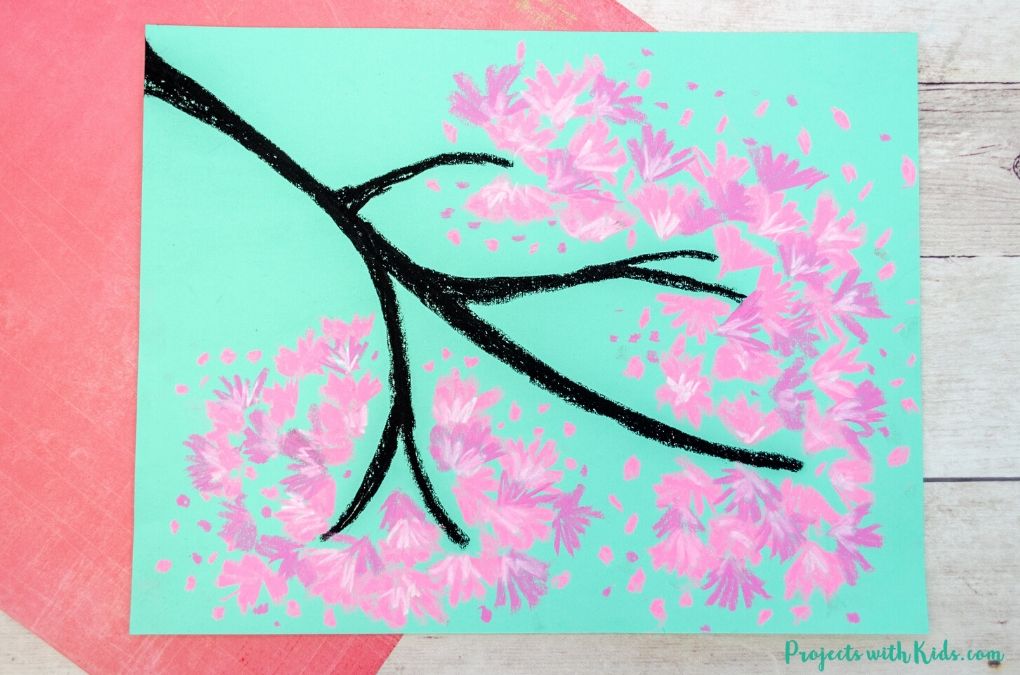
This is such a great spring art project that is easy and fun for kids to make. Kids will love using chalk pastels to make this beautiful cherry blossom project!
We love creating and exploring with different art supplies and techniques. If you are looking for more art projects to try, take a look at our ultimate collection of amazing art projects for kids!
More spring art projects kids will love
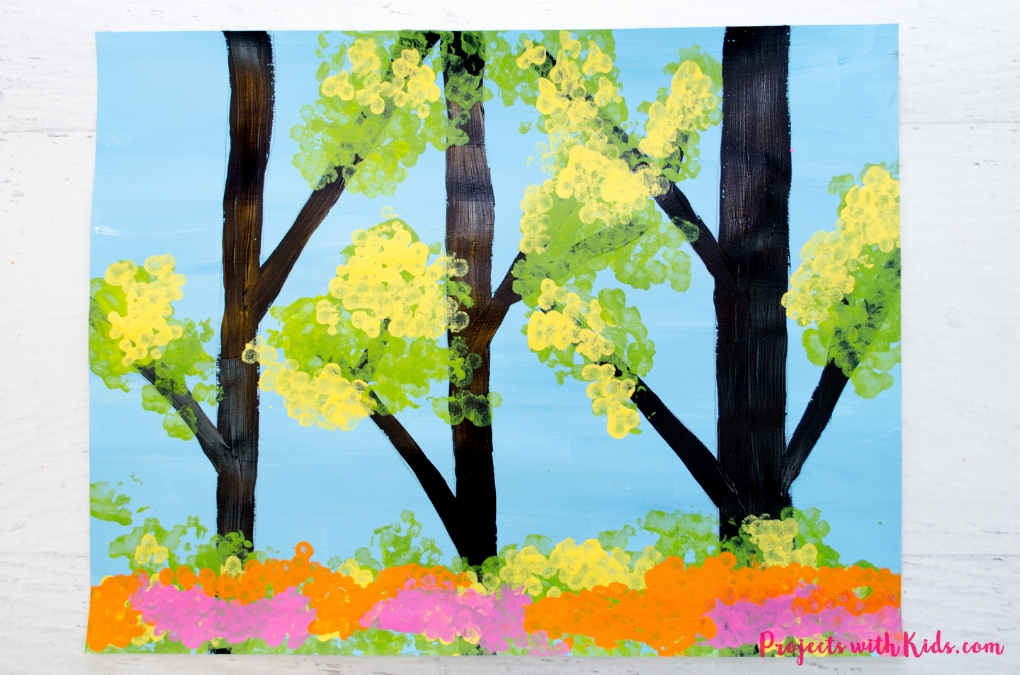
Easy Spring Trees Painting with Bundled Q-tips
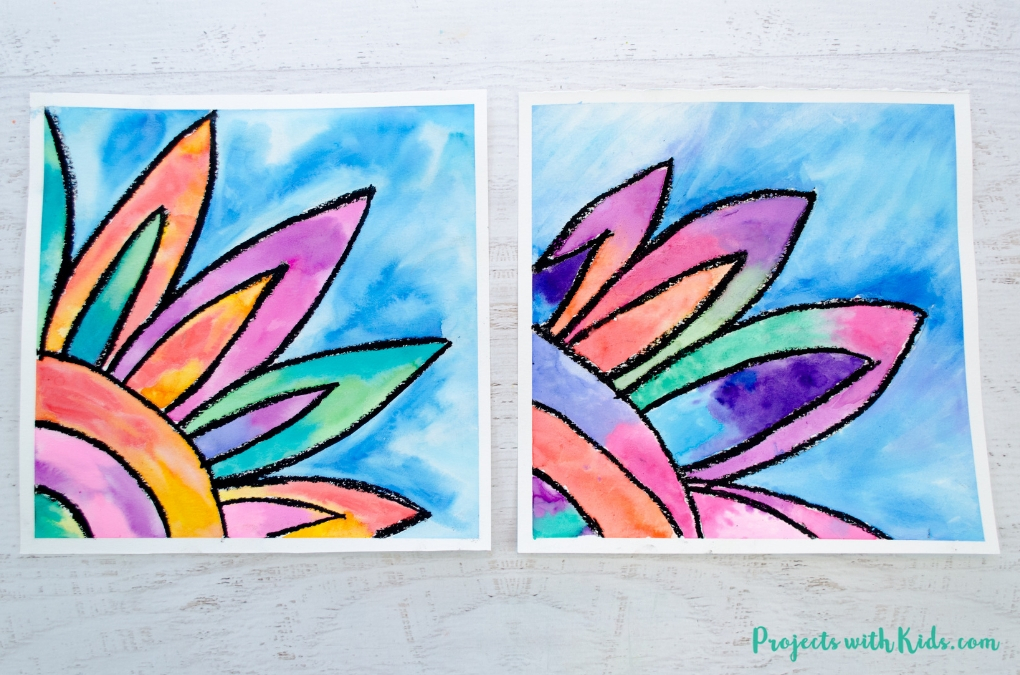
How to Make a Beautiful Watercolor Flower Painting
Follow me on Pinterest for more amazing project ideas.
Pin this art project for later
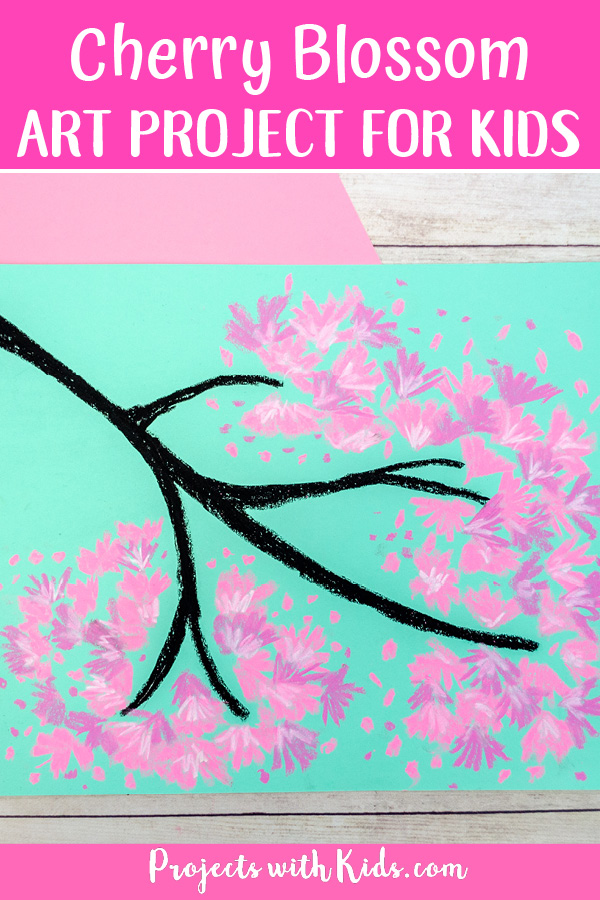
Chalk Pastel Cherry Blossom Art Project for Kids
Kids will love making this gorgeous chalk pastel cherry blossom art with only a few simple supplies. A fun art project to welcome spring!
Materials
- Blue cardstock or pastel paper
- Chalk pastels
- Paper towels
Tools
- Pencil
Instructions
- Start by drawing a tree branch with a pencil on blue cardstock or blue pastel paper.
- Trace over your pencil drawing with black chalk pastel. Make the main branch a bit thicker than the smaller branches.
- Get your cherry blossom pastel colors ready. You will need bright pink, darker pink, and white.
- Start with your bright pink pastel and draw small "fan" shapes in clusters at the ends of the branches to make your cherry blossoms. Continue drawing cherry blossoms at the ends of all of the branches.
- Next, add in the darker pink color. You can overlap the darker pink to add in another layer to the cherry blossoms.
- Use both the bright pink and dark pink pastels to draw in small dots around the cherry blossoms to make the cherry blossom petals.
- Finally, use white chalk pastel to draw in highlights on the cherry blossoms to make the whole artwork really pop.


