
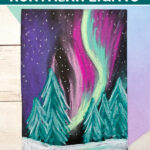
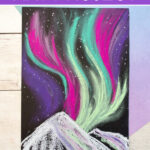
This Northern Lights chalk pastel art project is gorgeous! The bright colors of the Northern Lights streaking across the sky on the black paper make it look like it’s glowing. The snowy additions of the mountains or trees contrast against the bright colors for a beautiful winter effect.
This is a great pastel project for kids to practice drawing and blending with chalk pastels. Pastels are so fun for kids to explore! Take a look at my collection of chalk pastel art for more creative ideas kids will love.

The Northern Lights are so magical and always make a fun painting subject for kids to try. Take a look at our northern lights watercolor painting for another great idea.
If you are looking for more winter project ideas take a look at my collection of beautiful winter art for kids to make!
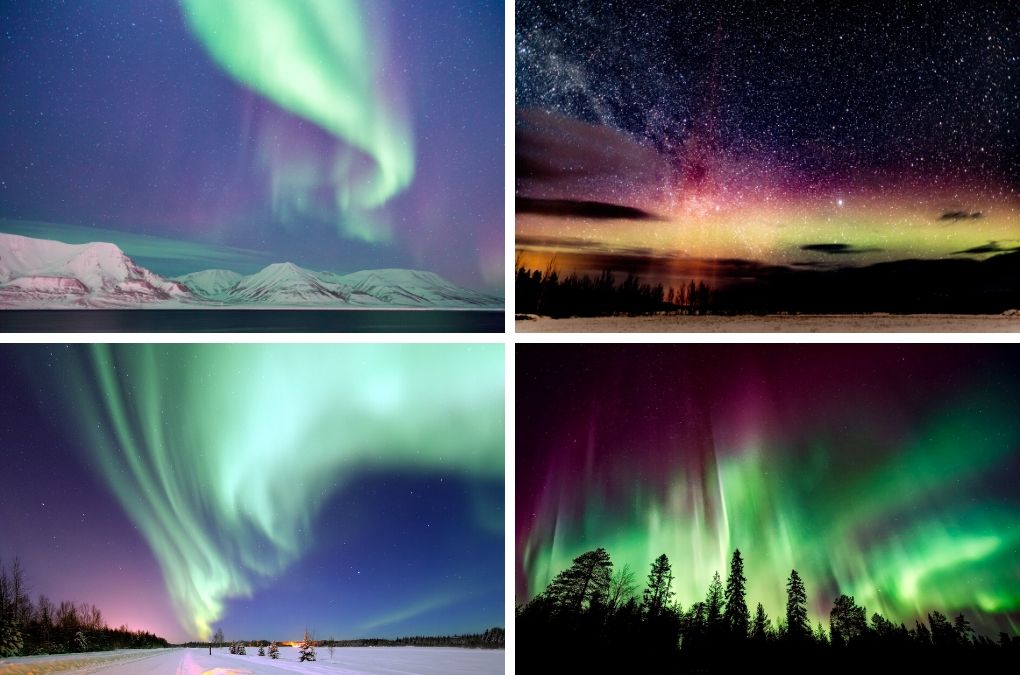
Before starting your art project, have kids take a look at some of the beautiful Northern Lights photos to see the different patterns and colors that they create.
Learn about the northern lights
This is a great project for kids to make while they are learning about the Northern Lights!
There are a lot of great resources for kids to learn about the science behind the magic and beauty of the aurora borealis, which is another name for the northern lights.
This article is geared towards kids and explains what the northern lights are and includes some interesting facts about them. Here is a good youtube video that explains what causes the Northern Lights.
Tips for working with chalk pastels
Chalk pastels can be messy (but so fun!). There are a few things you can do to help keep some of the mess contained:
- Put newspaper down on desks or tables
- Put your project on a tray or a shallow cardboard box which will keep most of the mess inside the tray
- You can try doing your project outside
- Have lots of paper towels handy
- Once you are done with your project (or even halfway through if it gets really dusty), take it outside to gently blow or shake off the excess dust
- If you are using chalk pastels in the classroom and the kids are ready to take their artwork home, simply place the art between some newspaper to keep it from smudging and for easy transport.
Create your own northern lights chalk pastel art
This post contains affiliate links. As an Amazon Associate I earn from qualifying purchases. If you would like more information please review my privacy & disclosure policy.
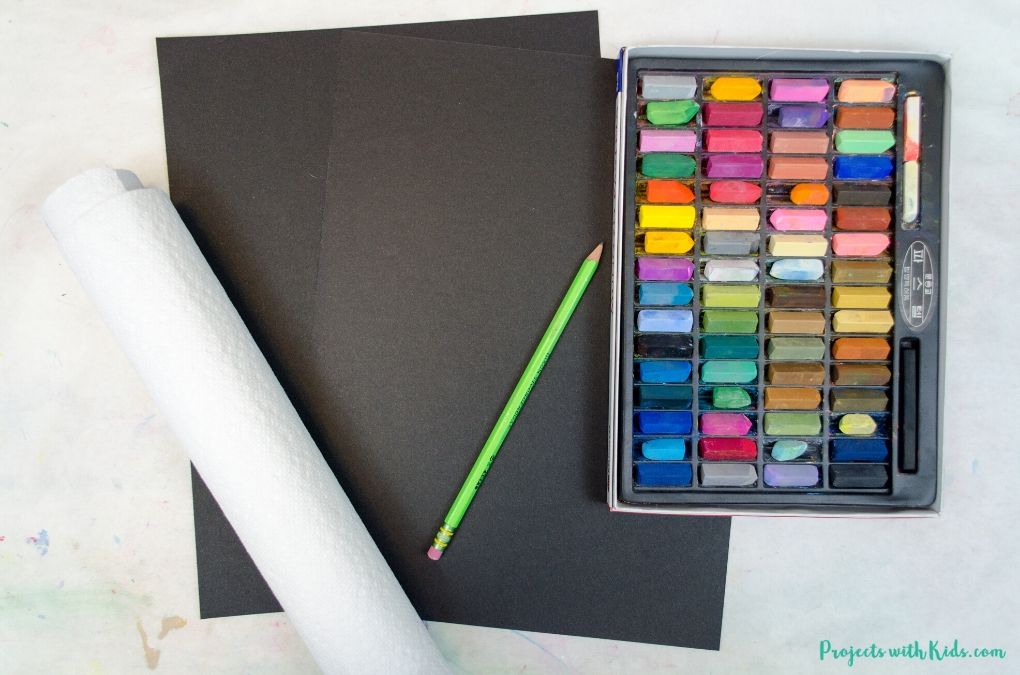
Supplies
- Chalk pastels
- Black drawing paper, pastel paper, scrapbook paper or construction paper
- Paper towels
- Pencil
- Workable fixative (optional)
Instructions for your chalk pastel art
1. Start by getting your paper ready. I cut our paper in half so each 9 x 12-inch piece of paper made two 9 x 6-inch paintings.
We used black drawing paper for this project but you can also use pastel paper, scrapbook paper or even try black construction paper. Each type of paper will look slightly different with the chalk pastels, but will still look great.
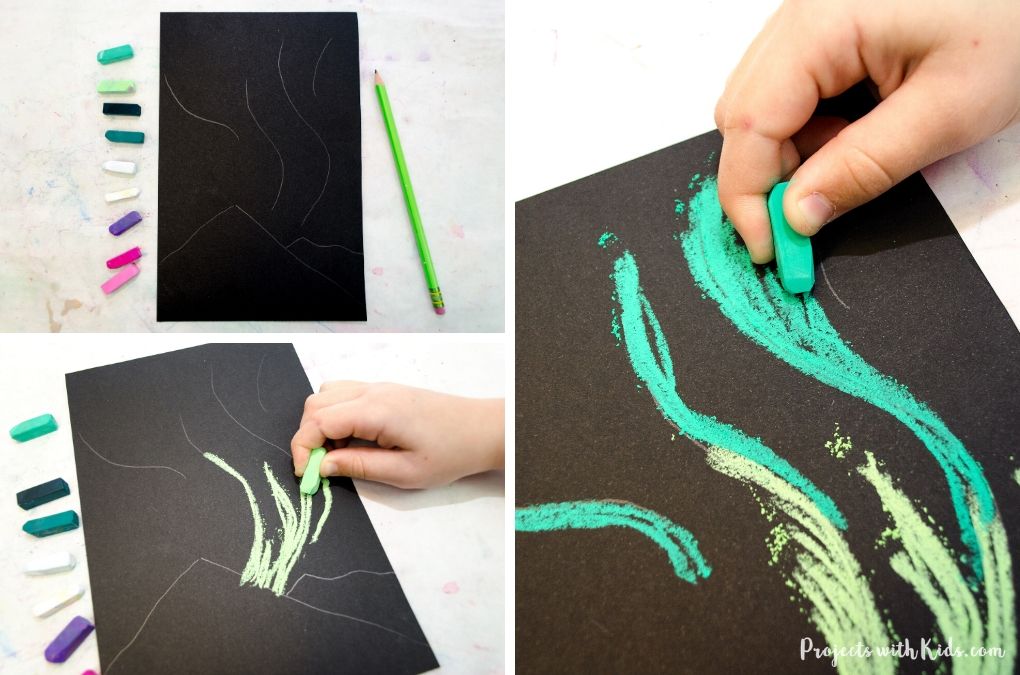
2. Draw out your picture with a pencil first, adding in some northern lights guidelines so you can see where to draw with your pastels. We did two different northern lights landscapes, one with snowy mountains and the other with a snowy field and trees.
Kids can take a look at some Northern Lights photos beforehand to get inspiration for the colors and patterns of the Northern Lights for their own artwork.
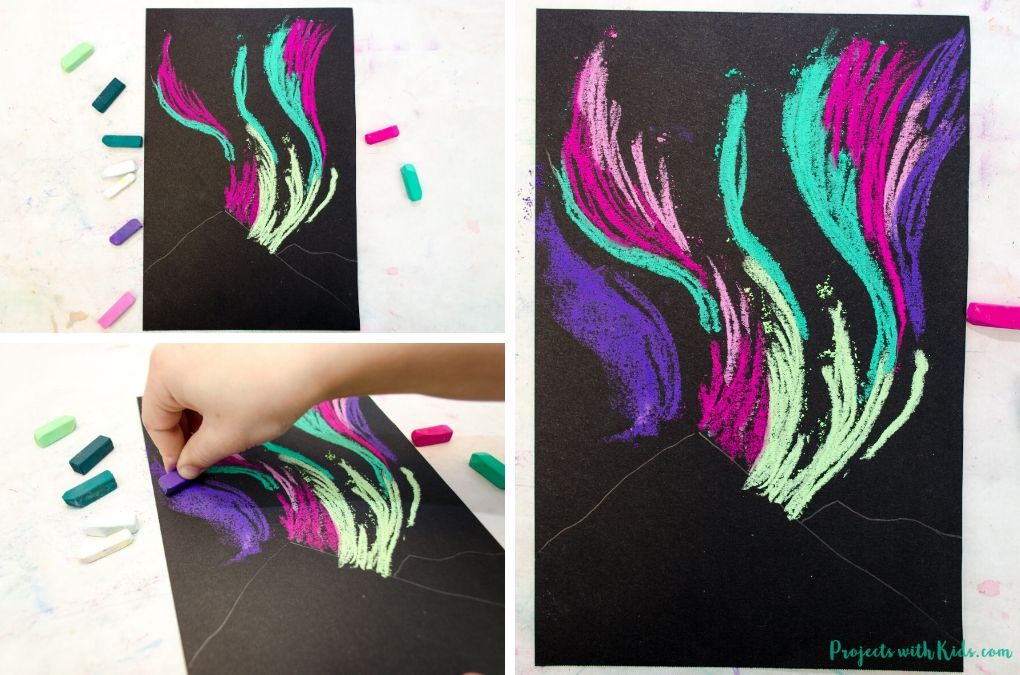
3. Have kids choose their northern lights pastel colors, three to five colors is a good amount. We choose bright and light green, bright and light pink and purple. Again, kids can look at photos to get some color combination ideas.
Start with one color and draw in your northern light streaks. Add in your second color and continue drawing the rest of your colors on your paper.
Make sure to leave lots of black paper showing through, you don’t want to completely cover your paper with pastels.
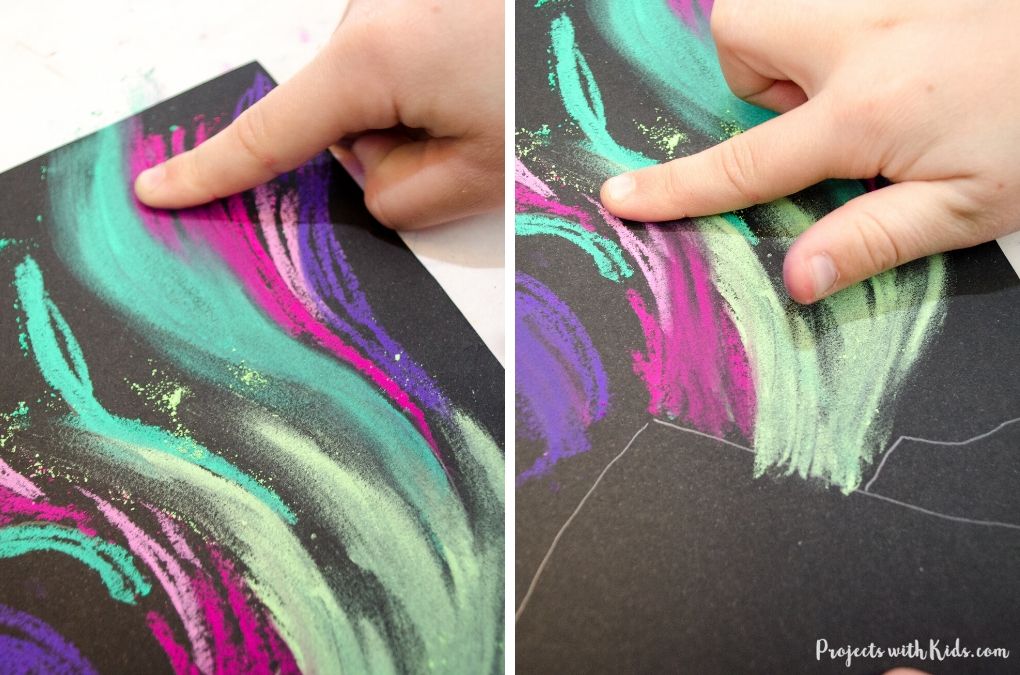
4. Once you are done your drawing, it’s time to blend. Blending pastels is always fun for kids! For more details on blending and other pastel techniques check out these 5 essential chalk pastel techniques for beginners.
Use one or two fingers to lightly blend your pastels in an upward direction to show the streaks of light across the sky. Kids can choose to blend some areas more than others, and even leave some areas unblended.
As kids are blending, have paper towels handy for them to wipe their fingers in between colors.
5. After you are done blending, you might notice that some of your colors aren’t as bright anymore. You can draw overtop of your blended areas with more pastels, this will add to the brightness and give your painting some texture.
You might need to blow the excess dust off of your painting at this point, doing this outside is a good idea.
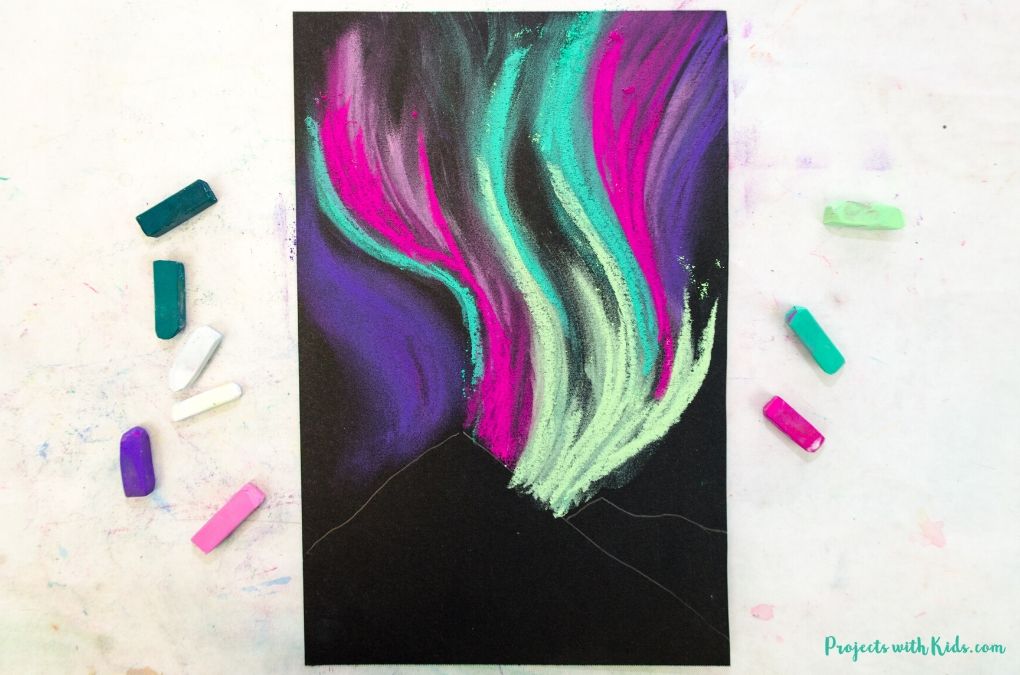
6. Once you are happy with how your northern lights look, take a white chalk pastel and add dots over your night sky for the stars.
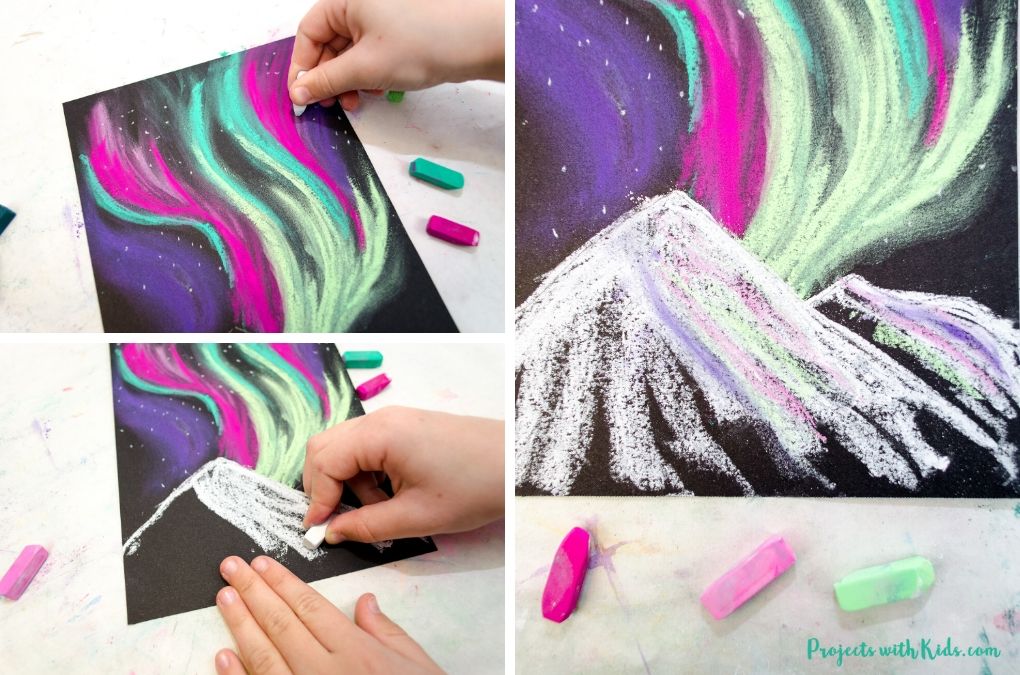
7. Finally, use the flat edge of a white chalk pastel to draw in the mountains. You don’t need to cover all of the mountains with the white, it looks nice to have some black showing through.
Draw in some northern lights reflections on the snowy mountains with two to three pale pastel colors in a couple of areas like in the photo above.
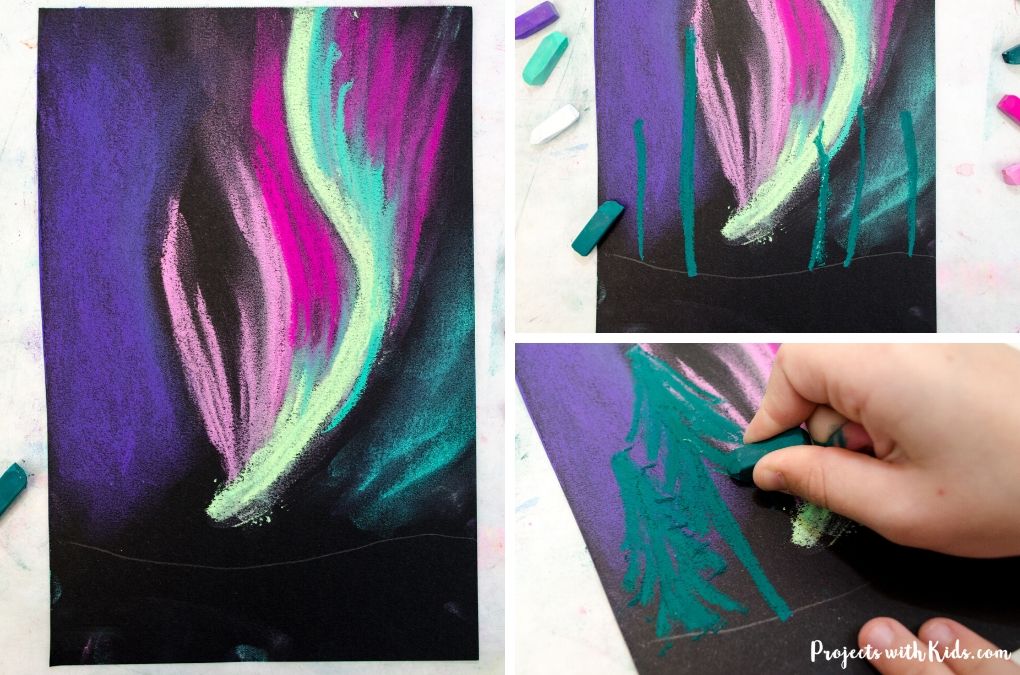
8. If you are doing the snowy tree landscape. After you have finished drawing in your northern lights, take a dark green pastel and draw straight lines to indicate where you want your trees to go.
9. Use the dark green pastel to draw in the trees. Then draw in the snow on the trees with white chalk pastel layered on top. You do not need to blend the white pastel on top of the trees.
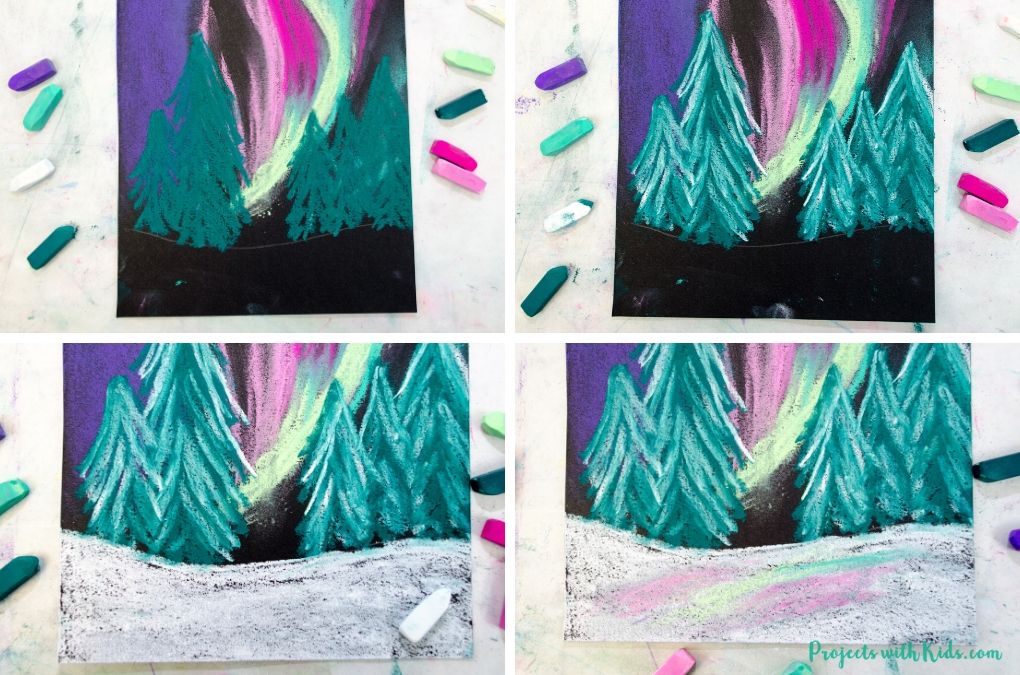
10. Use white pastel to color in the snow at the bottom of your painting. Draw in some northern light reflections on the snow with two to three pale pastel colors.
11. Add stars to your sky with dots of white pastel.
You can choose to spray your artwork with a workable fixative to help prevent smudging. This step should be done by an adult in an outdoor area.
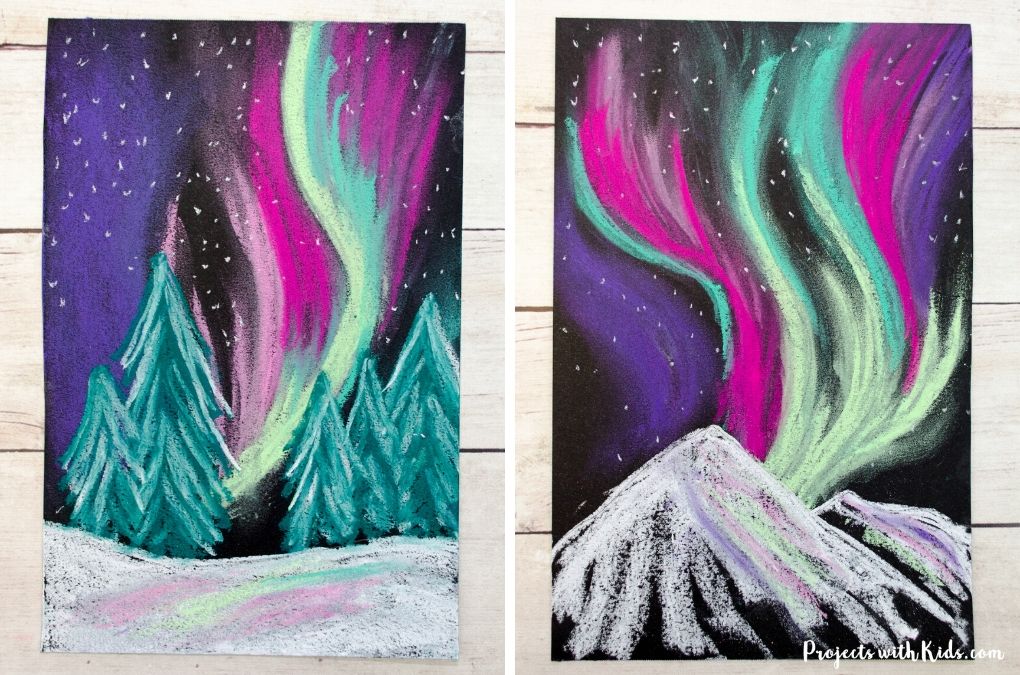
I love how colorful and bright this Northern Lights chalk pastel art turned out! The streaks of light look beautiful against the snowy landscape and black starry sky.
This is a great art project for kids to learn all about the northern lights and also to explore drawing and blending with chalk pastels.
For another beautiful chalk pastel winter art project, take a look at this magical winter cabin art!
We love creating and exploring with different art supplies and techniques. If you are looking for more art projects to try, take a look at our ultimate collection of amazing art projects for kids!
More winter art projects kids will love
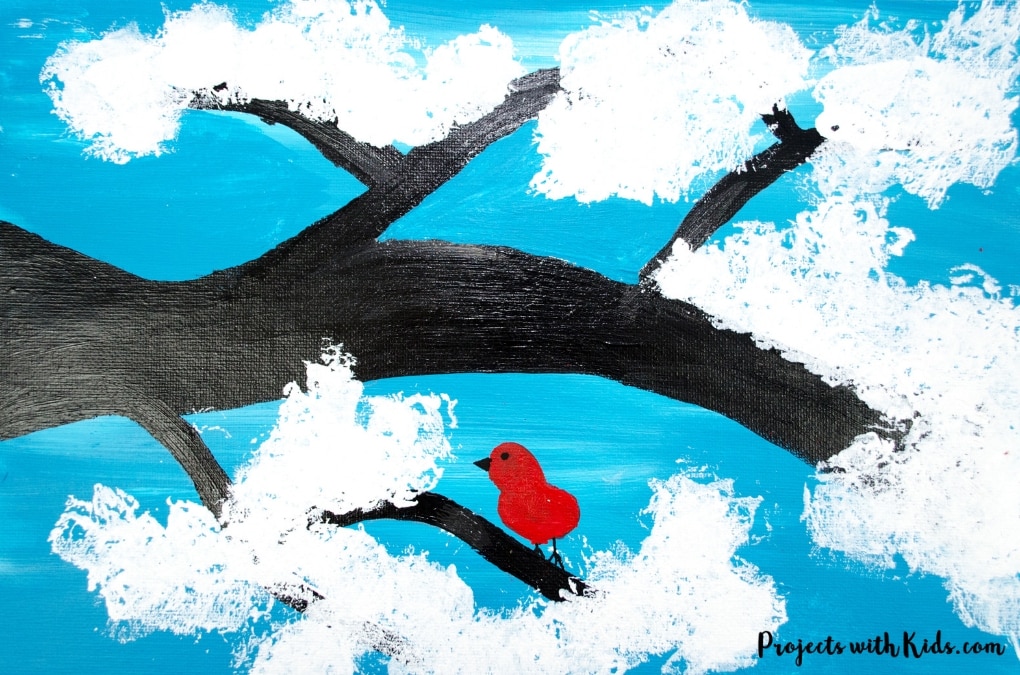
Winter Tree Painting with Cotton Balls
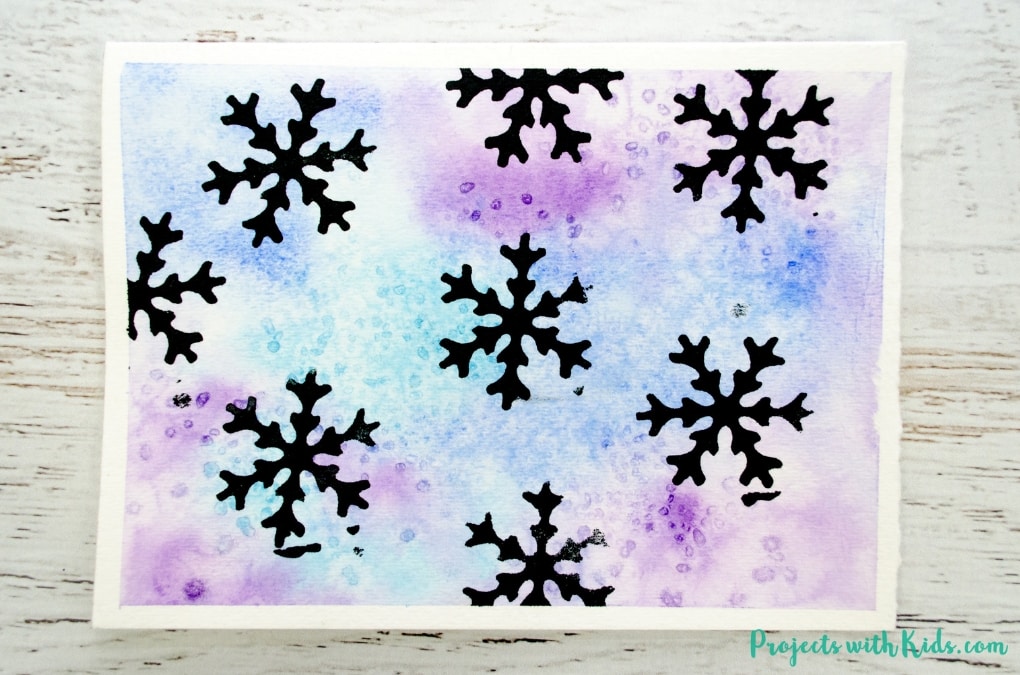
Snowflake Watercolor Winter Art
Follow me on Pinterest for more amazing project ideas.
Pin this chalk pastel art for later
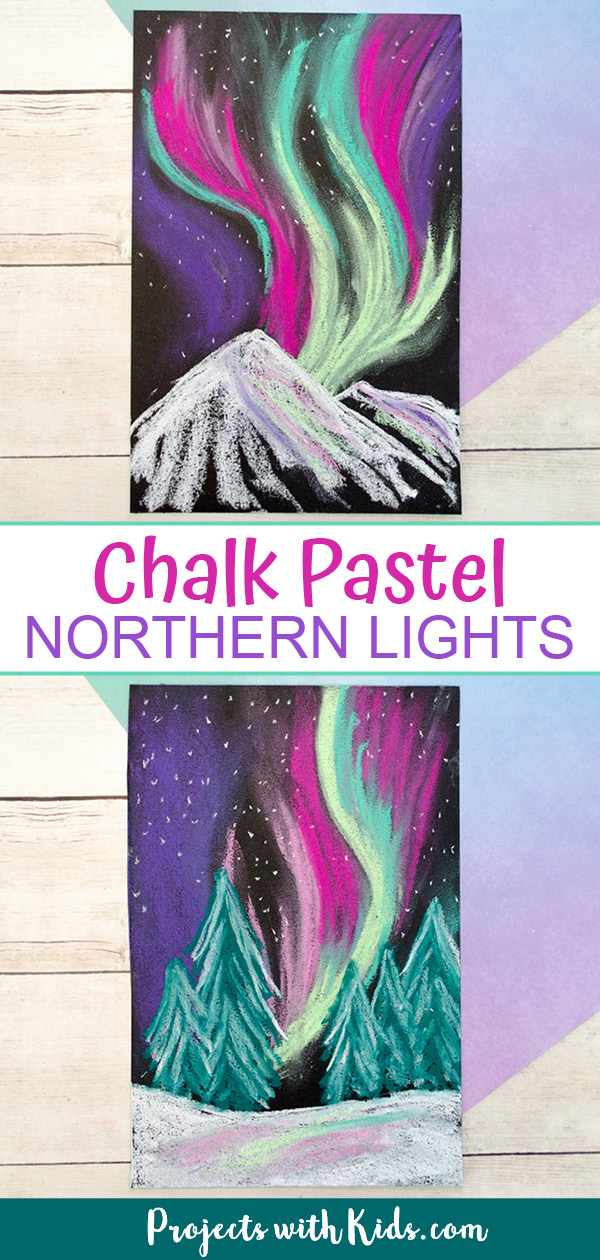
Create Stunning Northern Lights Chalk Pastel Art

Learn about layering and blending pastels with this gorgeous northern lights chalk pastel art! A beautiful winter art project kids will love creating.
Materials
- Chalk pastels
- Black drawing paper
- Paper towels
Tools
- Pencil
Instructions
- Decide on a northern lights painting idea and draw out your design on black paper with a pencil. We used black drawing paper for this project.
You don't need to draw in all of the northern lights, just a few areas to show where the beautiful colors will go. You also want to draw in your mountains or your snowy field. - Choose three to five bright colors for your northern lights. Using one color at a time, draw your northern lights onto your paper.
Remind kids to leave lots of black sky and not to cover the whole area with pastels. - Once you are happy with your drawing, blend your pastels in an upward direction to show the streaks of light in the sky. Do this step slowly and carefully.
Kids can draw in more pastels on top to brighten up their colors after blending. Try blending some of these areas again and leaving some areas unblended. - If you are doing the mountain landscape, use the flat edge of a white pastel and color in the mountains. Leave some areas of black showing through.
- Add some northern light reflections with two to three pale pastel colors on the snowy mountains. You only need to add these reflections in a couple of small areas.
- If you are doing the snowy tree landscape, use a dark green pastel to draw straight lines where the trees will go.
Use the dark green pastel to draw the evergreen trees. - Use white pastel to add snow to the trees.
- Color in the snowy field with white pastel and just like with the mountains, add a few light reflections with two to three pale pastel colors.
- Finally, use white pastel to dot stars in the sky.


