

This jellyfish bubble painting is the perfect art activity for summer! It’s easy enough for kids in preschool and early elementary school to make using simple techniques. Kids will learn how to do bubble painting to create the jellyfish body and use a small detail brush to paint in the tentacles.
Watching the colorful bubbles form and pop adds an extra layer of fun and creativity, and the finished jellyfish look bright, playful, and ready to float off the page!
We love exploring different painting techniques. Take a look at my collection of painting ideas for kids for more fun and creative art projects to try!

This jellyfish painting would be a great addition to any ocean unit. Kids can choose different colors to paint their jellyfish and try fun color combinations making each painting unique!
For another fun summer painting idea take a look at this straw flower painting and try a unique painting technique with straws!
Create your own jellyfish bubble painting
This post contains affiliate links. As an Amazon Associate, I earn from qualifying purchases. If you would like more information please review my privacy & disclosure policy.

Supplies
- Dish soap
- Acrylic paint (use dark colors for best results)
- Straws (you can use paper straws for sustainability)
- Bowl or cup
- White cardstock
- Fine-tip paintbrush
Instructions for your jellyfish art project
1. Have kids choose the colors they want to use and mix the bubble paint up in cups or small bowls. Combine 1 tablespoon of water, 1 tablespoon of dish soap, and 1 tablespoon of paint. Stir gently to avoid too many bubbles too early.
Mix all the colors up first before starting to paint, try starting with 2-3 colors for best results.

2. Next, make the bubble paint. Place the straw into the mixture and gently blow air through it to create bubbles. Make sure kids blow and not suck through the straw. Some kids might need assistance with this step.
You want the bubble paint to come just slightly over the top of the cup to create a dome of bubble paint.

3. Now it’s time to make your bubble prints. Once you have a dome of bubbles rising from the cup, carefully press a piece of white cardstock onto the bubbles. Gently lift it off to reveal your print.
These will be the main bodies of the jellyfish (in jellyfish anatomy it’s called the bell), so decide on how many jellyfish you want on your page and make sure you are leaving room for the tentacles.

Continue bubble printing your jellyfish on your paper. Try combining two or three colors to create a jellyfish or see if you can make a bigger jellyfish by bubble painting in the same area more than once.
Let your paper dry completely before moving on to the next step.

4. Add the tentacles next. Dip a fine-tip brush into the same bubble mixture and paint long, flowing tentacles coming down from the bubble shapes. Try varying the length and width of the tentacles a bit to add interest.

If you are using more than one color for your jellyfish, make sure to paint the tentacles with the different colors as well.
Once you are done painting the tentacles, let your artwork dry completely on a flat surface.

This is a fun and easy summer art activity that kids will love to make. Trying a unique process painting technique makes this jellyfish bubble painting idea a must try! It’s a great way to explore creativity, practice fine motor skills, and enjoy a bit of messy, hands-on fun.
Whether you’re planning an ocean unit, a summer camp activity, or just a creative afternoon at home, this project is sure to be a hit.
More easy summer painting ideas kids will love
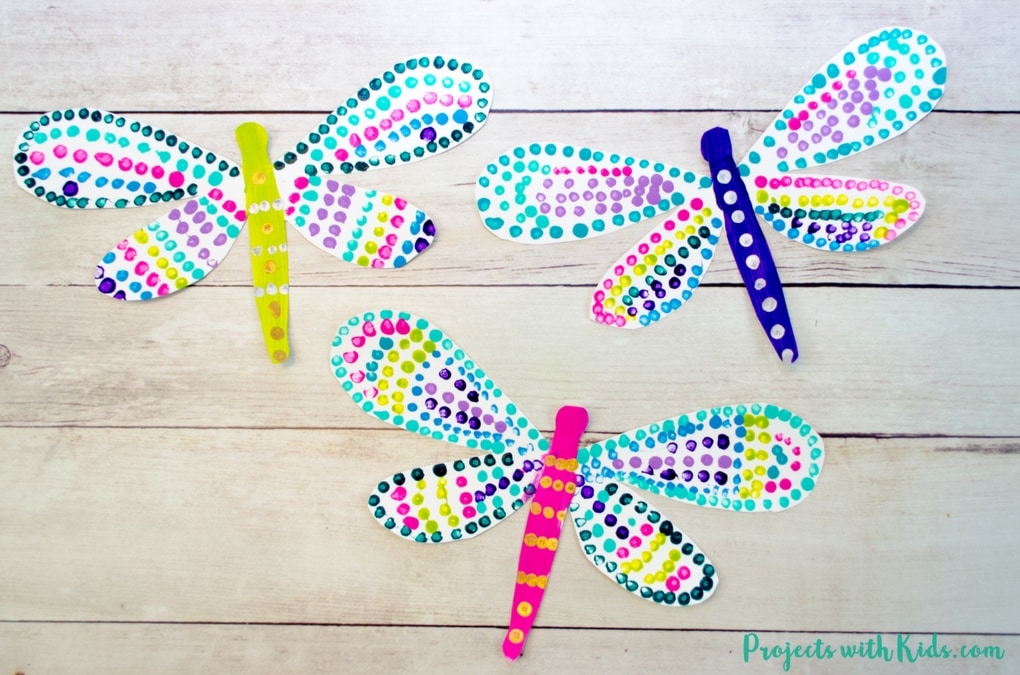
Colorful Q-tip Painted Dragonfly Craft
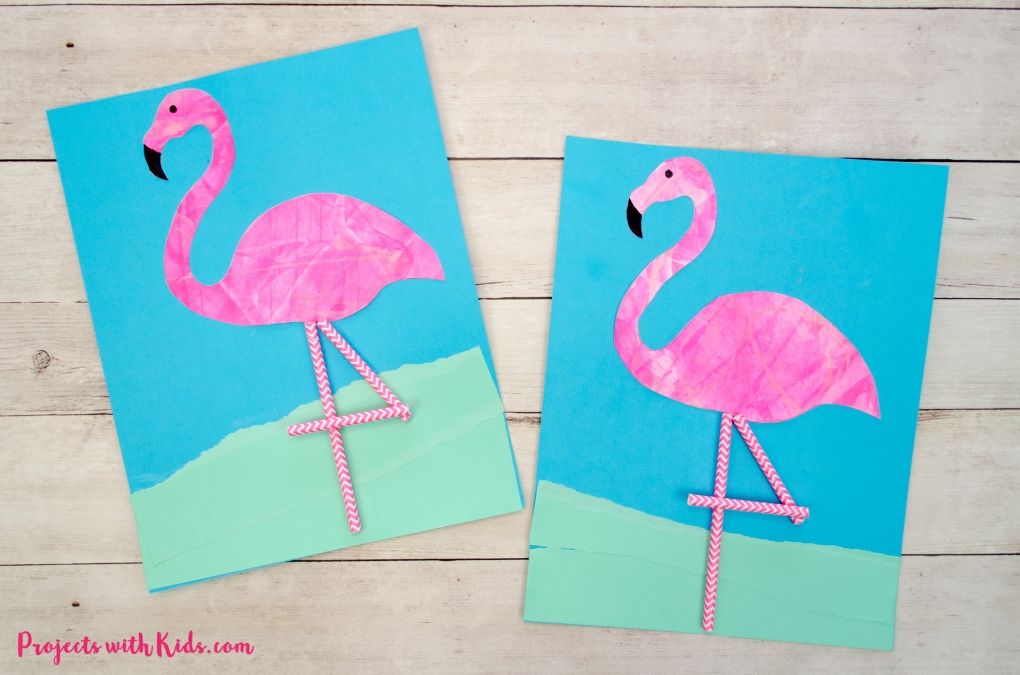
Colorful Flamingo Scrape Painting
Follow me on Pinterest for more creative project ideas!
Pin this jellyfish painting idea for later

Easy Jellyfish Bubble Painting

Make this fun and easy jellyfish bubble painting artwork with just a few simple supplies and easy bubble painting technique! A great summer art activity for younger kids.
Materials
- Dish soap
- Acrylic paint (use dark colors for best results)
- Straws (you can use paper straws for sustainability)
- Bowl or cup
- White cardstock
- Fine-tip paintbrush
Instructions
1. Mix your bubble paint.
Choose 2–3 colors to start. In a small cup or bowl, mix 1 tablespoon of water, 1 tablespoon of dish soap, and 1 tablespoon of paint for each color. Stir gently so you don’t make too many bubbles yet. Prepare all your colors before you begin painting.
2. Make the bubbles.
Put a straw into the paint mixture and gently blow to create bubbles (remind kids to blow out, not suck!). Keep blowing until the bubbles form a dome that rises just above the top of the cup.
3. Make your jellyfish prints.
Gently press a piece of white cardstock on top of the bubble dome, then lift it off to see your bubble print! These will be the jellyfish bodies (called the "bell"). Add as many jellyfish as you like, leaving space for tentacles. Let your paper dry.
4. Paint the tentacles.
Use a small brush and the same bubble paint to add long, flowing tentacles under each jellyfish. Once you're done, let your artwork dry flat.


