

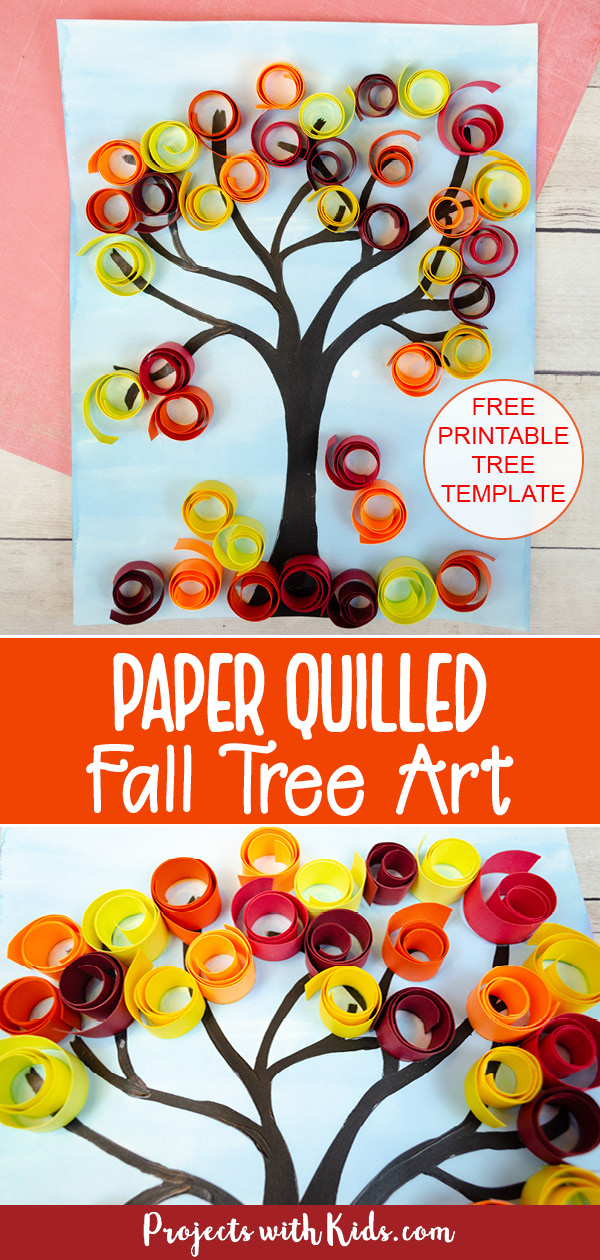
This fall tree art project is a great mixed media craft that uses paper quilling, watercolor, and acrylic paint. Use gorgeous fall colors and easy paper quilling to create the leaves and give it a 3D look.
Paper quilling is great for developing fine motor skills and kids of all ages will enjoy making this colorful autumn art.
If you are looking for more fall art projects take a look at my collection of creative fall painting ideas for kids! There are ideas for kids of all ages that use different types of art materials and techniques.

For this project, I created a free printable template to make this art project even easier for you. This template is available to my email subscribers. Fill out the form below to get the free template.
After signing up you will receive a welcome email with your download link.
For more awesome fall art ideas take a look at this watercolor resist fall leaf painting and this fall tree painting with bundled q-tips!
Create your own fall tree art project
This post contains affiliate links. As an Amazon Associate, I earn from qualifying purchases. If you would like more information please review my privacy & disclosure policy.
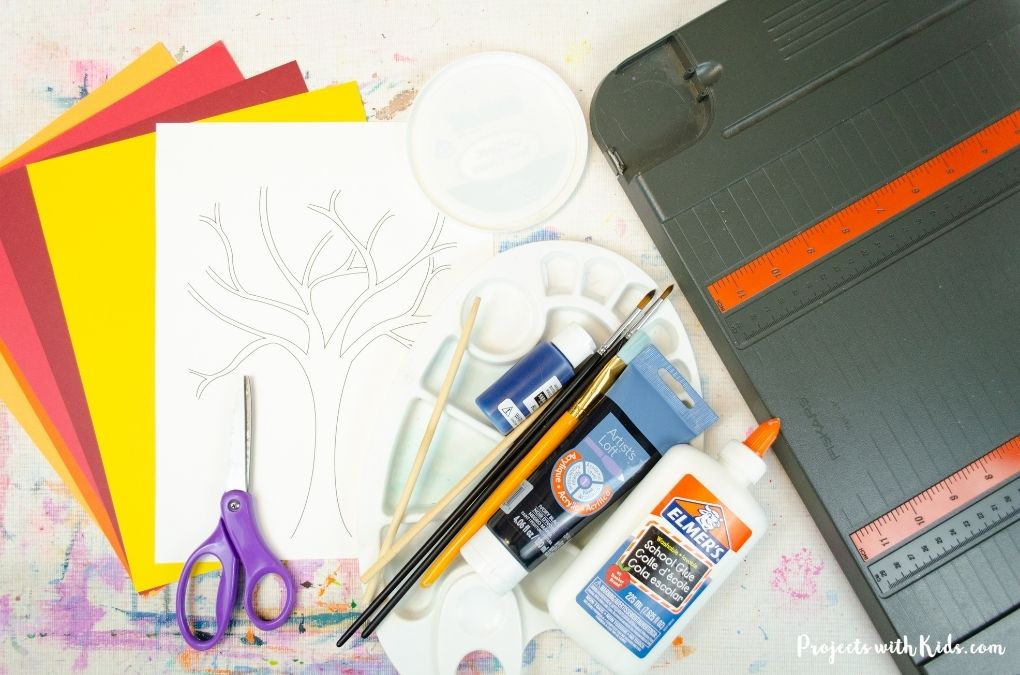
Supplies
- Cardstock or construction paper in red, orange, yellow,
- White cardstock
- Black acrylic paint
- Blue watercolor paint
- Paper cutter or scissors and ruler
- Paintbrushes
- Paint palette and water dish
- White glue
- Scissors
- Chopsticks for quilling
Instructions for your autumn art project
1. Print out the tree template onto white cardstock. Paint your paper with blue watercolor paint. You can use liquid watercolors or a watercolor set. Make sure to test your color on scrap paper first.
Kids can paint right over the tree, the watercolor paint will not cover it up. Let it dry completely.
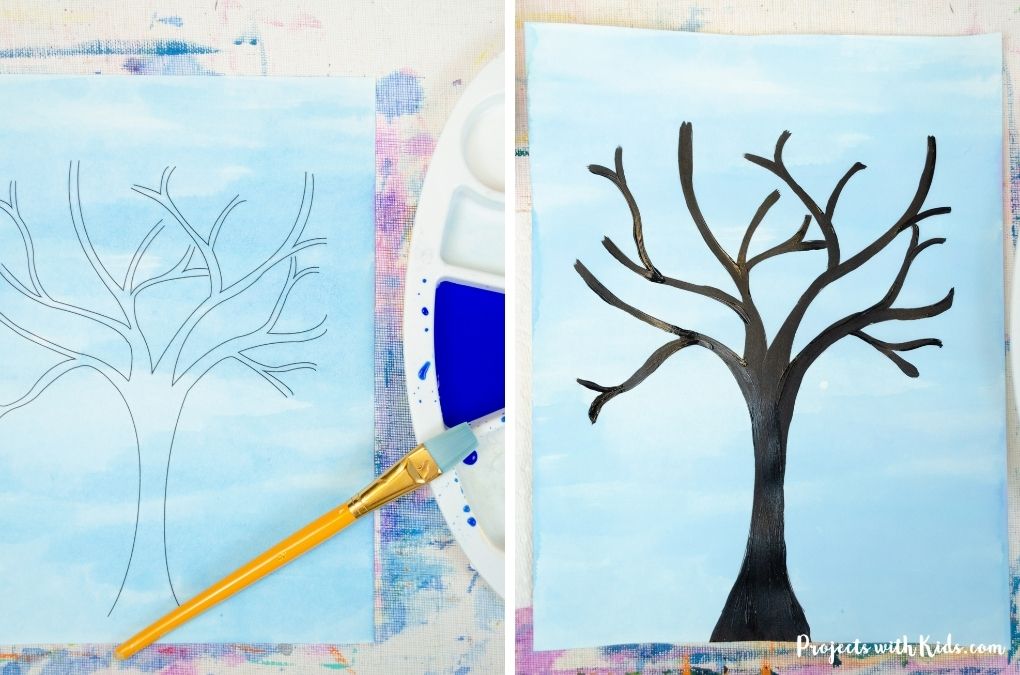
2. Paint the tree with black acrylic paint and let it dry. Using a smaller round brush will help kids paint in the branches more easily.
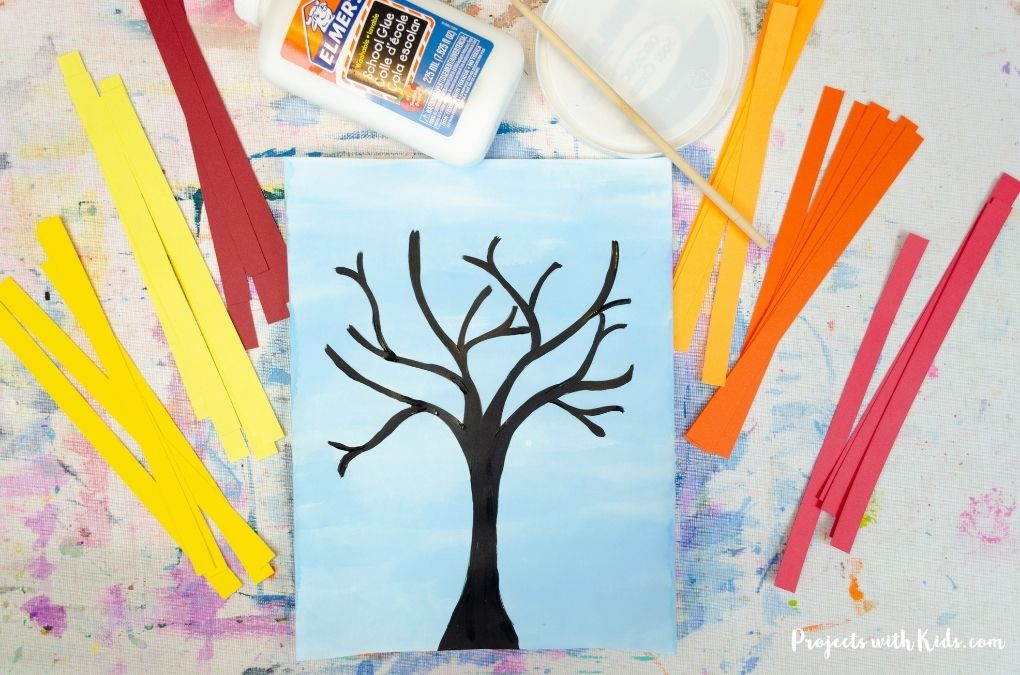
3. Get the paper strips ready in fall colors. I used six different shades of red, yellow, and orange but you really only need three to four colors.
If you are able to cut the paper strips with a paper cutter it goes much faster. You want to cut them about half an inch thick.
4. Pour some white glue into a plastic container and get your chopstick ready.
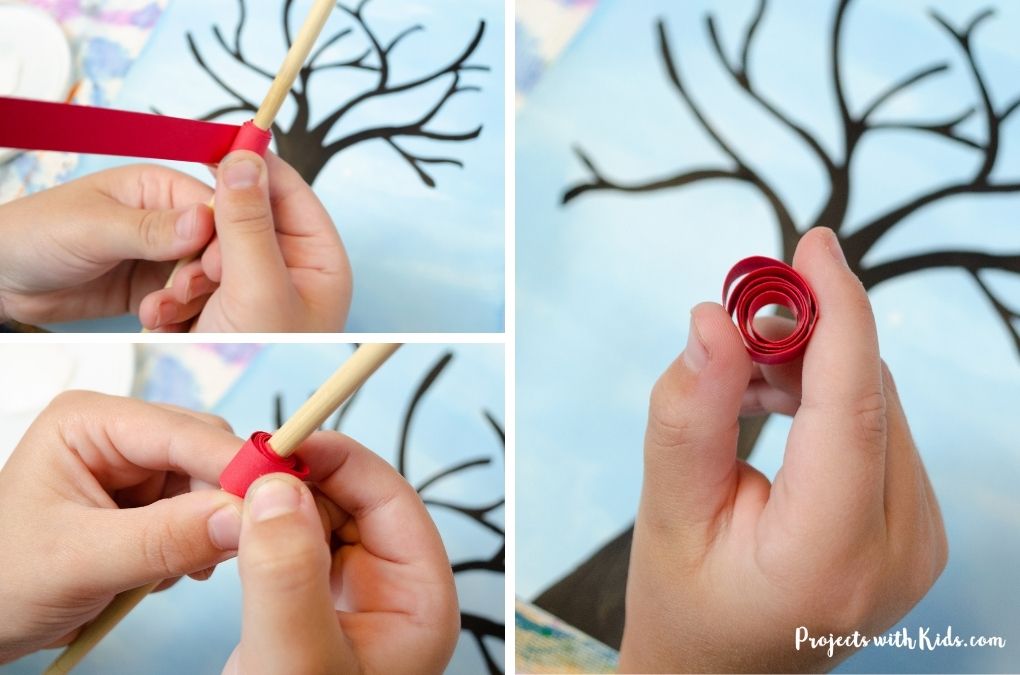
Take a paper strip and wrap it around the chopstick tightly. Carefully slide the paper quill off, dip it into the glue, and place it on the paper.
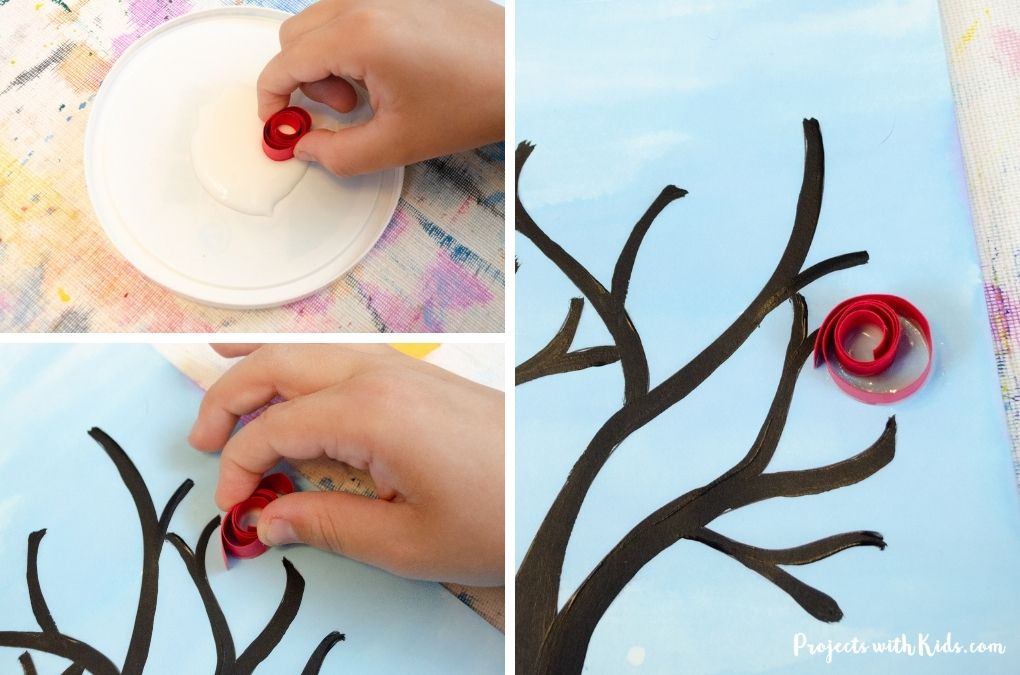
Some of it will unroll and that’s ok. It will depend on how tightly the kids have rolled it and how much glue they used. Having some of the paper quills unroll just adds to the design of the tree making each tree unique!
5. Continue to make paper quills and glue them onto the tree. Some kids might find it easier to make a bunch at a time and then glue them on rather than making and gluing one at a time.

Make sure to glue some paper quills falling off the tree and at the bottom of the paper so that it looks like the leaves are falling to the ground.
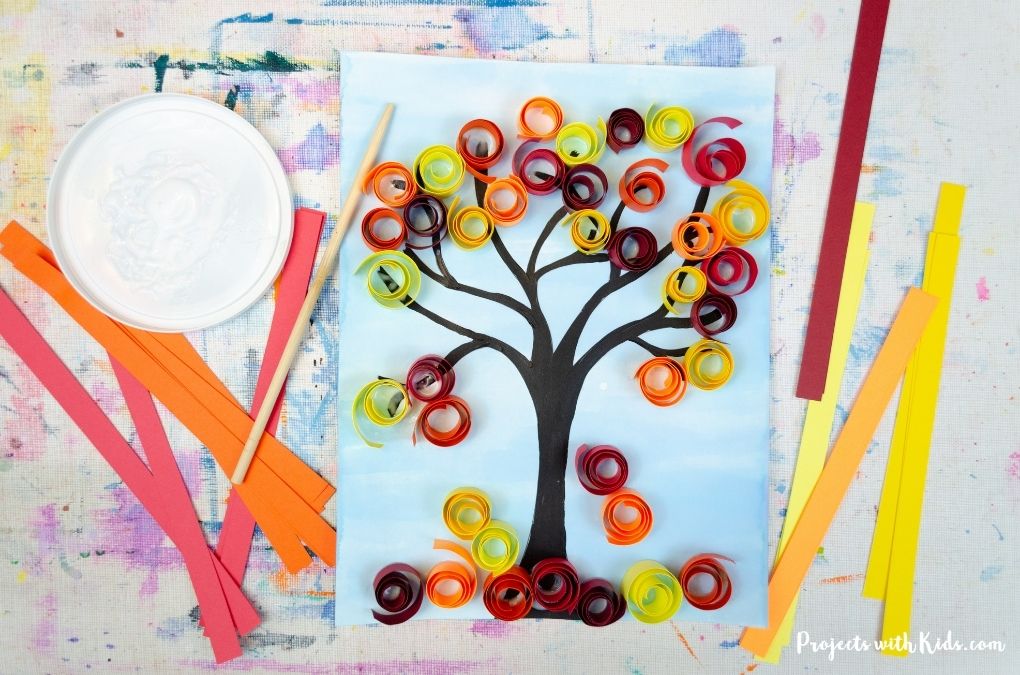
7. Once kids are done gluing all their paper quills down, let everything dry completely.
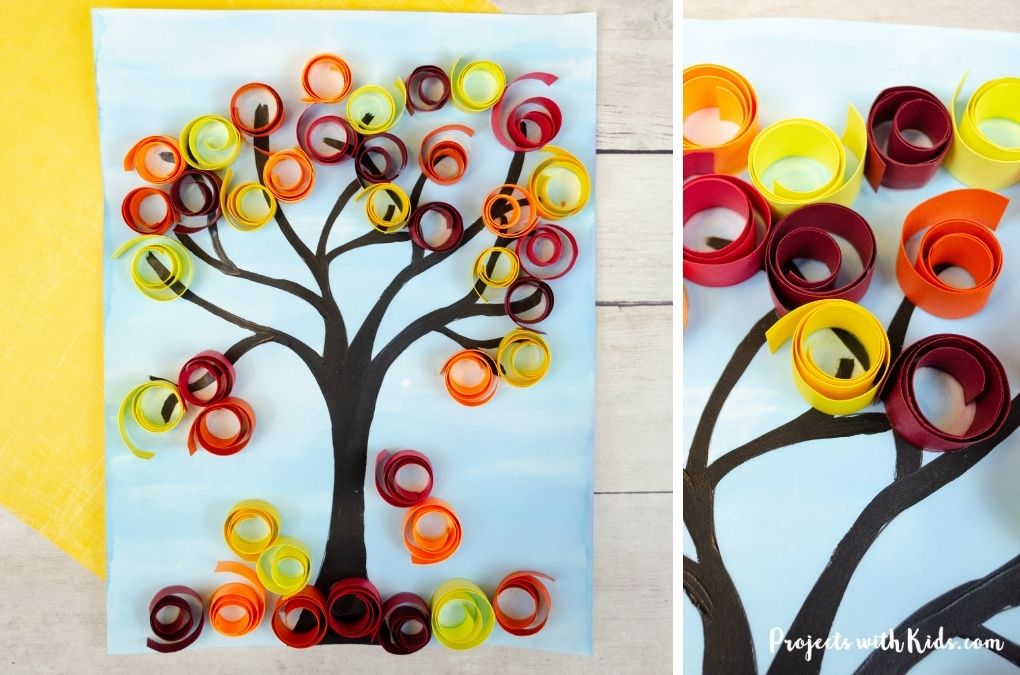
This fall tree art is a fun and easy art project that kids will enjoy making! Kids can choose the colors they use and how they glue on their paper quills, making each tree unique.
Fill in the form below to get your free printable template!
After signing up you will receive a welcome email with your download link.
More art projects kids will love
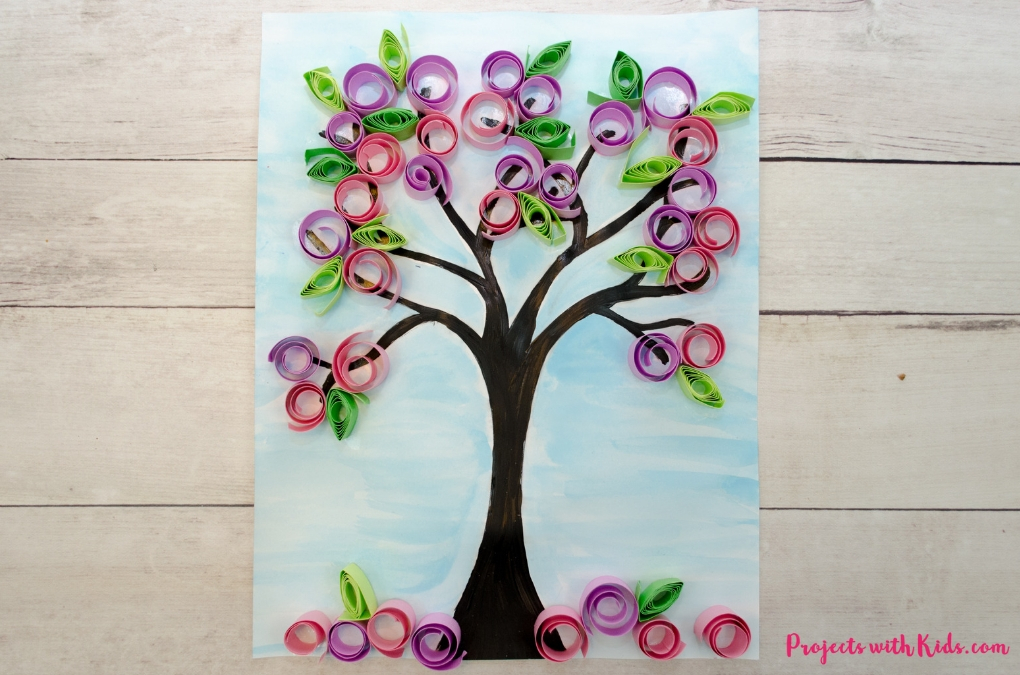
How to Make a Beautiful Spring Tree Craft
Make Colorful Watercolor Spider Web Art

Follow me on Pinterest for more amazing project ideas.
Pin this fall craft idea for later
How to Make a Beautiful Fall Tree Art Project

This fall tree art project for kids uses easy paper quilling to make the colorful autumn leaves and acrylic paint for the tree. A fun mixed media project that kids will love! Printable tree template included.
Materials
- Cardstock or construction paper in red, orange, yellow,
- White cardstock
- Black acrylic paint
- Blue watercolor paint
- White glue
Tools
- Paper cutter or scissors and ruler
- Paintbrushes
- Paint palette and water dish
- Scissors
- Chopsticks for quilling
Instructions
- Print out the tree template onto white cardstock.
- Paint the paper with blue watercolor paint and let it dry.
- Paint the tree with black acrylic paint and let it dry. Using a smaller round paintbrush will make painting the tree easier for kids.
- Cut up all the paper strips you will need. I used 6 different shades of orange, red, and yellow but you really only need 3-4 colors. Kids can choose the colors they would like to use .
Using a paper cutter makes this process go much faster but if you don't have a paper cutter then a ruler and scissors also work.
Cut your paper strips about 1/2 an inch thick. - Pour some glue into a plastic lid or on a paper plate and get your chopstick ready.
- Start making the paper quills. Take a strip of paper and roll it around the chopstick tightly and then carefully slide it off.
- Dip the paper quill into the glue and press it onto the paper. Depending on how tightly kids have wrapped the paper strip, part of it might unroll. This will just add to the design and make each tree look unique!
- Continue to make more paper quills and glue them down to your paper. Glue some to make it look like they are falling off the tree and around the bottom of the paper.
Some kids might find it easier to make a bunch of paper quills first and then glue them on. - Once everything has been glued on, let it dry completely.


