
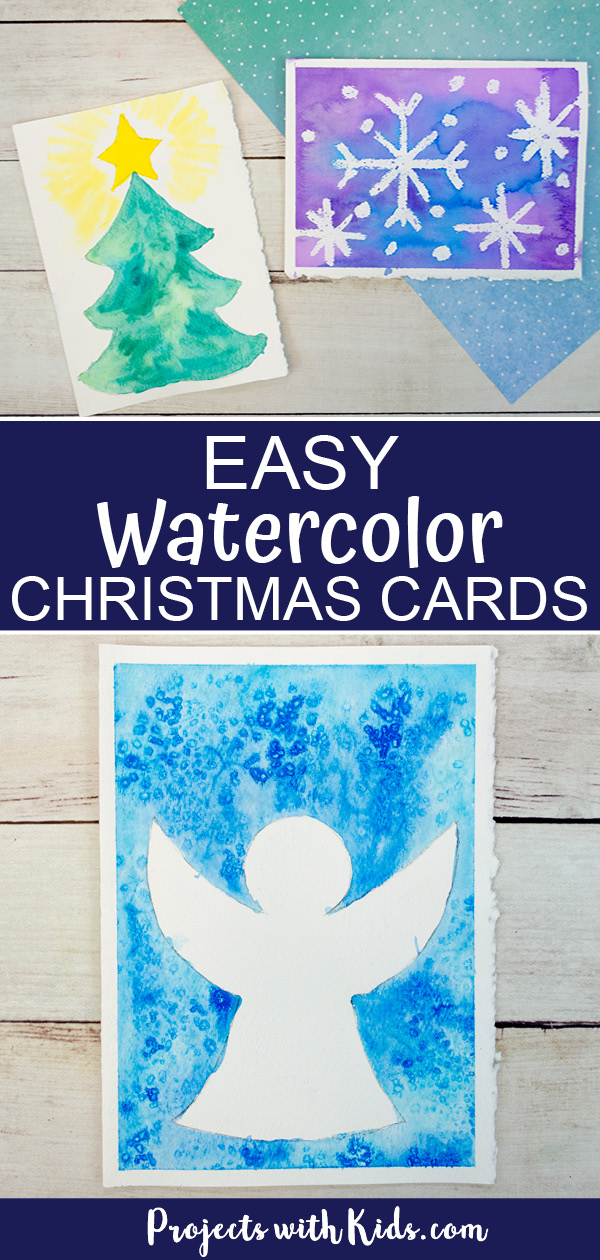
These easy watercolor Christmas cards are just gorgeous! They make a great handmade card idea that kids of all ages (and adults!) will enjoy making. There are three different card designs to choose from and use easy watercolor techniques that will produce wow results!
If you are looking for more Christmas projects to make take a look at our collection of creative Christmas arts and crafts for more fun ideas!
For this project, I created free printable angel and Christmas tree templates to make this art project even easier for you. These templates are available to my email subscribers. Fill out the form below to get the free templates
After signing up you will receive a welcome email with your download link.
There are so many fun watercolor techniques for kids to try! Take a look at my collection of watercolor painting for kids for more fun and creative ideas.
Create your own easy watercolor Christmas cards
This post contains affiliate links. As an Amazon Associate I earn from qualifying purchases. If you would like more information please review my privacy & disclosure policy.
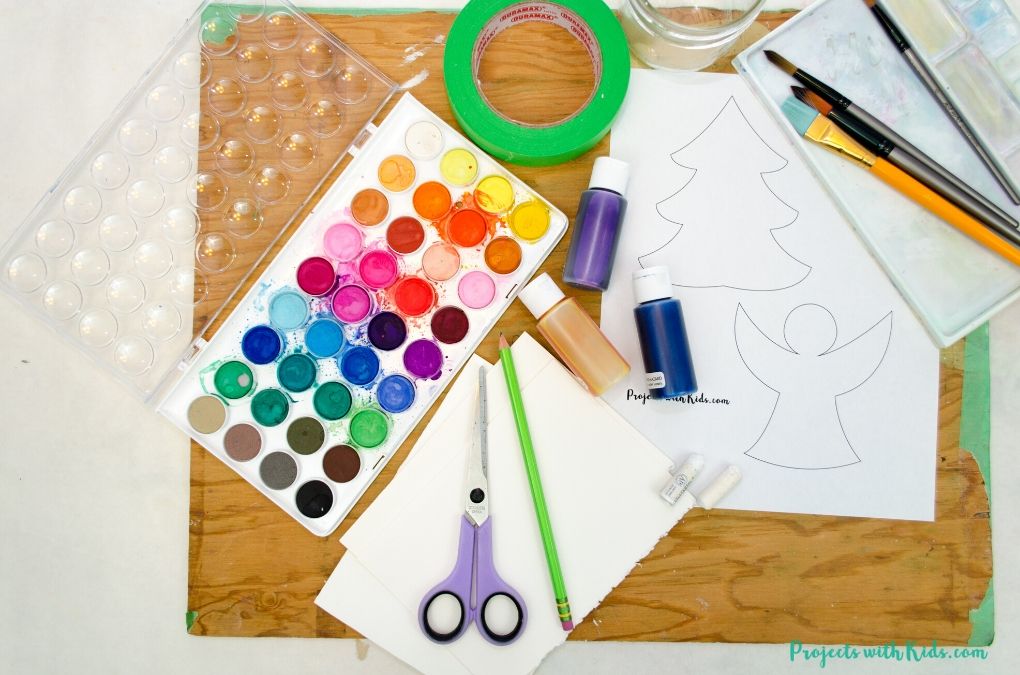
Supplies
- Printable templates
- Watercolor paint, we used liquid watercolors and a watercolor paint set for this project
- Paintbrushes, kids will need a flat brush and a smaller round brush
- Watercolor paper or precut blank watercolor cards
- Paint palette
- Painter’s tape and wooden board (optional)
- Scissors
- Pencil and eraser
- Coarse salt
Instructions to make your handmade Christmas cards
We used precut blank watercolor cards that I got at a local art store for this project, but you can easily cut watercolor paper down to size. A pad of 11×15 inch paper cut in half to 7×11 inches and then folded into cards makes the perfect size!
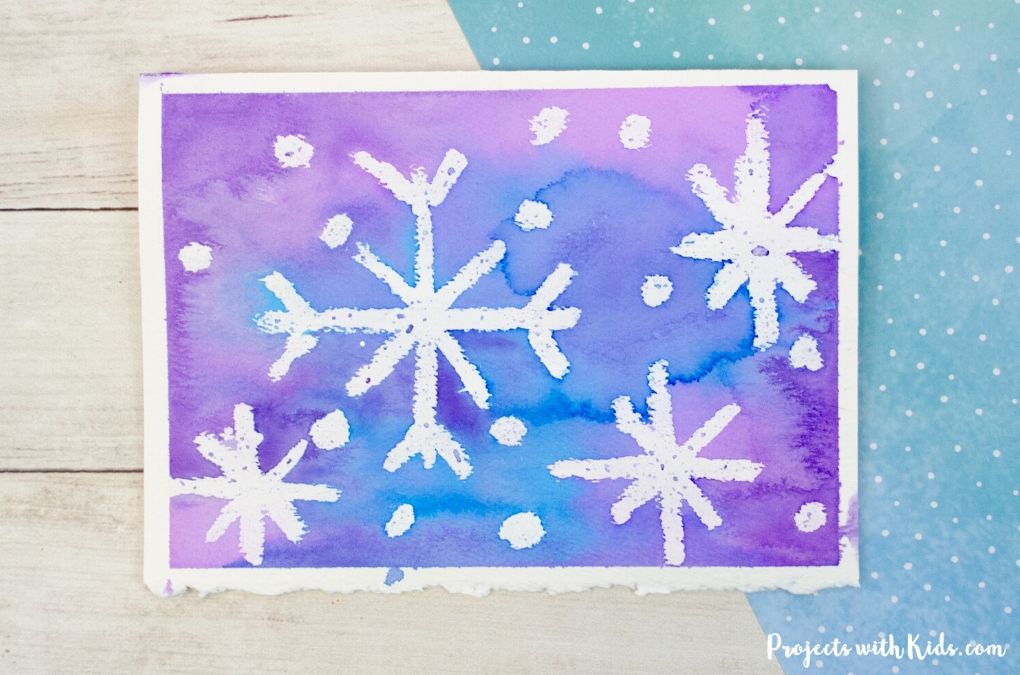
How to make a snowflake watercolor Christmas card
1. Once you have your paper ready, you will need to tape it down to a wooden board. Taping your paper down helps the paper to keep from sliding around, keeps the paper nice and flat and adds a crisp white border around your image.
I got our wooden board from the scrap pile at our local hardware store. You can also try taping the paper down to a desk, but the paper might not fully dry until you take the tape off.
If you can’t tape your paper down your card will still look beautiful!

2. Draw snowflakes and falling snow with white oil pastel on the front of your card. Make sure to press firmly with the pastel, this will produce the best results.
3. Mix two to three shades of blue and purple watercolors. We used liquid watercolors for this card (diluted with water), but you can use any type of watercolor that you have.
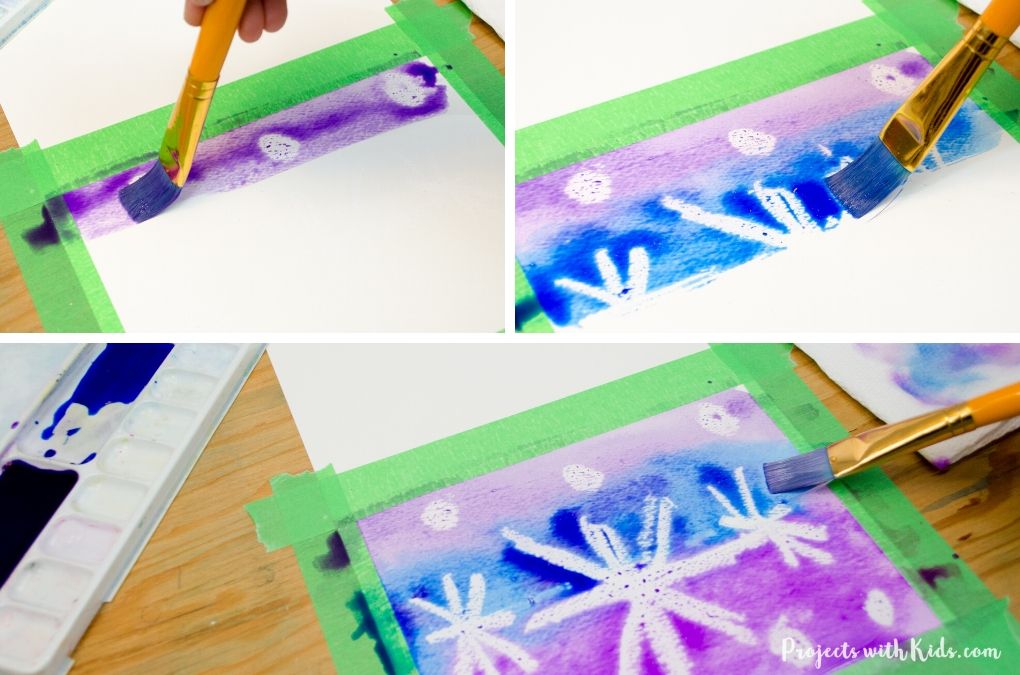
Use a scrap piece of paper to test out your colors beforehand, your colors will always dry a bit lighter.
4. Using a flat brush, paint your paper with your blue and purple watercolors to reveal your amazing snowflake design! Let the paint colors mix together on the paper to create different shades and interesting patterns.
Let your paper dry completely before taking the tape off.
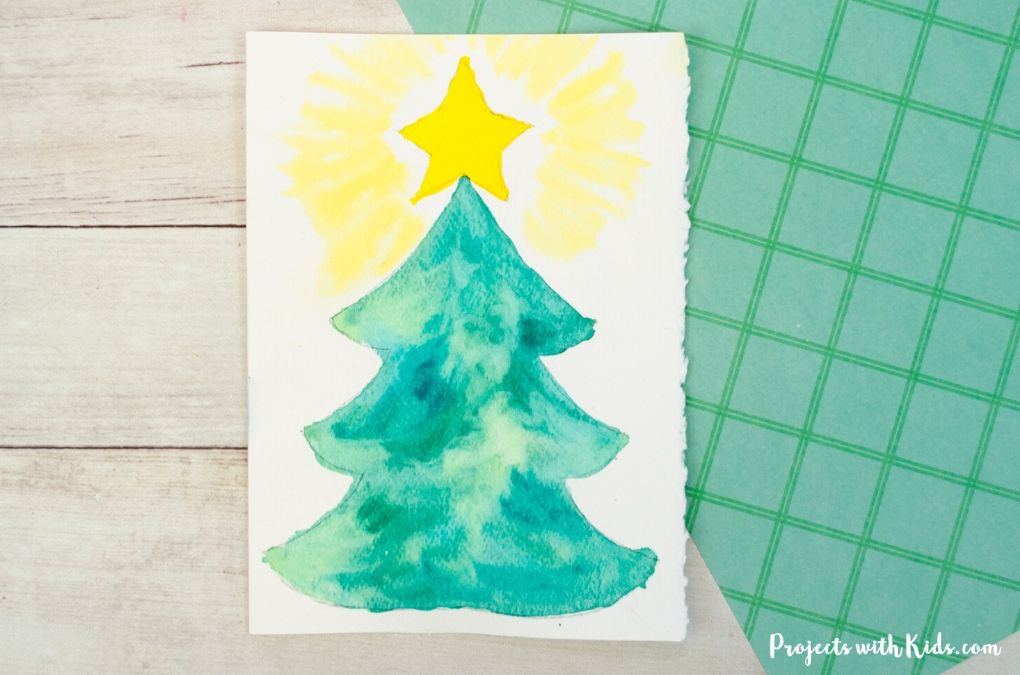
How to paint a watercolor Christmas tree card
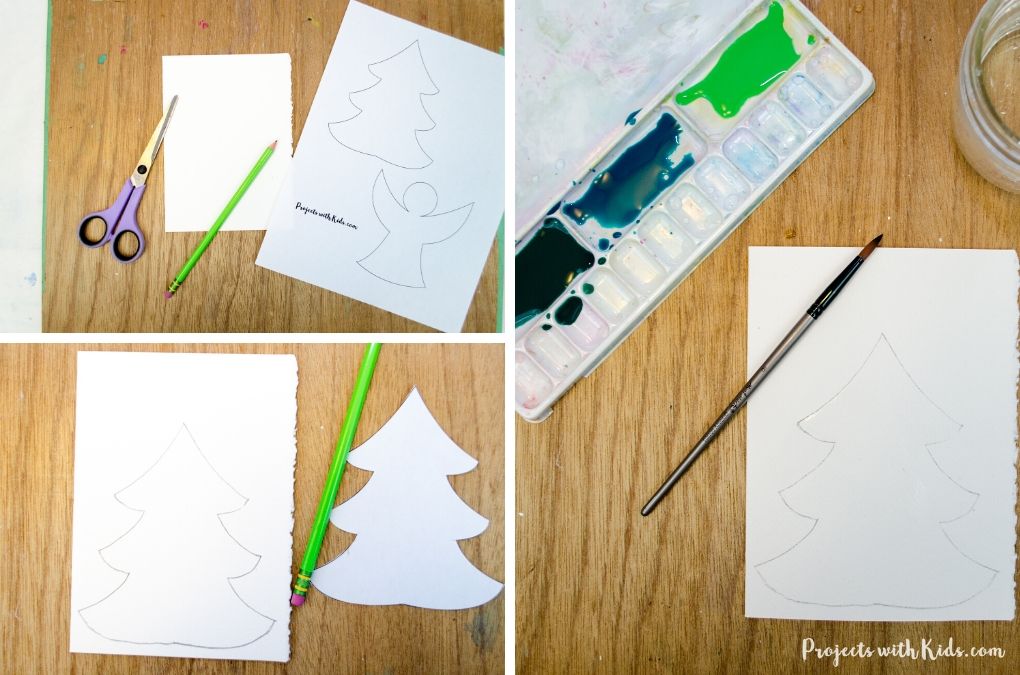
1. Print out the templates onto white printer paper. Cut out the Christmas tree template and trace the template on your card paper with a pencil.
2. Mix three shades of green watercolor, a light shade, a bright green, and a dark green shade. Make sure to test out your colors on scrap paper first.
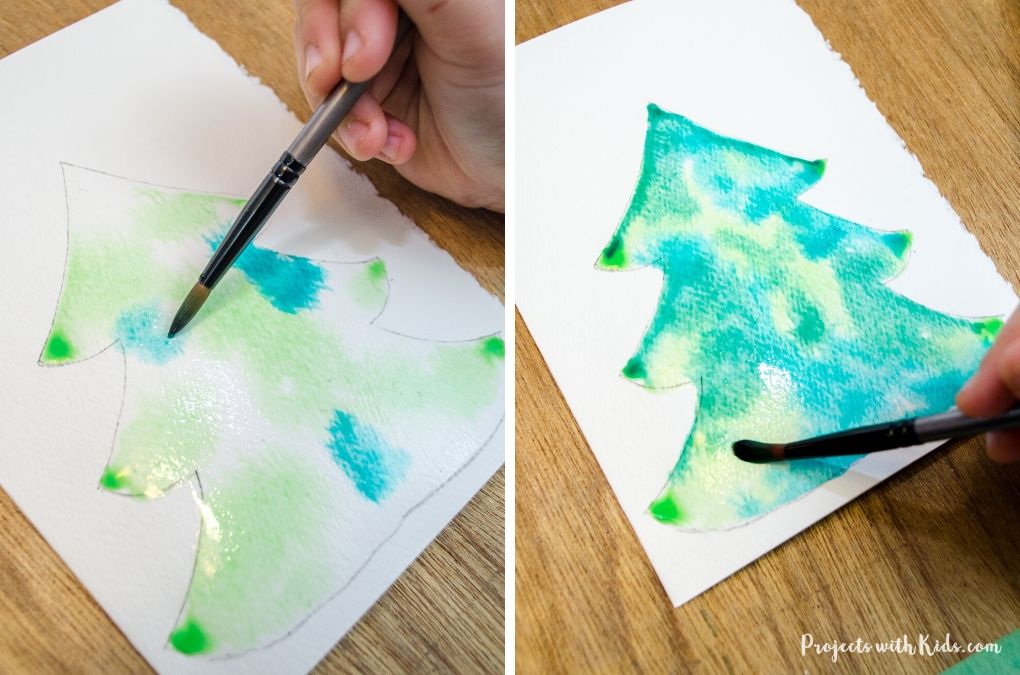
3. Paint your tree carefully with clean water. Use a small detail brush for this step. Remind kids to go slowly and stay in the lines of the tree, the paint will go where the paper is wet.
For another fun Christmas painting idea take a look at this mixed media Christmas tree art project.
4. Going from lightest to darkest, start to paint inside your tree while the paper is wet. The colors will mix together and create interesting patterns as the paper dries. Each tree will look unique!
This is called a wet on wet technique, for more watercolor techniques to try, take a look at these 5 easy watercolor techniques for kids.
Remind kids to paint carefully and try and stay in the lines of the tree drawing. Let the tree dry before moving on to the star.
5. Draw a star on top of your tree with a pencil.
6. Paint it with bright yellow watercolor. We used liquid watercolor for the star and did not dilute it with water.
Let the star dry.
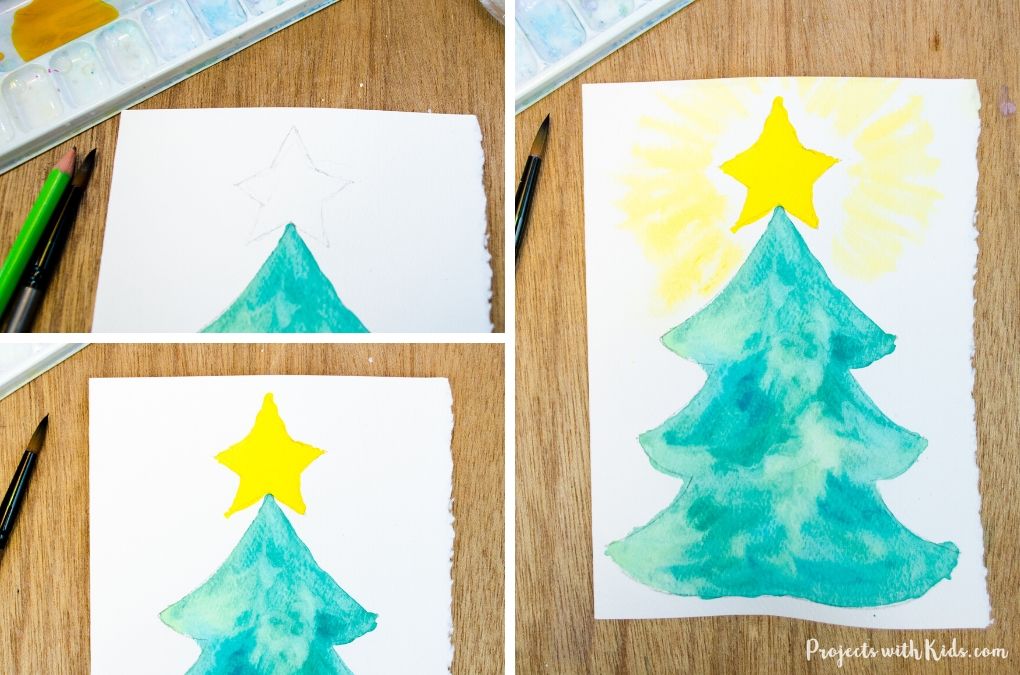
7. Dilute your yellow color with some water and using a small detail brush, paint lines in an outward direction around your star like in the photo above. This will help make your star look like it’s glowing.
You can go over these lines with clean water and a small brush to soften the lines a bit more.
Check out these easy watercolor Valentine cards for another great handmade card idea!
How to paint a simple angel watercolor Christmas card
1. Tape your paper to a wooden board with painter’s tape in the same way you did for the snowflake card.
2. Print and cut out the angel template. Trace it onto the front of your card with a pencil.
3. Mix two to three shades of blue. We used two blues from our watercolor pan set for this card. Test out your colors on a scrap piece of paper first, remember that your colors will always dry lighter.
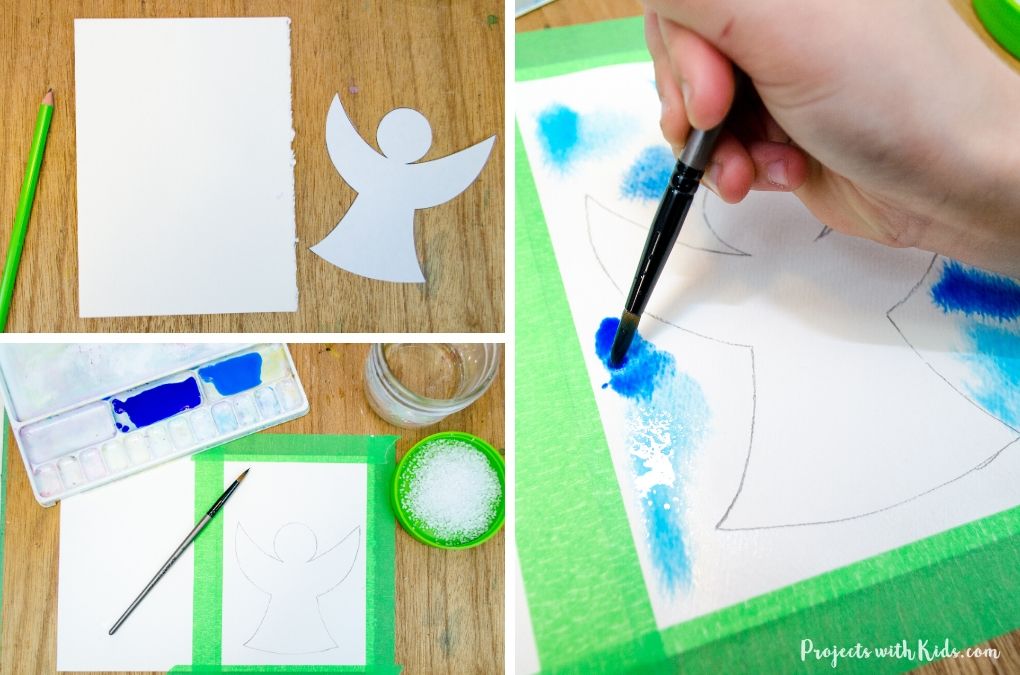
4. Paint around your angel with clean water using a smaller sized brush. Remind kids to go slow and not to paint any water inside the angel. This is the reverse of what we did for the Christmas tree card above.
5. While the paper is still wet, paint around the angel with your blue colors. Remind kids to paint slowly and not to go inside the angel drawing.
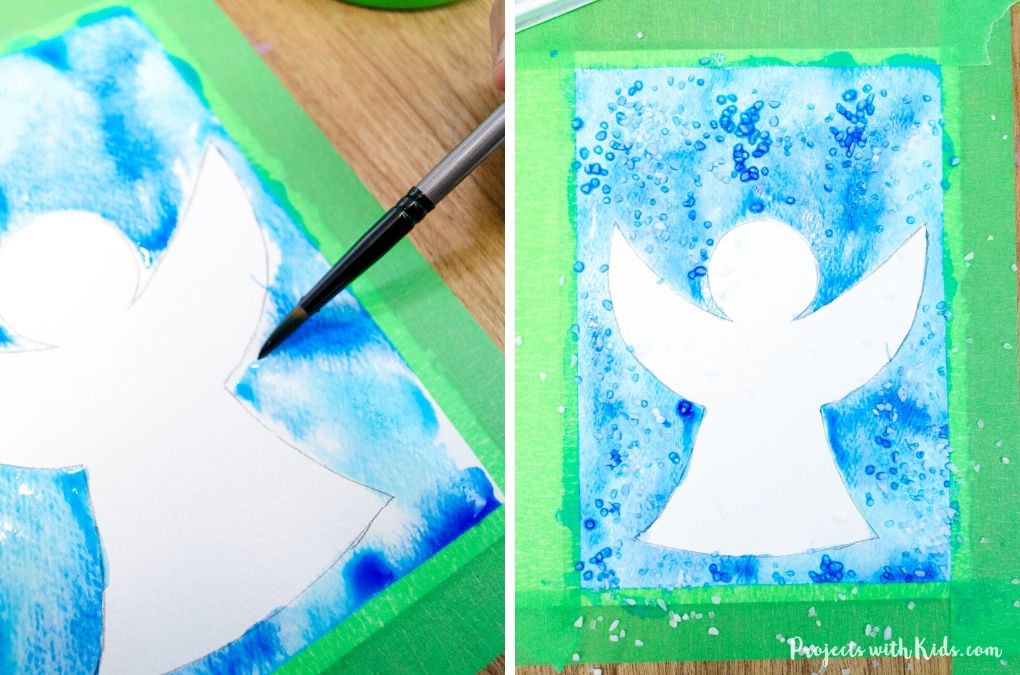
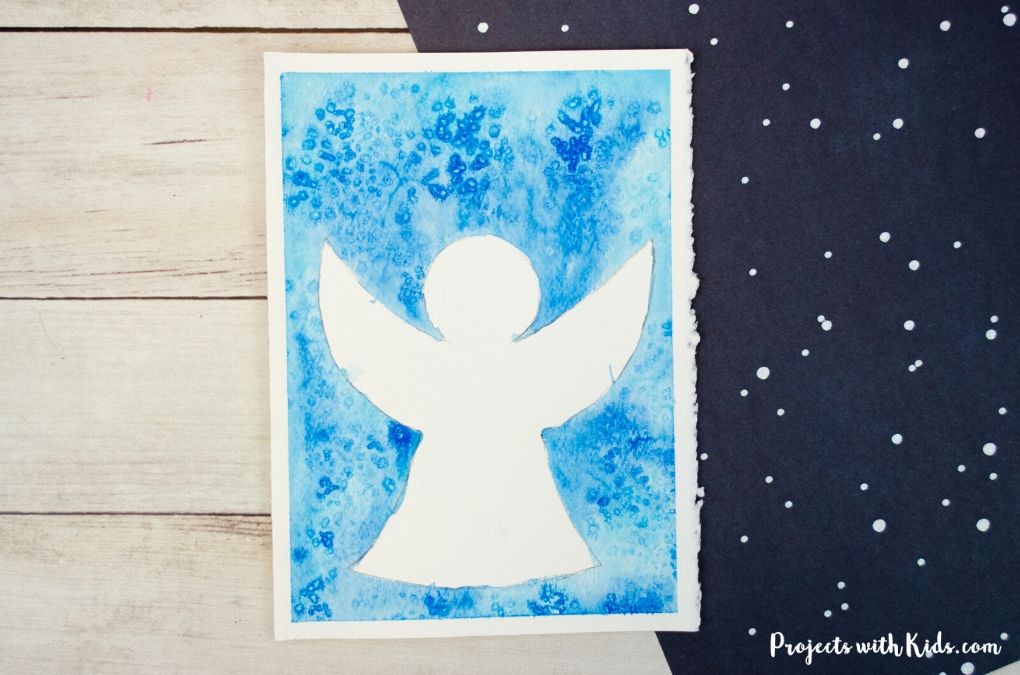
6. Sprinkle coarse salt over your painting while the paint is still wet. As the salt dries it will create patterns in the paint.
Let the salt dry completely and then brush it off outside or into a sink. Kids love doing this to reveal their cool designs!
Carefully take the tape off your paper.
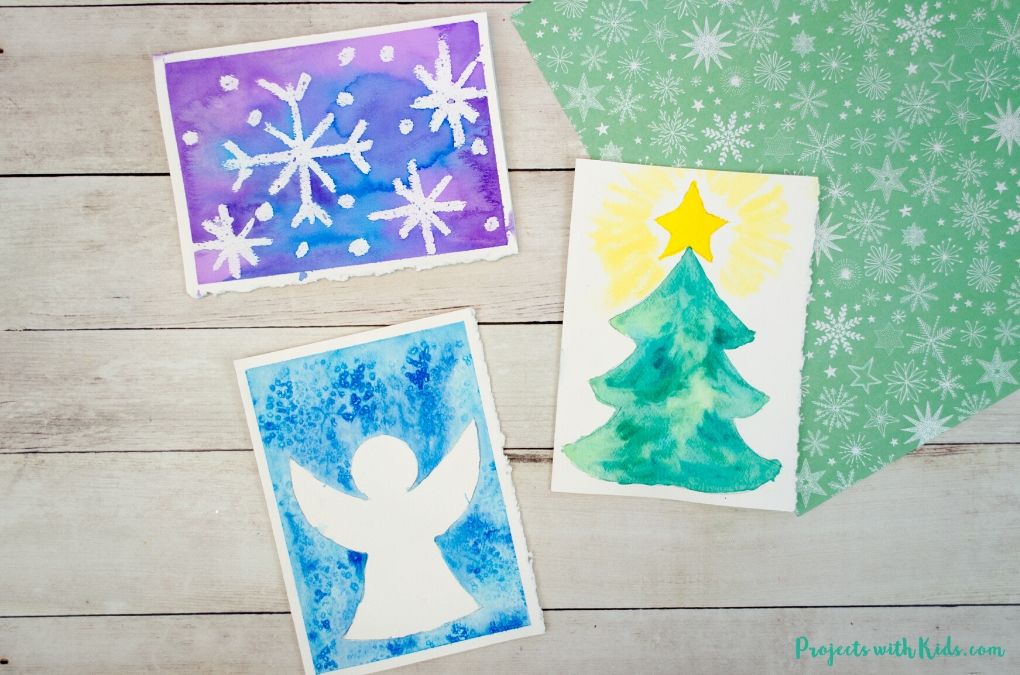
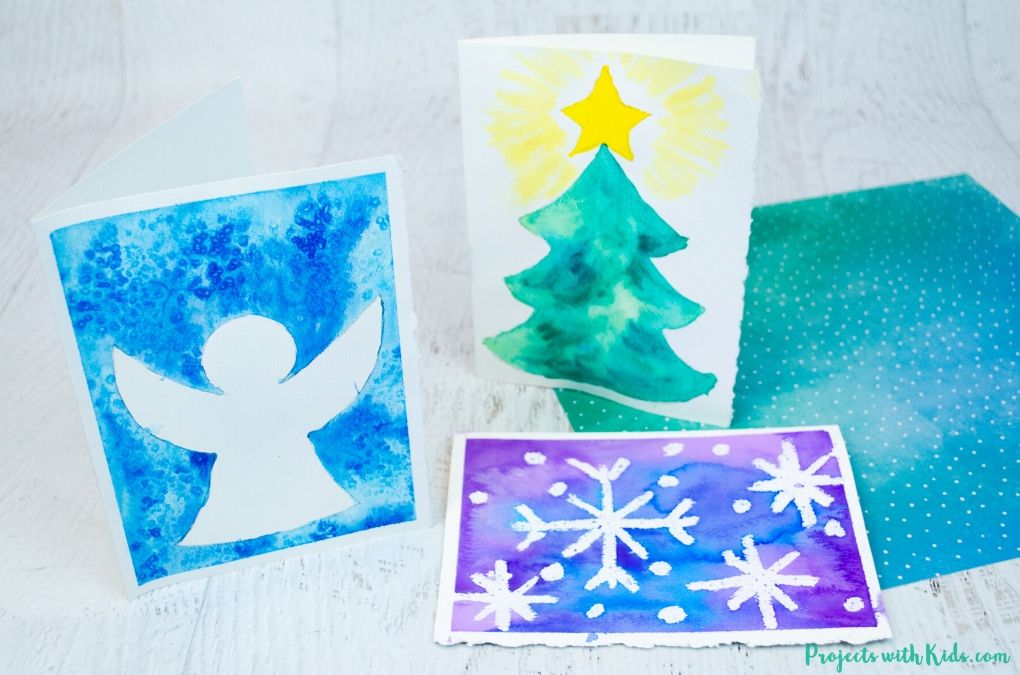
I love how colorful and beautiful these easy watercolor Christmas cards turned out! They were simple to make using easy watercolor techniques that kids will enjoy trying out.
They make a special handmade card idea that kids will be proud to give to family and friends. For another handmade Christmas card idea take a look at these fork painted Christmas cards!
We love creating and exploring with different art supplies and techniques. If you are looking for more art projects to try, take a look at our ultimate collection of amazing art projects for kids!
Fill in the form below to get your free printable templates!
After signing up you will receive a welcome email with your download link.
More Christmas art projects kids will love
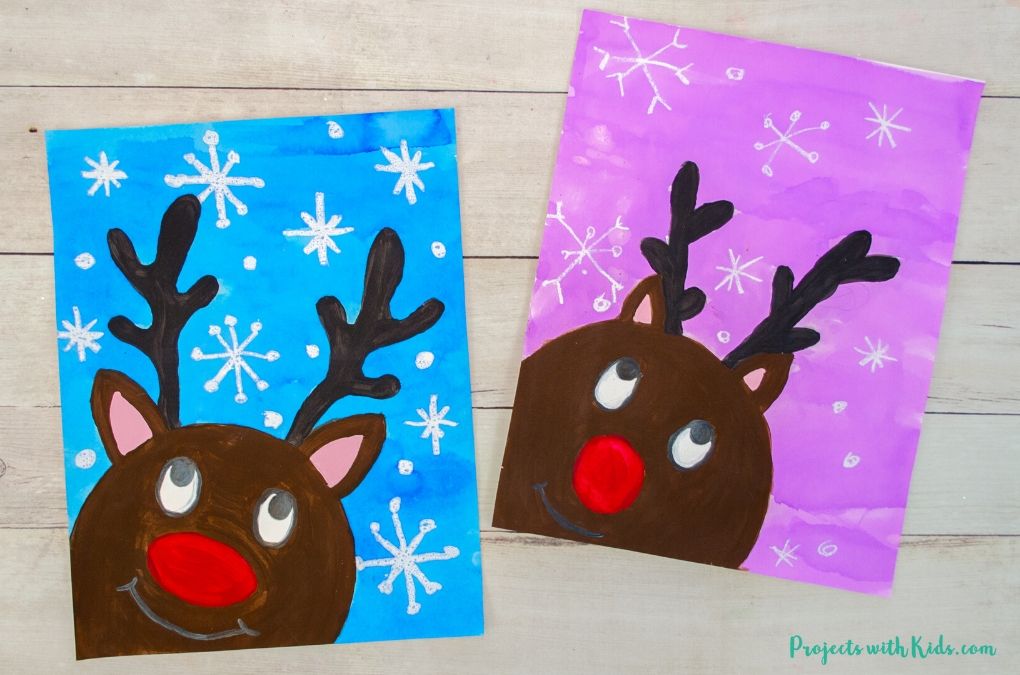
The Most Adorable Reindeer Painting for Kids to Make
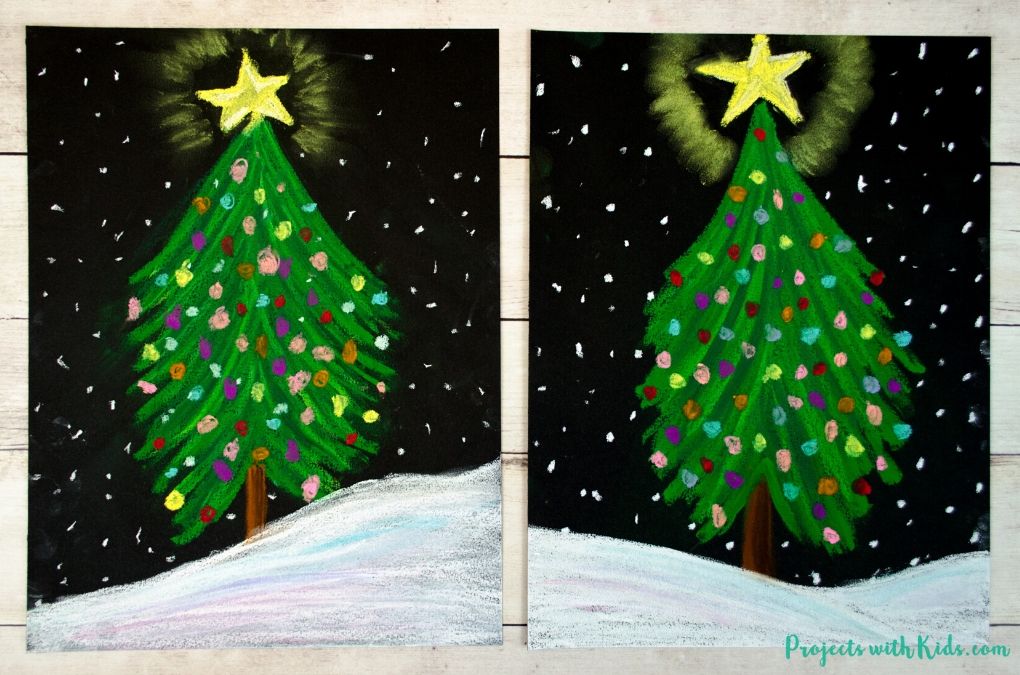
How to Draw a Beautiful Chalk Pastel Christmas Tree
Follow me on Pinterest for more amazing project ideas.
Pin these DIY Christmas cards for later
Easy Watercolor Christmas Cards for Kids to Make

These easy watercolor Christmas cards are a fun handmade card idea for kids to make! Use easy watercolor techniques to create these gorgeous cards for family and friends.
Materials
- Printable templates
- Watercolor paint
- Watercolor paper or precut blank watercolor cards
- Painter’s tape and wooden board (optional)
- Pencil and eraser
- Coarse salt
Tools
- Scissors
- Paintbrushes
- Paint palette
- Water dish
Instructions
- For the snowflake card, tape your paper down to a wooden board.
- Use white oil pastel to draw snowflakes on your paper. Remind kids to press firmly, this will produce the best results.
- Mix two to three shades of blue and purple watercolor paint.
- Paint your paper with your blue and purple watercolor paint to reveal your amazing snowflake design!
Let the paint mix together on the paper and as it dries, the paint will create interesting shades and patterns.
Let your paper dry completely before taking the tape off. - For the Christmas tree card, print and cut out the tree template.
- Trace the template onto the front of your card with a pencil.
- Mix 3 shades of green watercolor paint. A light green, bright green and a dark green shade.
- Using a clean small brush, paint the inside of the tree with clean water. Have kids go slowly and carefully so they don't paint outside the tree drawing.
- Starting with the lightest shade of green start to paint your tree using a smaller brush. Again, paint slowly and carefully so as not to paint outside the tree.
Let the tree dry before moving on to the star. - Draw a star on the top of your Christmas tree with a pencil. Paint the star a bright yellow.
- Mix up a light yellow shade and use a small brush to paint lines in an outward direction around your star.
Soften these lines up a bit by painting over them with a clean wet brush. - For the angel card, tape your paper down to a wooden board.
- Cut out the angel template and trace it onto your card paper with a pencil.
- Mix two to three shades of blue watercolor paint.
- Paint around your angel drawing with clean water.
- Paint around the angel with your blue paint. Do this step carefully so no paint goes inside the angel drawing.
- While the paint is still wet, sprinkle coarse salt over your painting.
As the salt dries it will create patterns in the paint. - Let the salt dry completely and then brush it off outside or into a sink. Kids love doing this step to reveal their cool designs!
Carefully take the tape off your paper.


