

Kids will love making these adorable DIY watercolor Christmas cards for family and friends this season. They are super easy to make and only require a few simple supplies. This is a great Christmas art project idea for kids and tweens!
If you are looking for more Christmas projects for kids to make take a look at our collection of creative Christmas arts and crafts for more fun ideas!
If you are cutting the cards from a 12×18 sheet of watercolor paper, you will be able to get 6 cards from one sheet of paper! For another fun watercolor Christmas art idea, take a look at this colorful gingerbread house painting using a watercolor resist technique.
Create your own DIY watercolor Christmas cards
This post contains affiliate links. As an Amazon Associate, I earn from qualifying purchases. If you would like more information please review my privacy & disclosure policy.
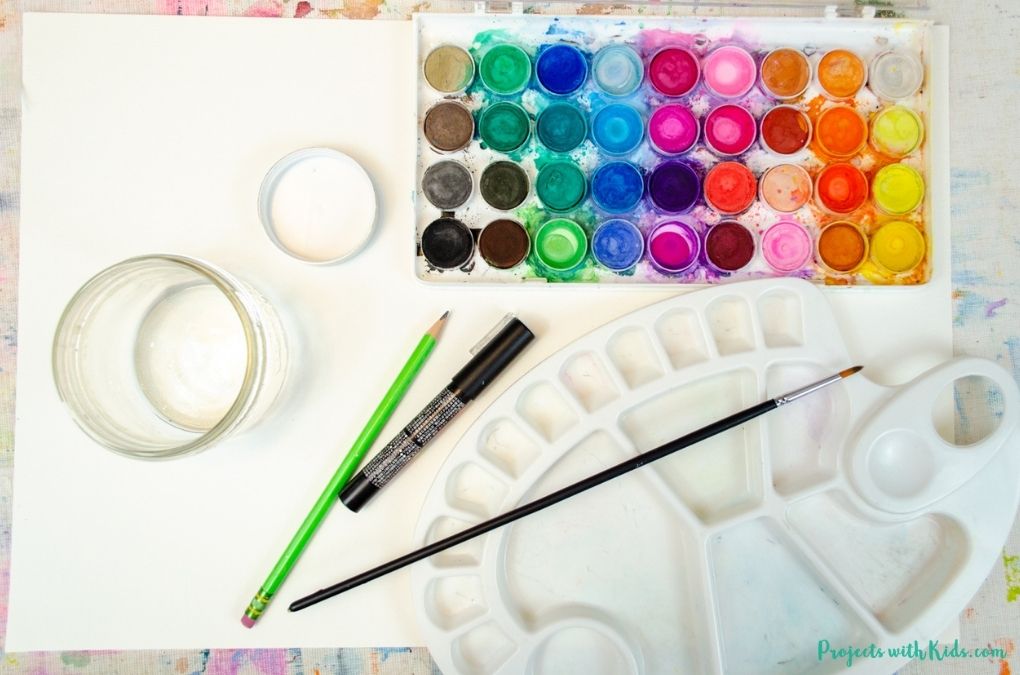
Supplies
- Watercolor paper (you can get 6 cards from 12x18inch watercolor paper)
- Watercolor paint set
- Paintbrush
- Paint palette and water dish
- Fine point black paint pen or marker
- Pencil
- Scissors
- Ruler
- Plastic lid or cardboard circle template approximately 2.25 inches in diameter
Instructions for your Christmas cards
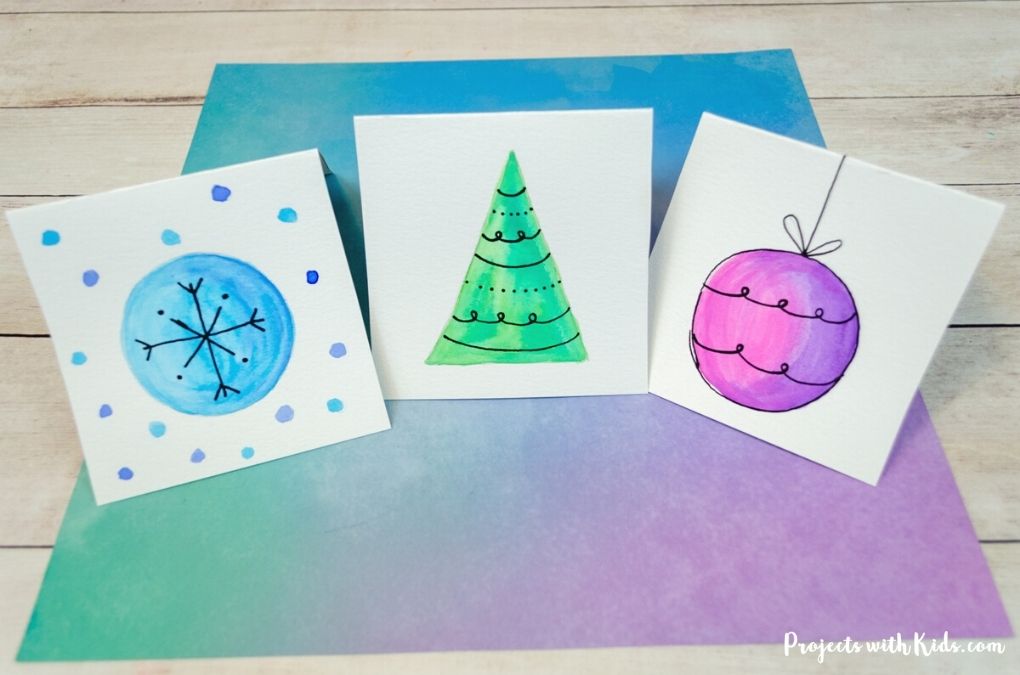
Start by getting your paper cut and folded. I made these cards 4 x 4 inches square when folded, so each card measures 4 x 8 inches. If you are using a sheet of 12×18 watercolor paper, you can get 6 cards from one sheet of paper!
Measure, cut and fold your cards.
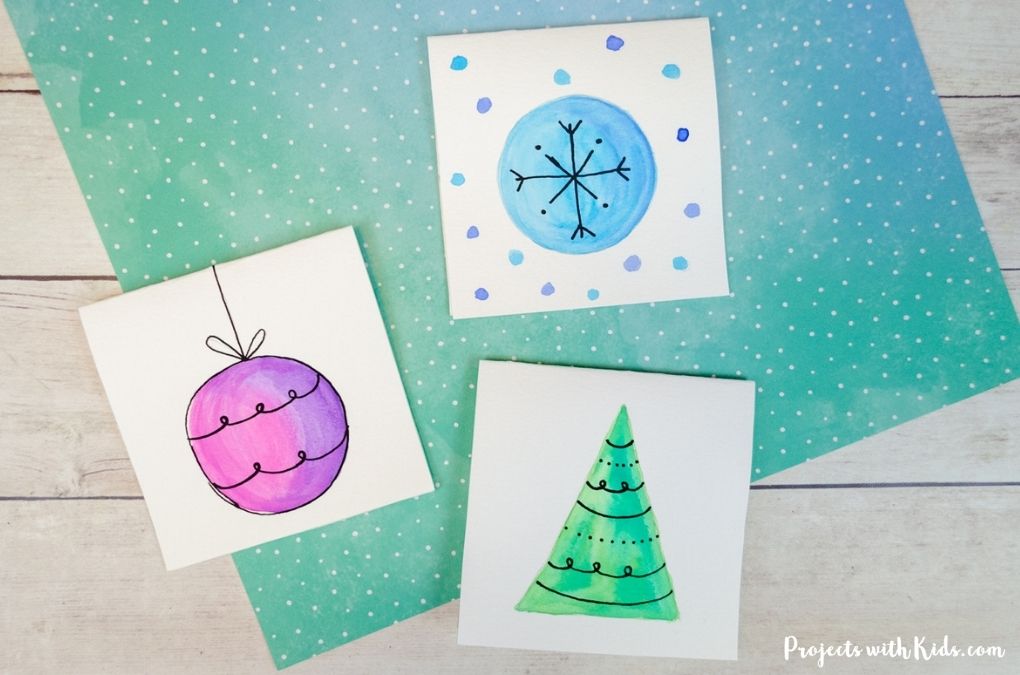
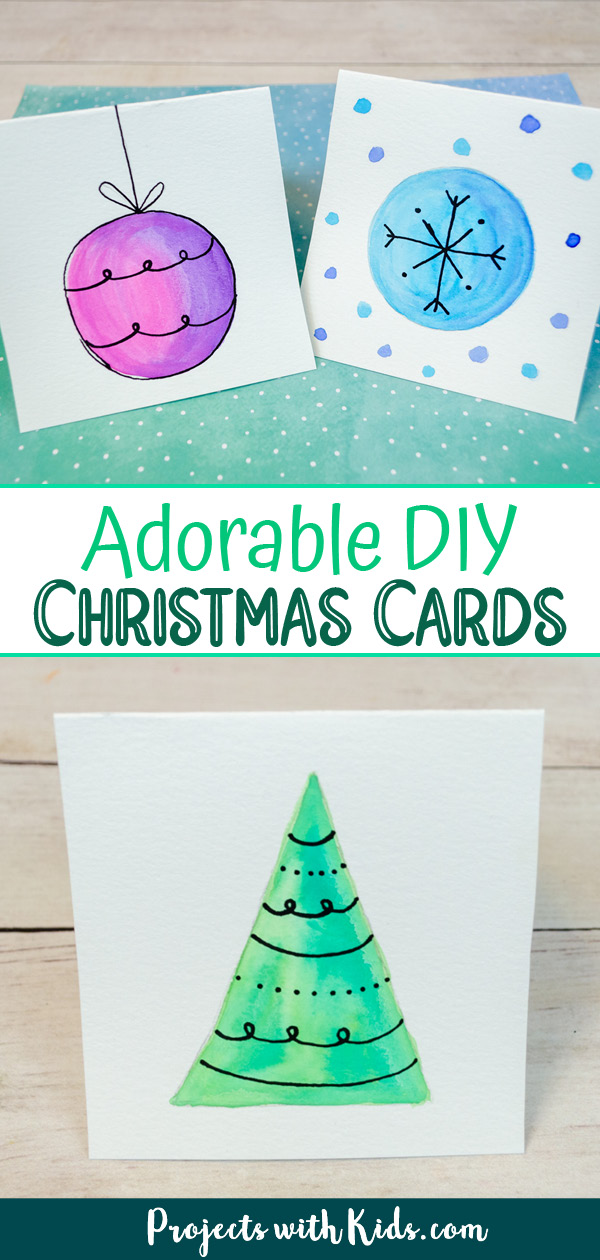
How to make a snowflake watercolor card
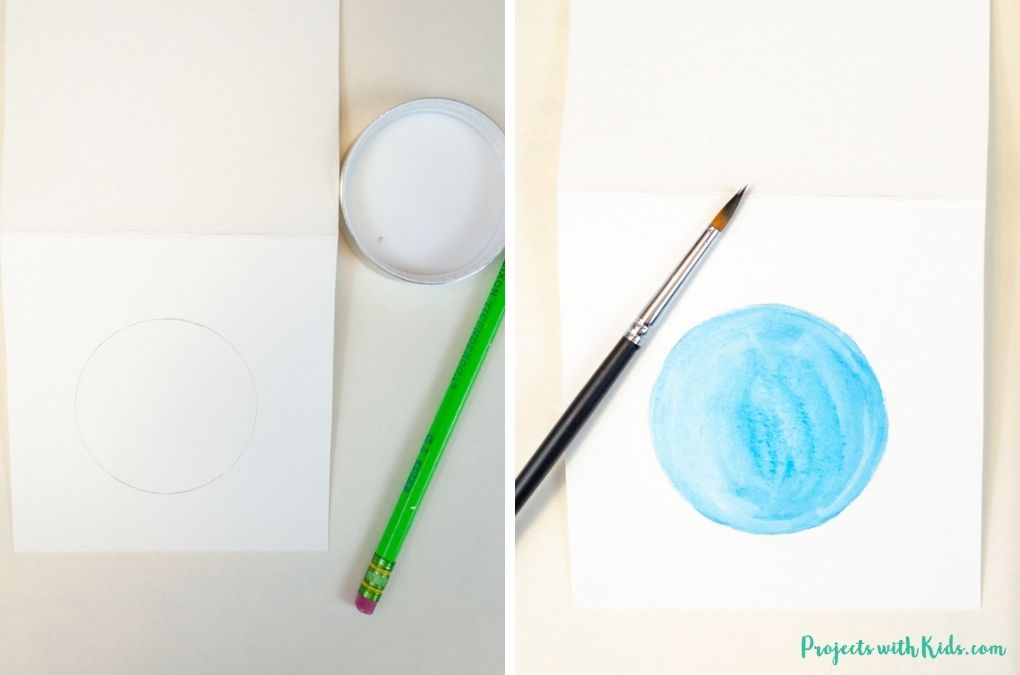
1. Use a plastic lid or cardboard tempate approximately 2.25 inches in diameter and have kids trace around the template lightly with a pencil. You want the circle to be in the middle of your card.
2. Make sure to have your watercolor paint colors ready to go. Kids can use the paint straight from the paint set or mix the colors with a bit of water in a paint palette. You will need 2-3 shades of blue for this card.
Use a lighter blue color to paint inside the circle. Older kids can add a second shade of blue to the cirlce if they like. The wet paint will help to mix the two colors together. Using a smaller detail brush will help to make this step easier for kids.
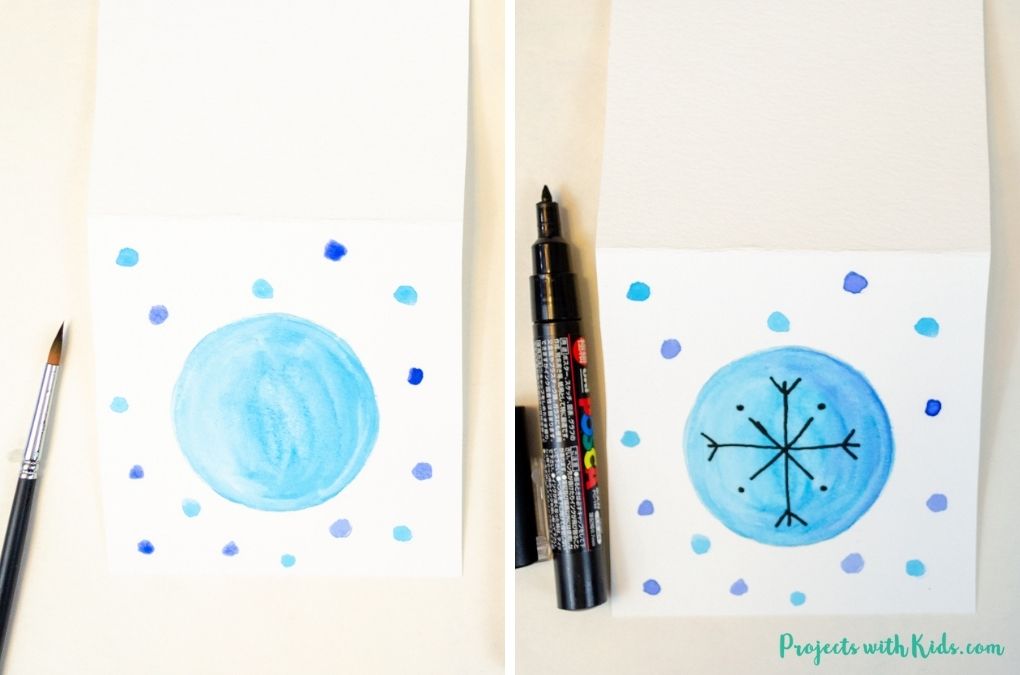
3. Use a small brush to dot on small circles around the bigger circle. You can use different shades of blue for this step to give your painting some variety. Let the paint completely dry before moving on.
4. Draw on a simple snowflake design in the middle of your big circle using a black fine point paint pen or marker.
How to make an ornament watercolor Christmas card
1. Use the same circle template to draw on a circle closer to the bottom of your card lightly with pencil. Draw in the string and simple bow for your ornament as well. Use the photos above and below as a guide.
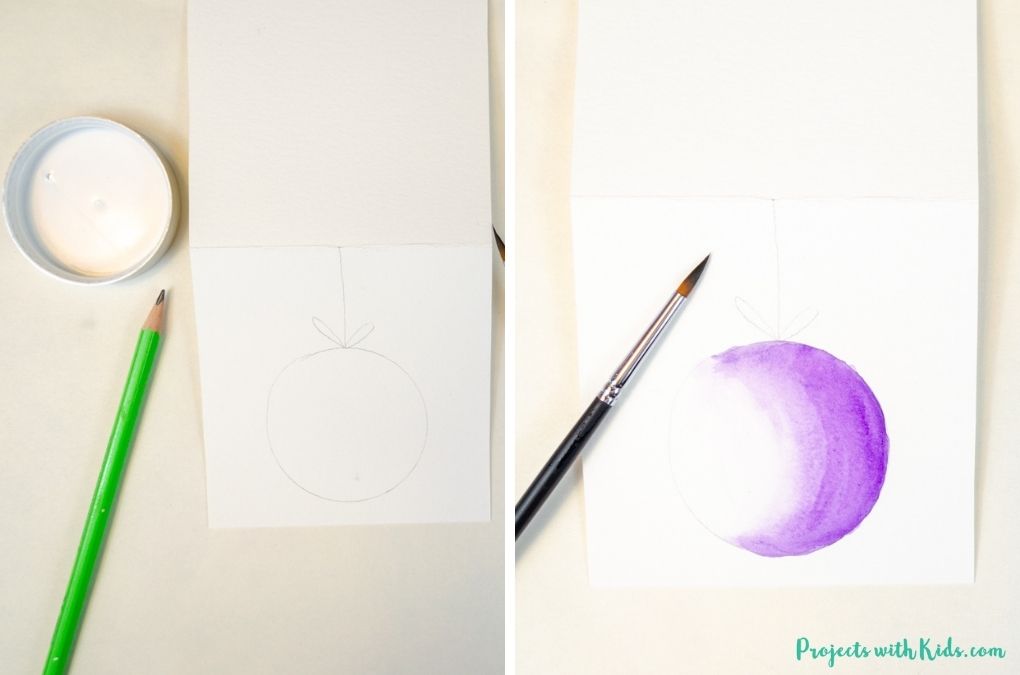
2. Make sure to have your watercolor paint colors ready to go. Kids can use the paint straight from the paint set or mix the colors with a bit of water in a paint palette. You will need purple and pink for this card.
First, paint the circle with clean water, you don’t want the paper soaking wet. You can dab the paper with a paper towel if it’s too wet.
Using a small brush, start to paint the right side of the circle with a purple color. Paint the other side of the circle with a pink color, letting the wet paint and wet paper mix the colors together.
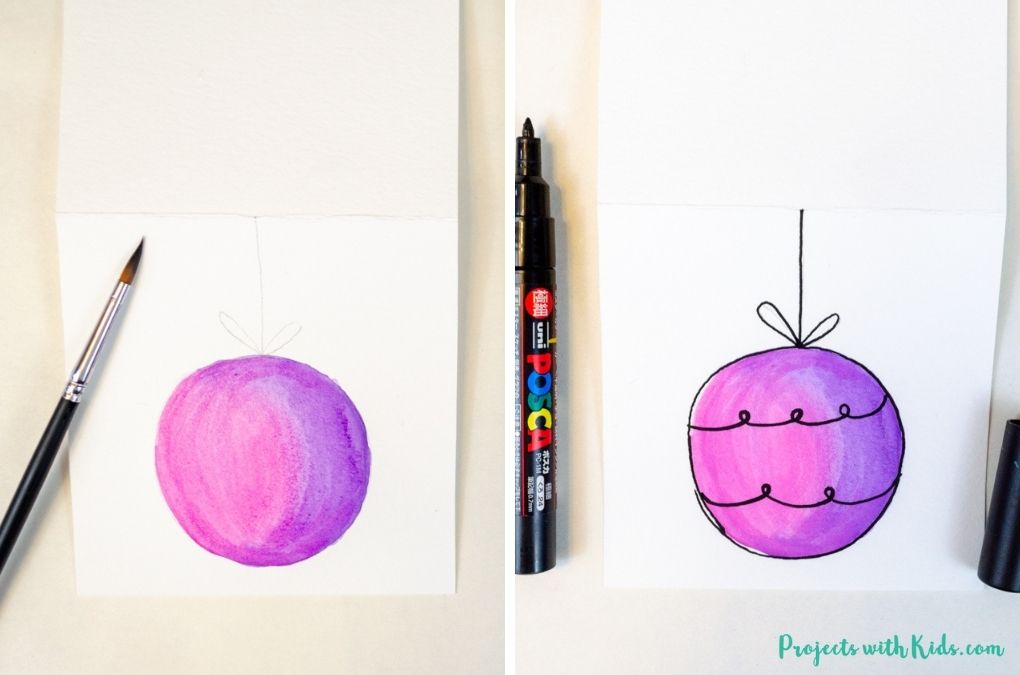
3. Once your paper is completely dry, use a fine point black paint pen or marker to outline the ornament and trace over your pencil lines for the string and simple bow. Finish off the card by drawing in the design on the ornament. Kids can choose to draw in any design they like or use my photo a a guide.
How to paint a simple watercolor Christmas tree card
1. First, draw a triangle in the middle of your card lightly with a pencil. You want the triangle big enough to take up quite a bit of space on the front of your card.
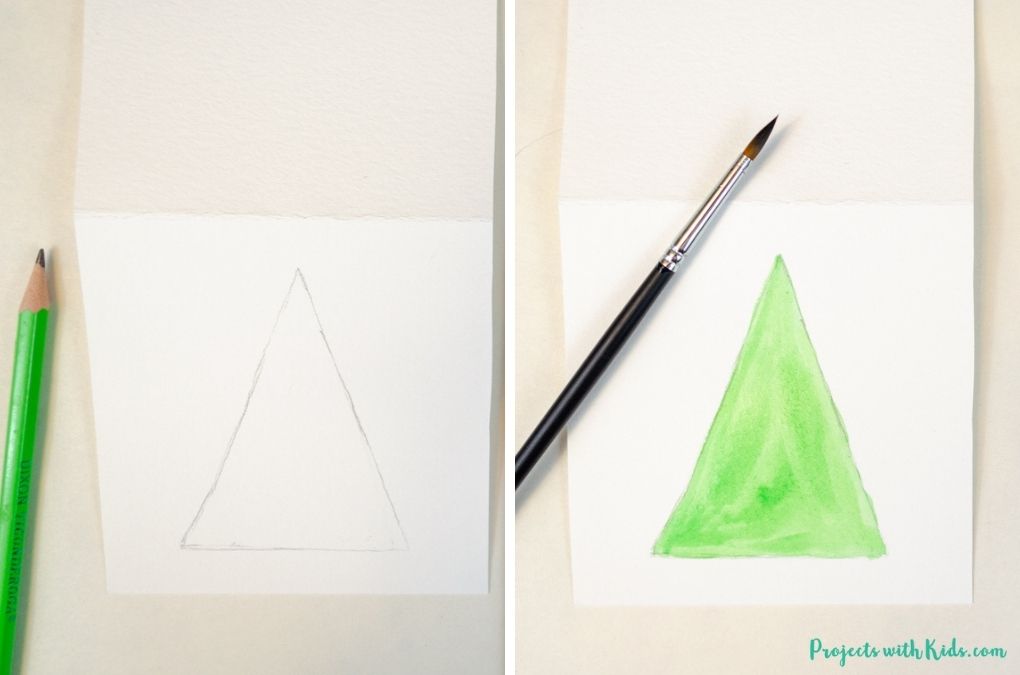
2. Make sure to have your watercolor paint colors ready to go. Kids can use the paint straight from the paint set or mix the colors with a bit of water in a paint palette. You will need two shades of green for this card, one lighter shade and a medium bright green.
3. Start by painting the tree with a light green color. Using a smaller brush will help make this easier for kids. While your paint is still wet, paint in some areas of the bright green color. Let the wet paint mix together on it’s own as it dries.
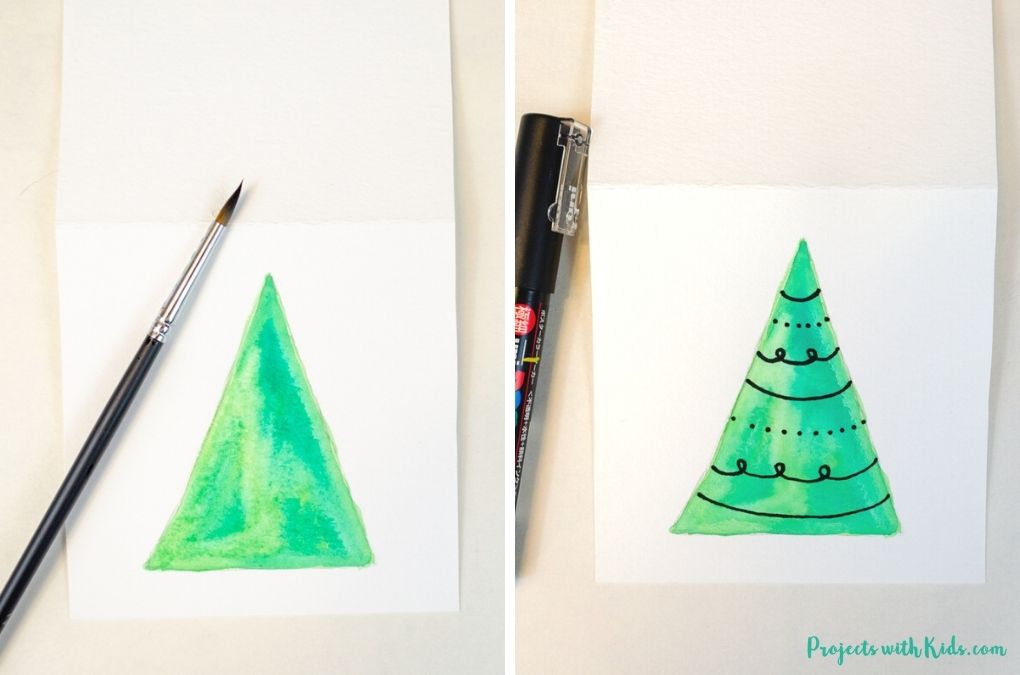
4. Once your paper is completely dry, use a fine point black marker or paint pen to draw in the design details. Kids can follow along with my pattern or create their own.
These DIY watercolor Christmas cards are so cute. This is a fast and easy card craft, kids will want to make more than one!
More Christmas card ideas kids will love
Fork Painted Christmas Cards for Kids to Make
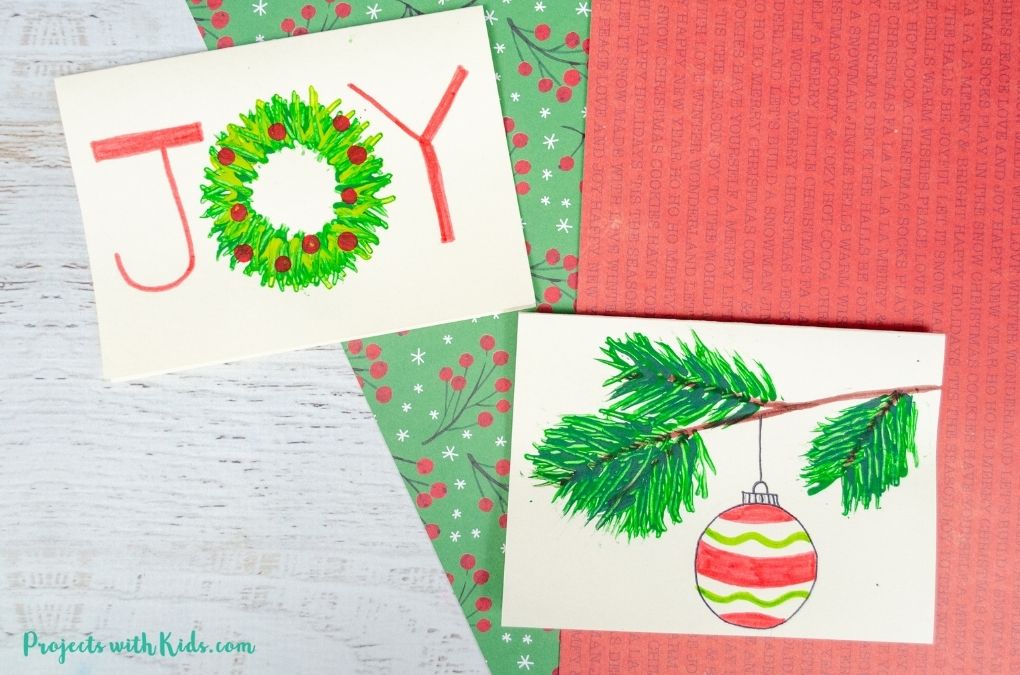
Easy Watercolor Christmas Cards for Kids to Make
Follow me on Pinterest for more amazing project ideas.
Pin this Christmas card idea for later
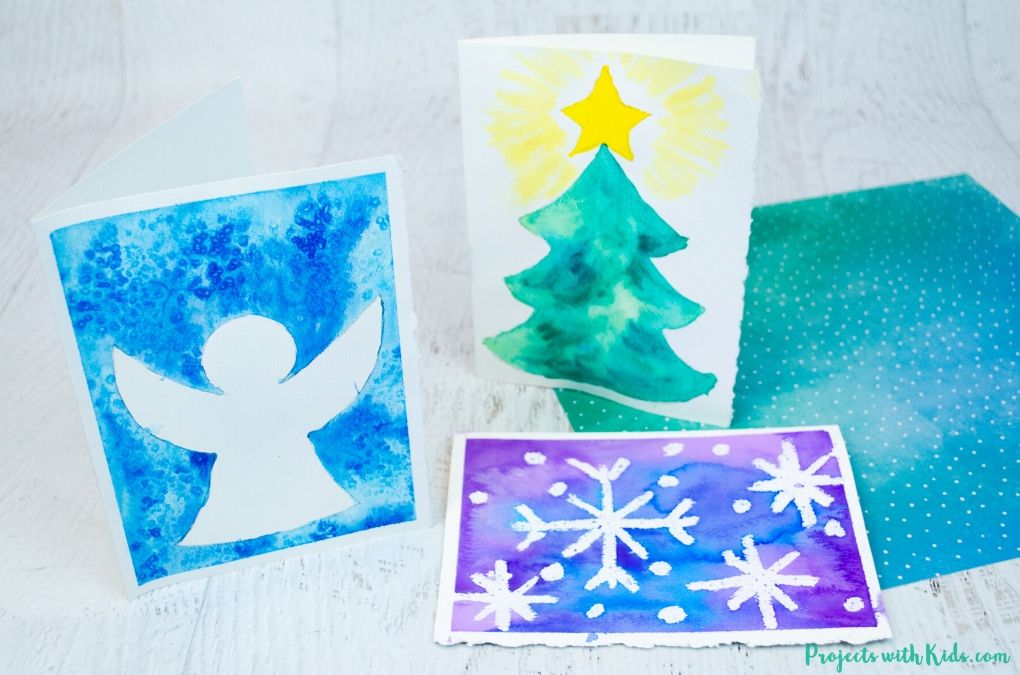
Adorable DIY Watercolor Christmas Cards Kids Can Make

Easy DIY watercolor Christmas cards kids can make using only a few simple supplies!
Materials
- Watercolor paper (you can get 6 cards from 12x18inch watercolor paper)
- Watercolor paint set
- Fine point black paint pen or marker
- Pencil
Tools
- Paintbrush
- Paint palette and water dish
- Scissors
- Ruler
- Plastic lid or cardboard circle template approximately 2.25 inches in diameter
Instructions
- Cut your watercolor paper to 8 x 4 inches and fold it in half, so each card will be 4x4 inches square. You can get multiple cards from one sheet of paper. I used 12x18 inch watercolor paper and cut out 6 cards.
- For the snowflake card, use a lid or cardboard template approximately 2.25 inches in diameter and trace a circle in the centre of your card. Use a pencil and press lightly.
- Get your paints ready, you will need 2-3 shades of blue. Paint the circle with a light blue color. Some kids might want to add in a second shade, but that's optional.
- Use a small detail brush to paint on small dots of blue around the big circle. Let the paint dry completely.
- Use a fine point black paint pen or marker to draw on a simple snowflake design.
- For the ornament card, use the same circle template to draw a circle close to the bottom of the card. Draw a string and simple bow like in the photo above.
- Get your paints ready, you will need purple and pink for this card. Start by painting the circle with clean water.
- Paint the right side of the circle with purple, then paint the left side with pink and let the wet paint and paper mix the two colors together. Let this dry completely.
- Use a fine point black paint pen or marker to outline the circle and trace over your pencil lines for the string and bow. Finish off the card by drawing in a simple design on the ornament.
Kids can follow my example or choose their own design. - For the Christmas tree card, draw a triangle in the middle of your card lightly with a pencil.
- Get your paints ready, you will need a light shade of green and a bright green. Start by painting the triangle with a light green color. While the paint is still wet, add the bright green color to some areas. Let the wet paint mix together as it dries.
- Once your paper is completely dry, draw on some simple designs using a fine point black paint pen or marker. Kids can follow my example or draw their own designs.


