
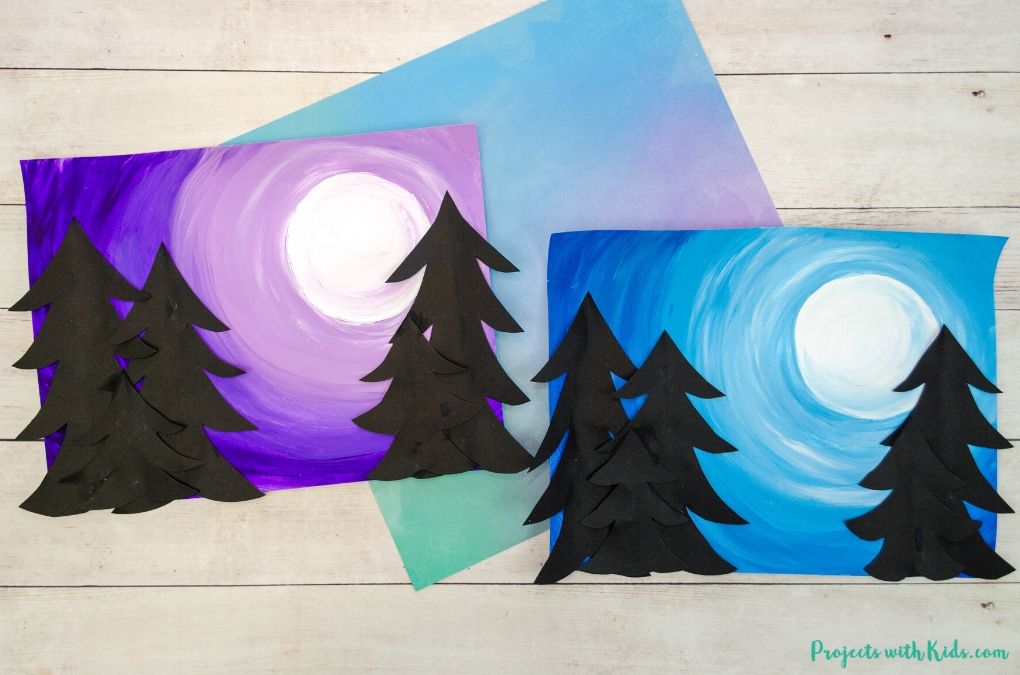
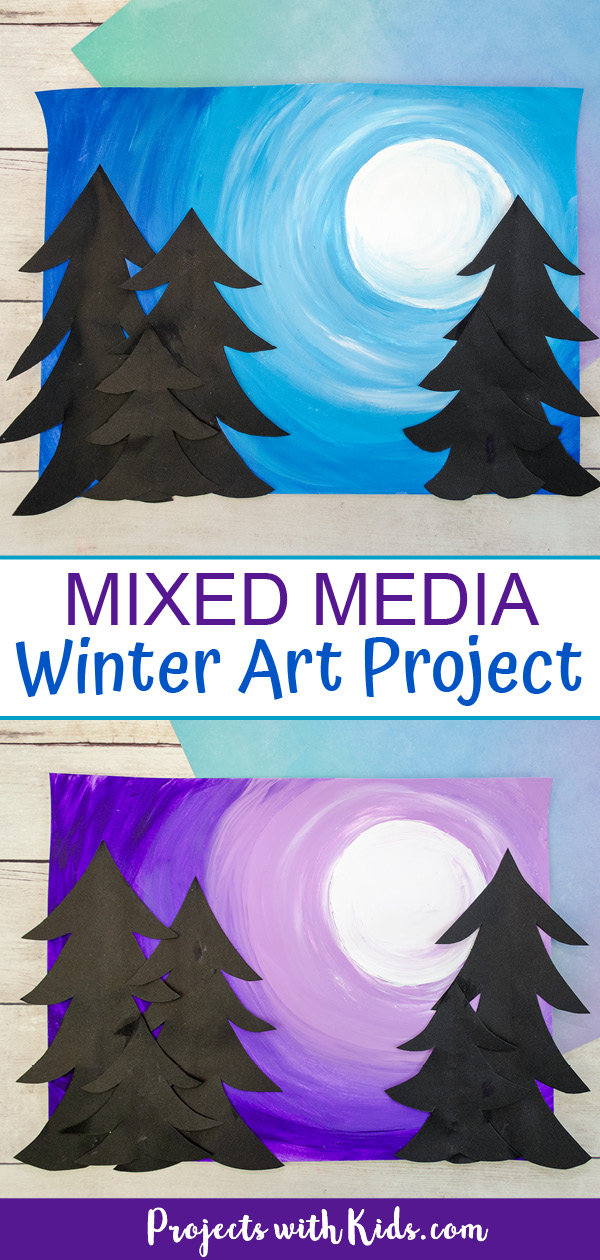
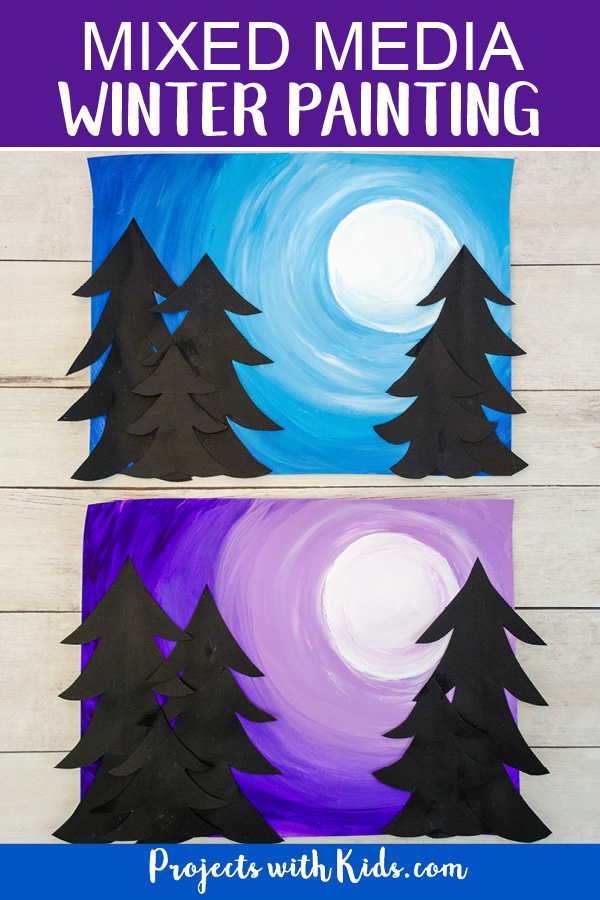
This mixed media winter art is a beautiful art project that kids can make using easy techniques and simple supplies. It’s also a great project for kids to experiment with blending colors together. It has a fun 3D element to it with paper evergreen trees that really pop off of the winter sky painting.
If you are looking for more winter project ideas take a look at my collection of beautiful winter art for kids to make!
We made a similar art project for Halloween, take a look at this Halloween art project with 3D paper bats for another fun idea!
Check out my collection of painting ideas for kids for more fun and creative art projects to try!
Create your own mixed media winter art
This post contains affiliate links. As an Amazon Associate, I earn from qualifying purchases. If you would like more information please review my privacy & disclosure policy.
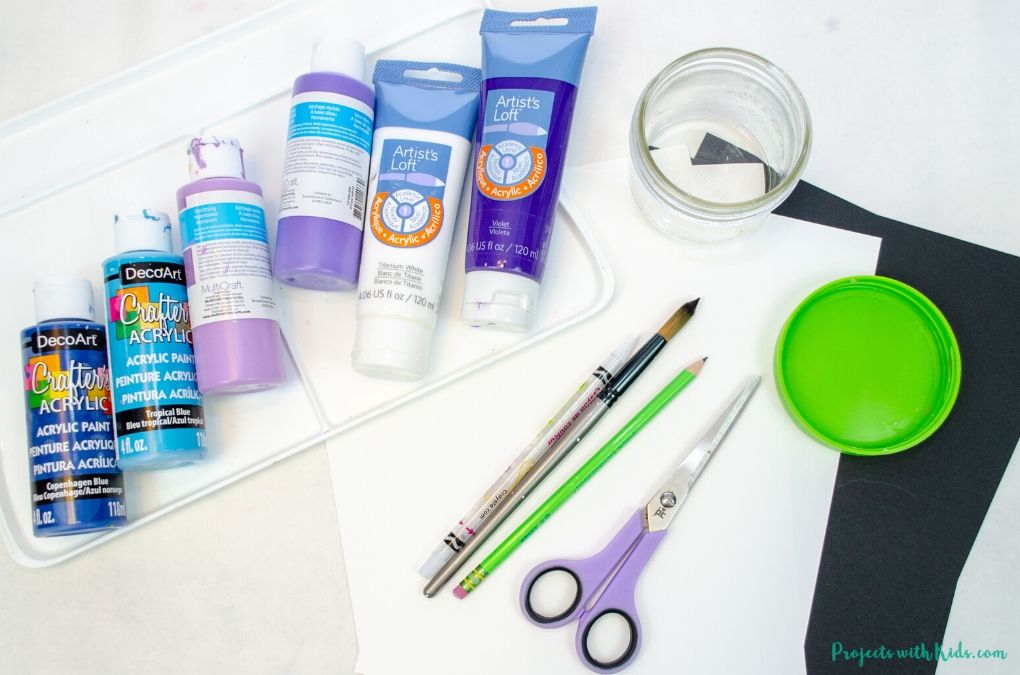
Supplies
- White cardstock
- Black cardstock or construction paper
- Acrylic paint
- Paint palette
- Paintbrushes
- Pencil and white pencil crayon
- Scissors
- Medium-sized plastic lid or cardboard template
Instructions to make your winter painting
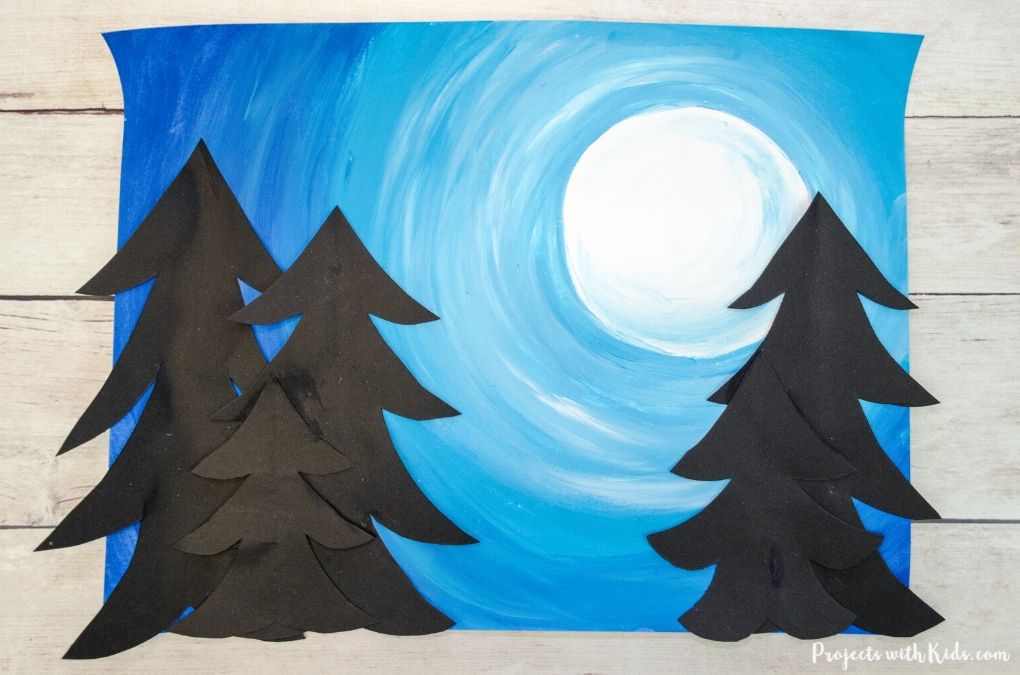
1. The first thing you want to do is draw a moon in the upper right corner of your paper. If you don’t have a plastic lid big enough, you can try using a mason jar, drinking glass or a cardboard template to draw your moon.
White cardstock works well for this project.
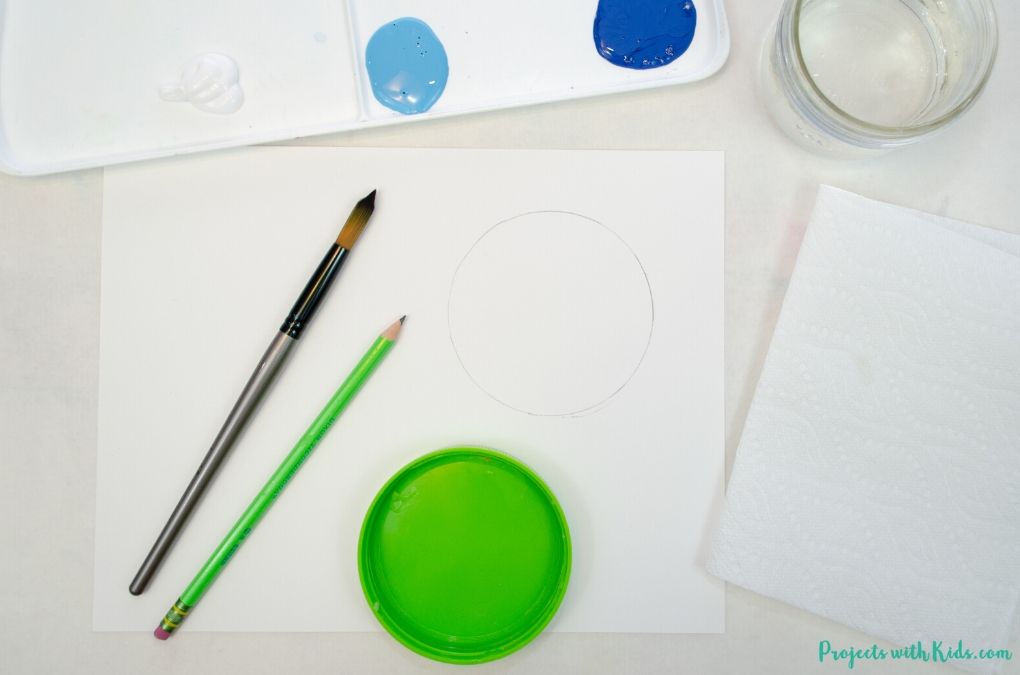
2. Get your paint ready. Use white acrylic for the moon and 2 – 3 shades of another color. We used shades of blue and purple in our examples.
You want a light shade and a darker shade, as you paint the colors will blend together creating more color variations.
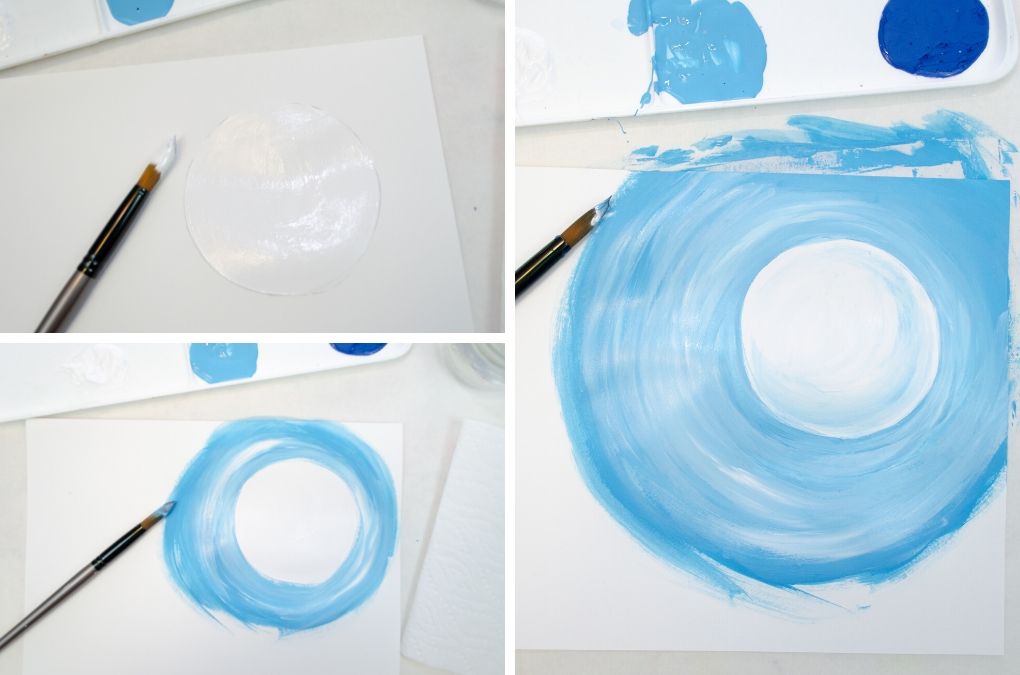
Paint the moon with white acrylic paint. Add a very small amount of your lightest shade to the bottom of the moon and blend it in. This adds just a bit of shading and dimension to the moon shape.
3. Start to paint your winter sky. Use the lightest shade of your color and paint around the moon. While the paint is still wet, add some white paint and blend together.
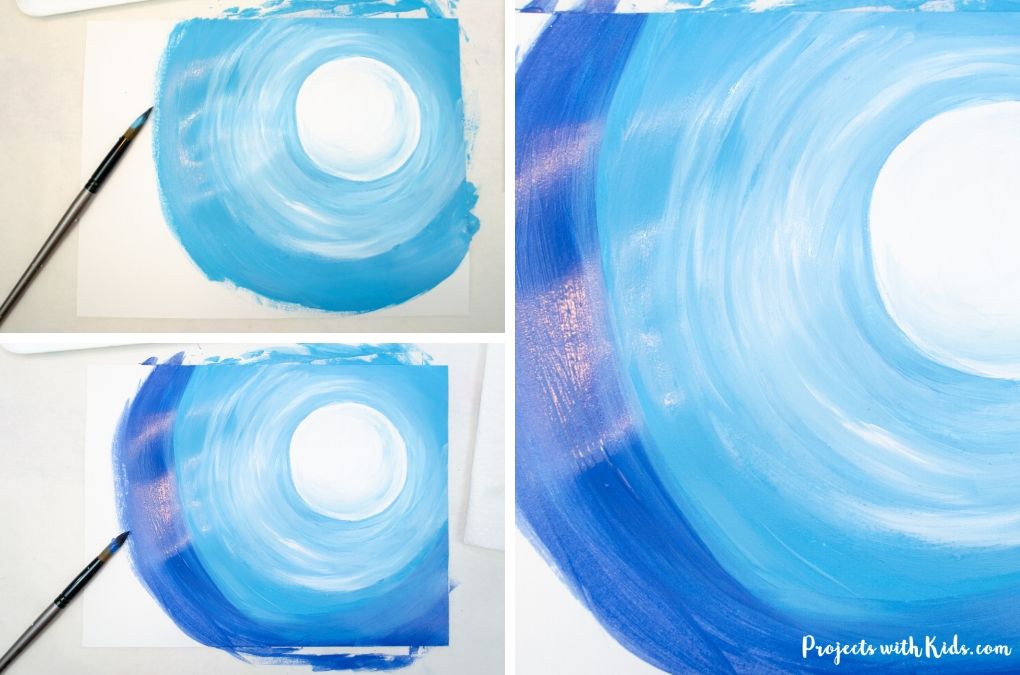
Continue painting around your moon in a circle, let kids explore blending the blue and white colors together.
4. Start to add in the darker shade and blend it with the lighter shade. Blending and mixing the colors, painting in a circular motion around the moon.
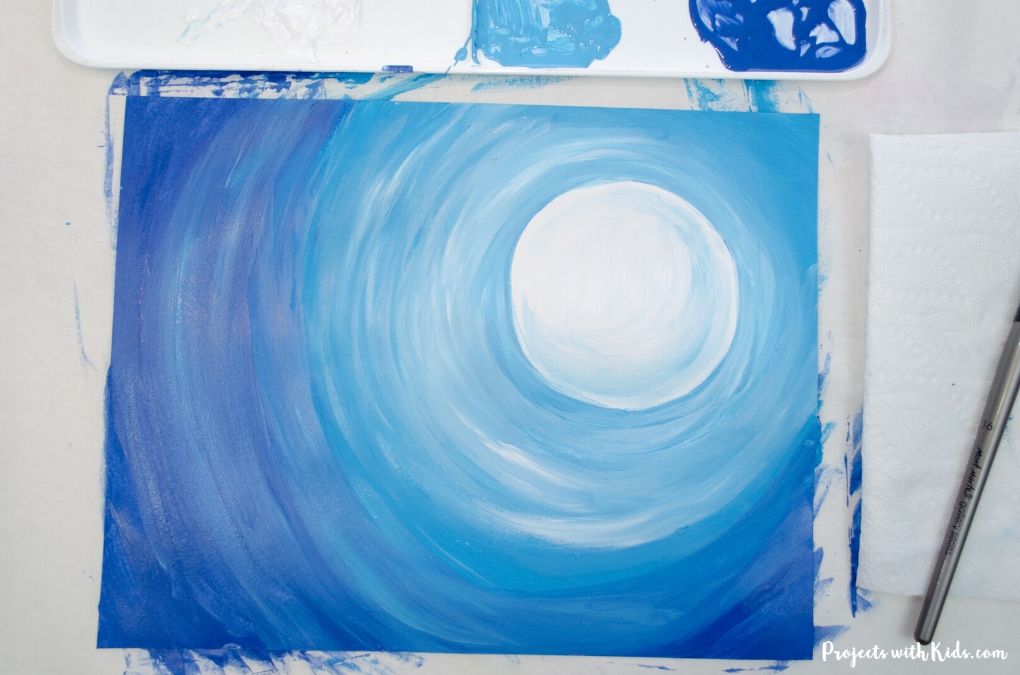
Keep painting with the darker shade until you finish painting the entire paper. So the lightest shades will be closest to the moon and the darkest shade will be at the other edge of your painting.
Let your paper dry completely.
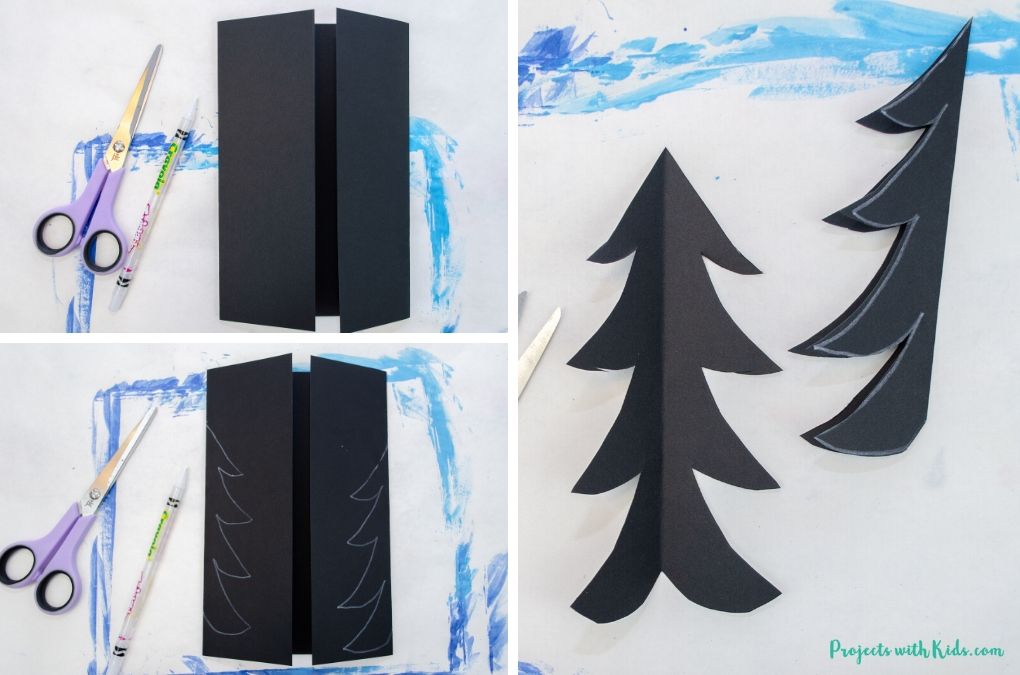
5. Time to make the evergreen trees! Take a sheet of black cardstock or construction paper and fold both sides in to meet in the middle like in the photo above.
Use a white pencil crayon or crayon to draw half of a tree on each folded side of your paper. These are evergreen trees and are an easy shape for kids to draw. You want a variety of sizes for your trees so make these ones taller.
Using this folding method makes it easier for kids to draw their trees and also will give you three trees per piece of paper.
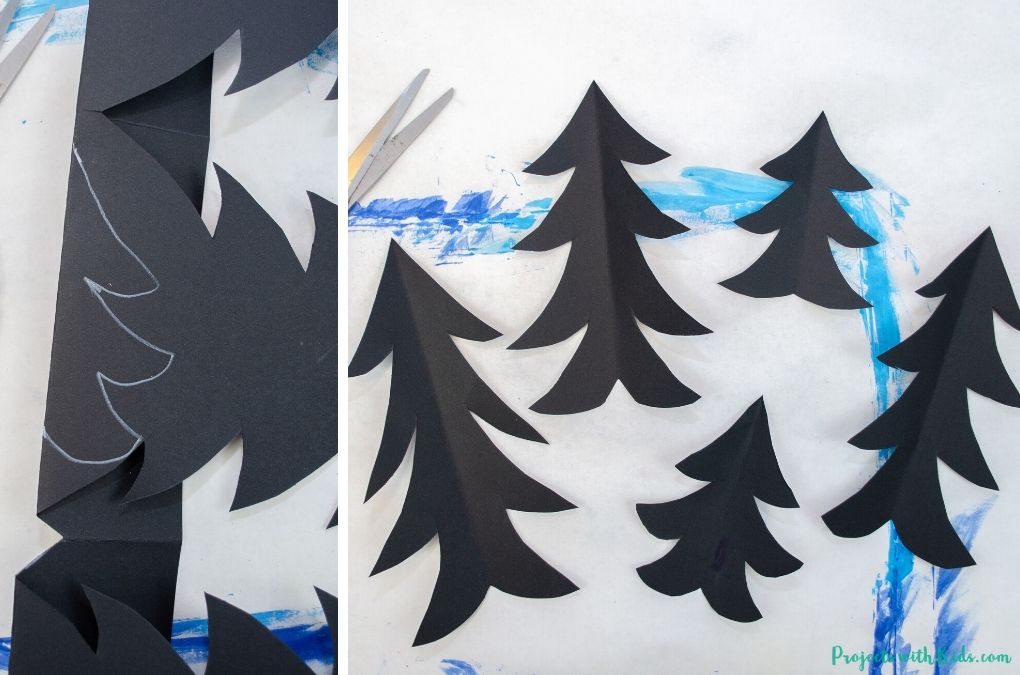
Cut out the trees and unfold them. Fold the paper again and draw a smaller tree. Continue folding, drawing and cutting out trees.
We used five trees per painting. Three bigger trees and two smaller ones. But kids can choose to use more or fewer trees for their painting.

6. Before gluing down your trees, arrange them onto your winter sky painting. Try overlapping them a bit to create some depth and interest.
Use white glue to glue your trees down to your painting. Keep the white glue in the center of your trees so that the edges of the trees pop out a bit from your painting giving it a cool 3D look!
This mixed media winter art is such a pretty painting for kids to make with a fun 3D element. It’s a great way for kids to experiment with blending colors together and adding in a mixed media element to their artwork.
We love creating and exploring with different art supplies and techniques. If you are looking for more art projects to try, take a look at our ultimate collection of amazing art projects for kids!
More art projects kids will love
The Cutest Polar Bear Winter Painting for Kids to Make

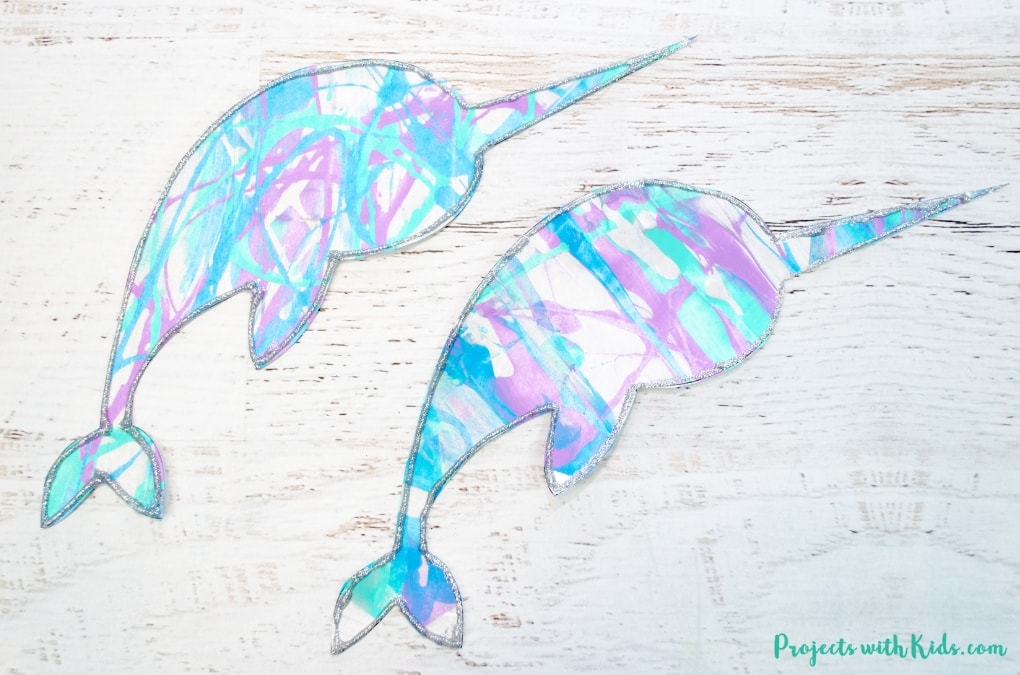
Winter Scrape Painting with Narwhal Printable
Follow me on Pinterest for more amazing project ideas.
Pin this winter art for later
Mixed Media Winter Art Project for Kids

Create beautiful mixed media winter art with easy techniques and simple supplies. A fun winter art project that kids will love to create!
Materials
- White cardstock
- Black cardstock or construction paper
- Acrylic paint
- Pencil and white pencil crayon or crayon
Tools
- Paint palette
- Paintbrushes
- Scissors
- Medium-sized plastic lid or cardboard template
Instructions
- First, draw a moon onto white cardstock. Use a bigger lid, mason jar or cardboard template to draw a moon in the upper right corner of your paper.
- Get your acrylic paint ready, you will need white and 2 - 3 shades of the same color. We used shades of blue and shades of purple for our examples.
Paint the moon white and while the paint is still wet add a small amount of your lightest shade to the bottom of your moon. Blend it in to create a slight shadow. - Paint with your lightest color around the moon, add in some white paint and blend these colors together. Let kids experiment with adding on the lighter shade and some white and blending the two colors together.
- Start to add in your darker shade and blend that with the light color. Continue adding in the darker shade to finish your night sky painting.
So the colors around the moon will be lighter and as you move away from the moon the colors get darker. - Use black cardstock or construction paper to make your evergreen trees. Fold the sides of each piece of paper into the middle. On each folded side, have kids draw one half of an evergreen tree, like in the photo above. Using a white pencil crayon or crayon will make it easier to see.
Cut out the trees and take that paper, fold it again and draw a smaller tree and cut it out.
For our paintings, there were three larger trees and two smaller ones, but kids can choose to make more or less for their painting. - Arrange the trees on your winter sky painting before gluing them down to make sure you are happy with the placement.
Use white glue down the center of each tree to glue them down, leave glue off of the edges to add a cool 3D effect.


