


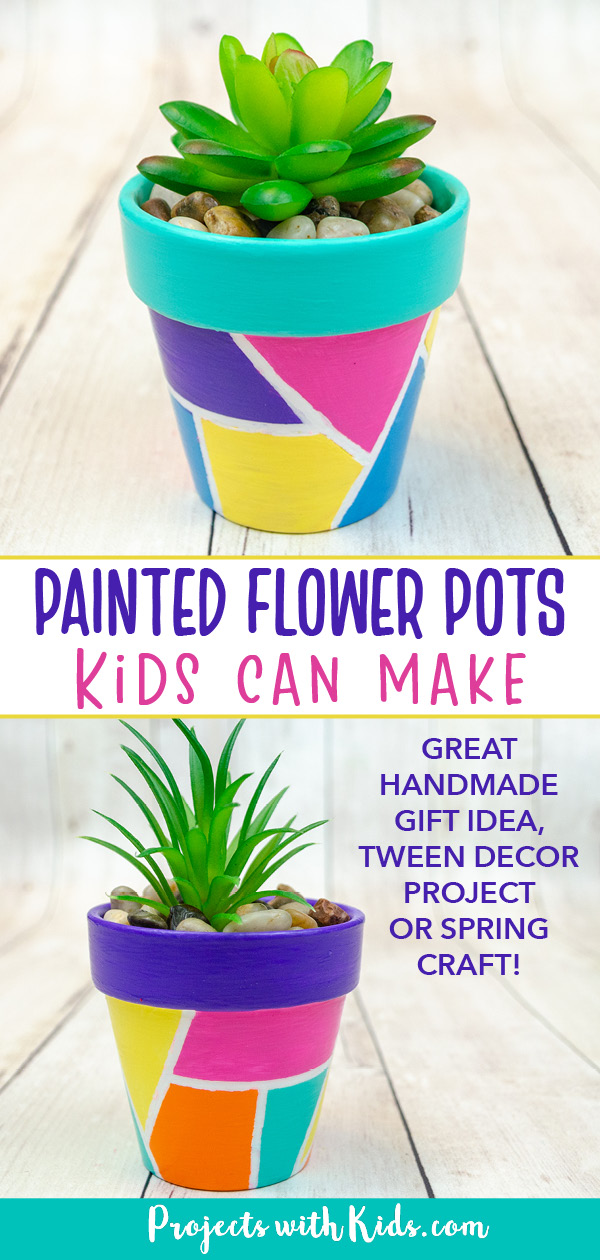
These geometric painted flower pots are so cute and colorful! They make a great handmade gift idea that would be perfect for Mother’s Day, a fun tween or teen decor idea, or an easy spring or summer craft project. They are easy to make and would work well with different sizes of pots.
If you are looking for more painted flower pot ideas, take a look at these 15+ awesome flower pot painting ideas that kids will love to make!

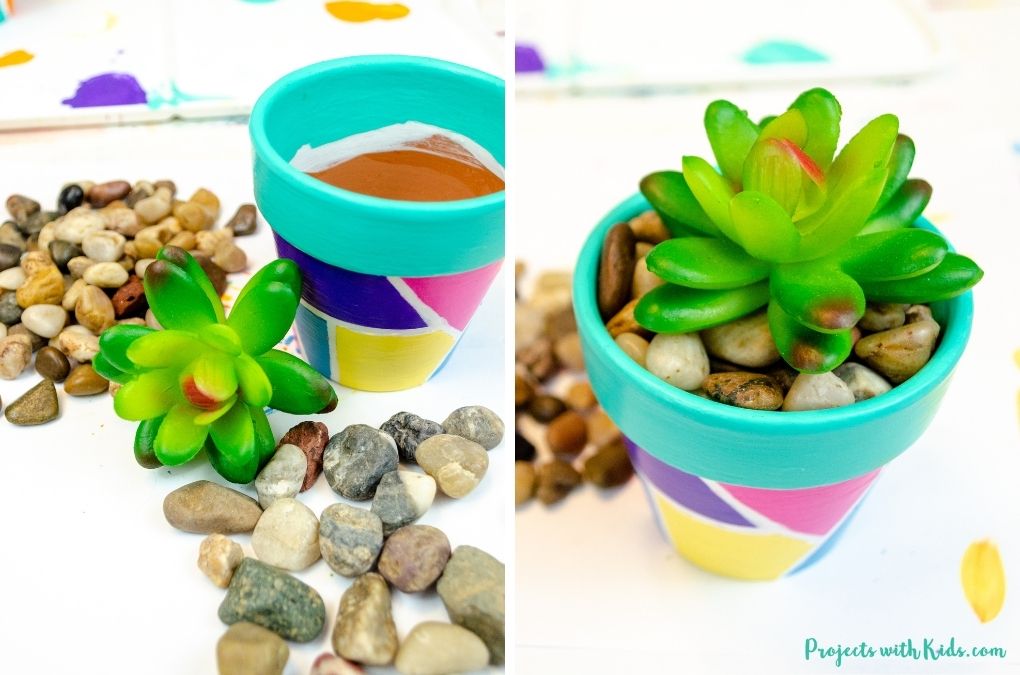
You don’t need any special paint for this project, just regular acrylic paint and a sealer like Mod Podge works great. I filled these pots with fake succulents and rocks, if you are going to use real plants you would need to have a plant tray underneath.
Create your own geometric painted flower pots
This post contains affiliate links. As an Amazon Associate, I earn from qualifying purchases. If you would like more information please review my privacy & disclosure policy.
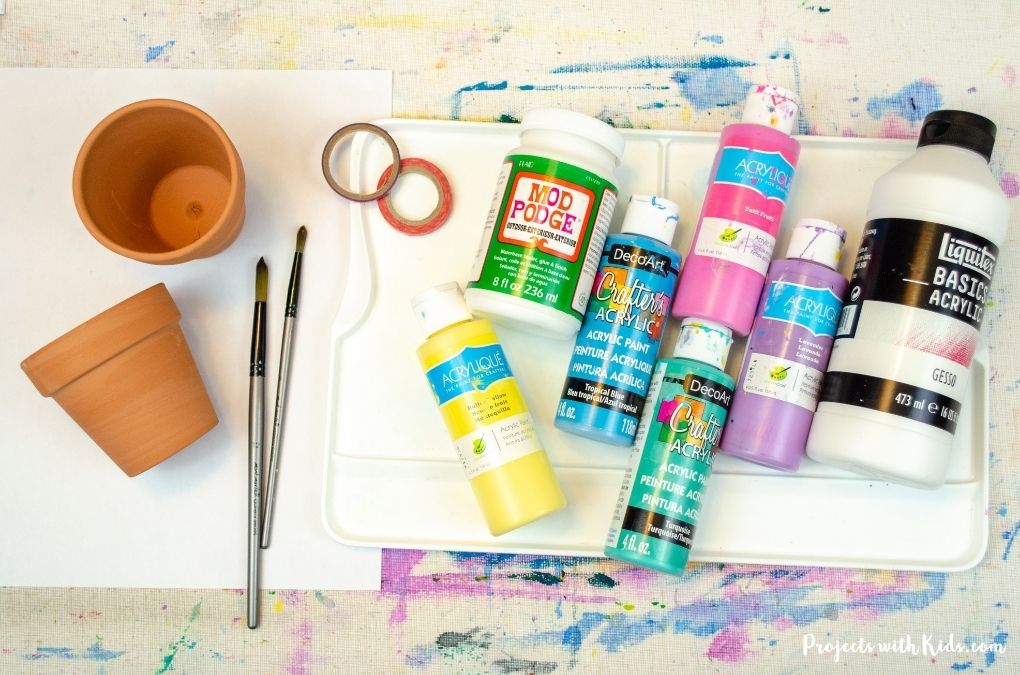
Supplies
- Terra cotta pots (I used 3 inch pots, but you could also use a bigger size)
- Acrylic paint
- Acrylic gesso
- Mod Podge (outdoor Mod Podge if these will be used outside)
- Thin washi tape
- Paintbrushes
- Scissors
- Paint palette and water dish
- White medium point paint pen (optional, but great for touch-ups!)
- Rocks and fake succulents (if you are using fake plants)
Instructions for your painted flower pots
1. First, paint your terra cotta pot with two coats of gesso. These types of flower pots really soak up the paint and painting on the gesso first will help with that. If you don’t have any gesso, you can try painting on a couple of coats of white acrylic paint to start.
Let your flower pot dry completely before moving on.
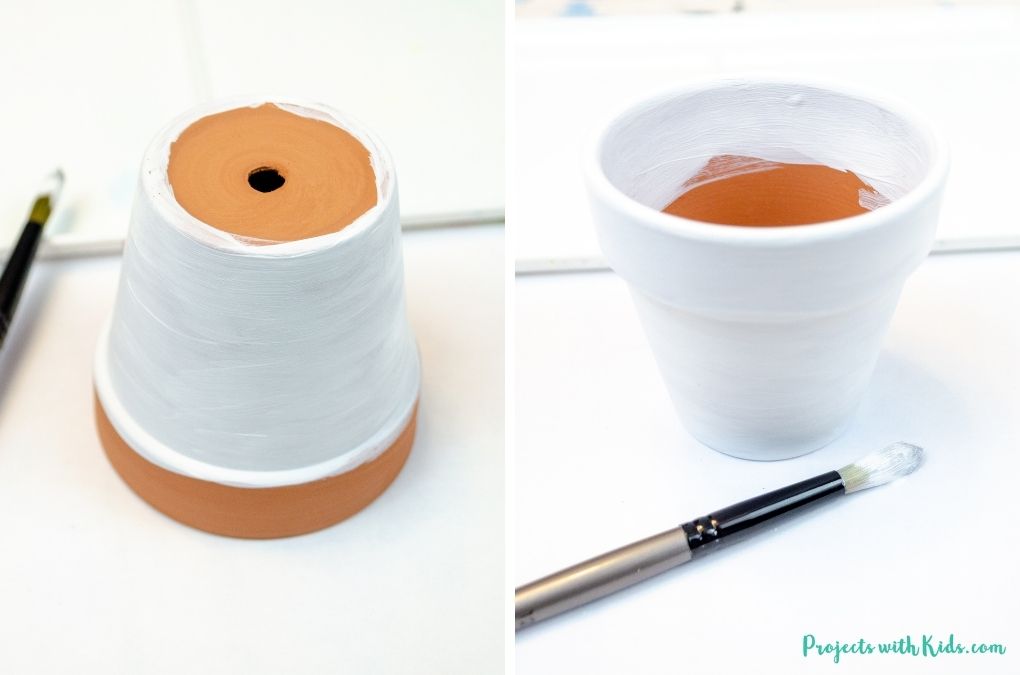
I used 3 inch mini pots for this project, but this idea will work with any size of flower pot.
2. Use a thin washi tape to tape off sections on your flower pot. Make sure to press the tape down so the paint will not leak underneath. If you are using a larger size pot, you can use a thicker tape.
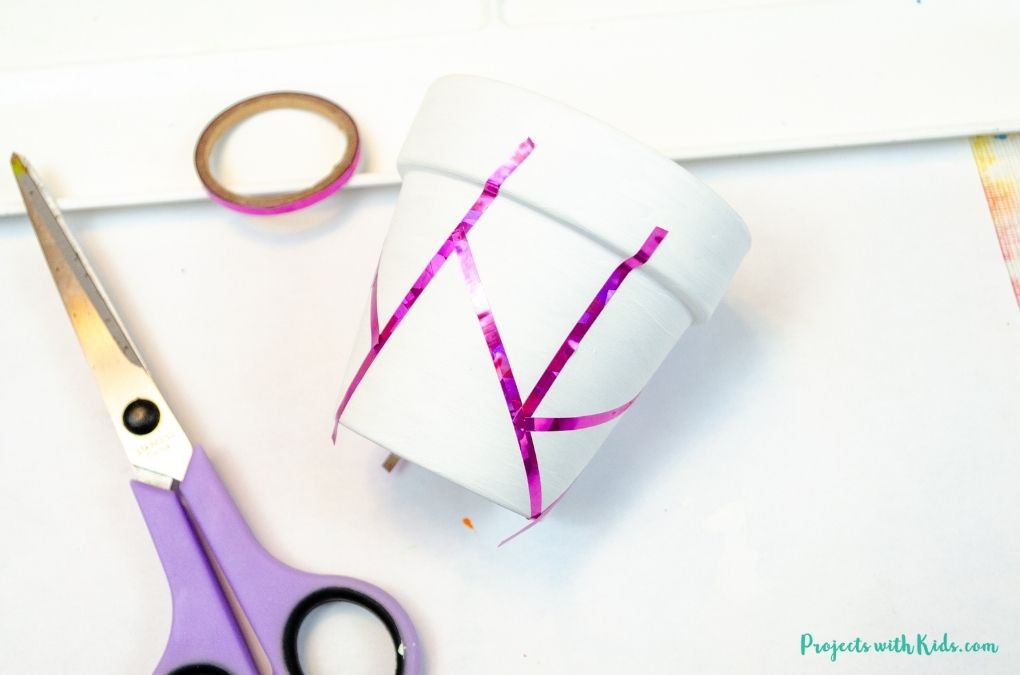
You don’t need to tape off the top part, that will be painted a solid color after.
3. Carefully paint each section of your pot with different colors of acrylic paint. Using a small detail brush will help make this easier for kids.
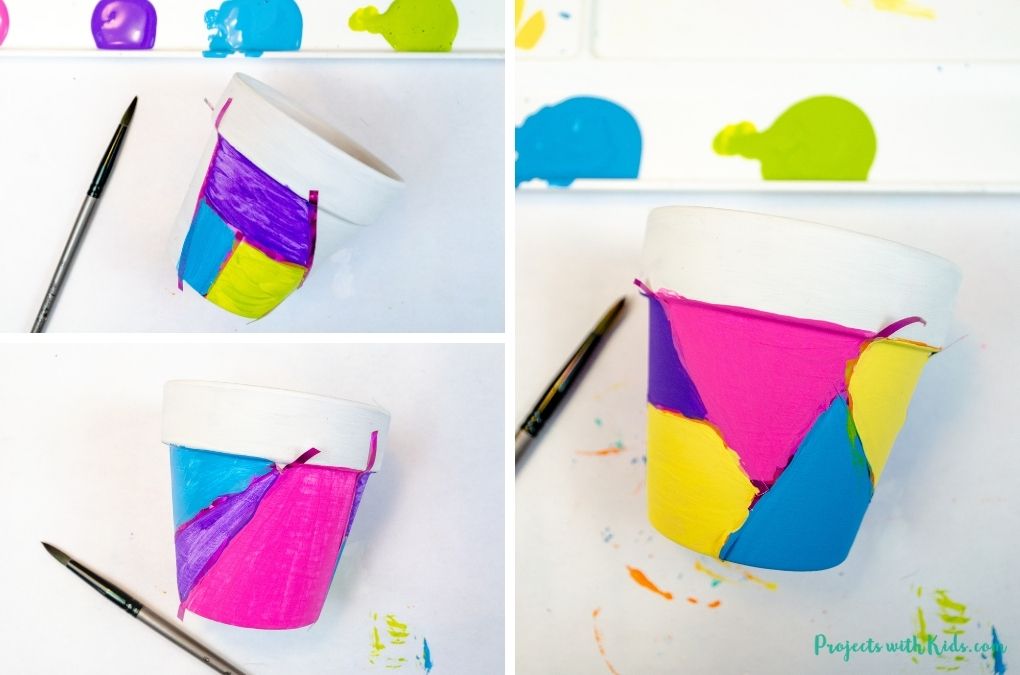
Let the paint dry and then paint on a second coat.
4. Once your paint is dry, carefully peel off the tape. If some of the paint has leaked through, you can easily do touch-ups with a white paint pen.
If you don’t have a paint pen, try using a small detail brush and some white paint.

5. Paint the top of your flower pot with 2 coats of a solid color letting each coat dry in between.
6. Paint your entire finished pot with two coats of Mod Podge to seal and protect everything. Let each coat completely dry in between.
If you are going to be keeping your flower pot inside, you can just use regular Mod Podge, if your flower pot will be outside, you can use outdoor Mod Podge to protect it.
7. The last step is to fill your flower pot. You can use rocks and fake succulents like in my examples or a real plant or flower. If you do use a real plant, make sure there is a plant tray underneath to catch any water drips.
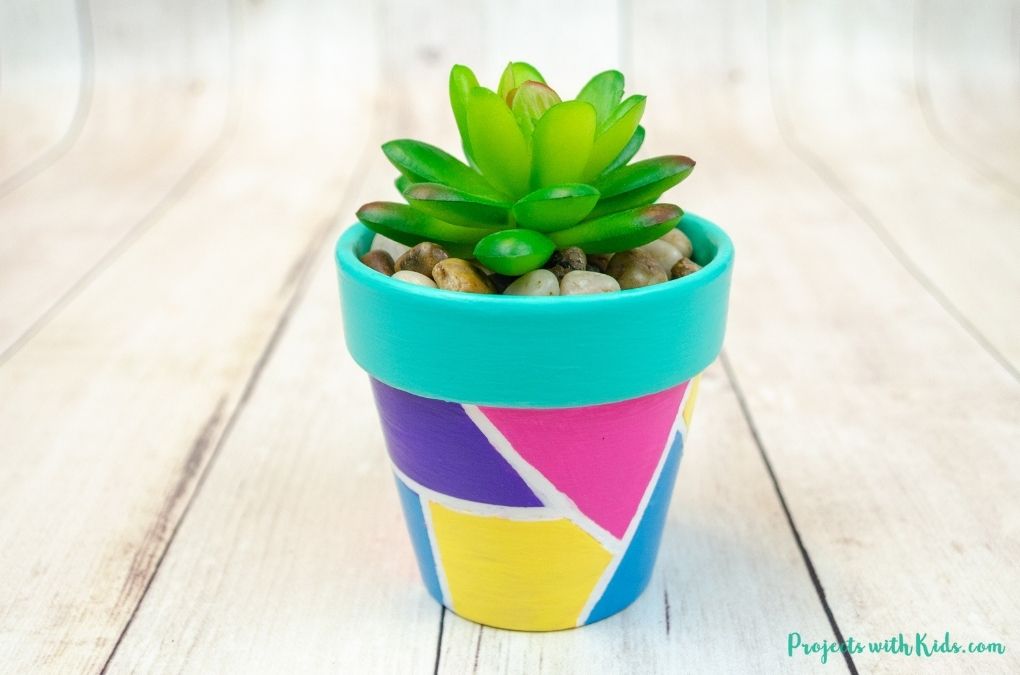
These geometric painted flower pots are adorable and fun for kids to make!
More craft projects kids will love
Easy Painted Fairy Houses for the Garden


Follow me on Pinterest for more amazing project ideas.
Pin this craft for later
Make Easy Geometric Painted Flower Pots

Kids of all ages can make these easy geometric painted flower pots! A great handmade gift idea, and spring or summer craft.
Materials
- Terra cotta pots (I used 3 inch pots, but you could also use a bigger size)
- Acrylic paint
- Acrylic gesso
- Mod Podge (outdoor Mod Podge if these will be used outside)
- Thin washi tape
- White medium point paint pen (optional, but great for touch-ups!)
- Rocks and fake succulents (if you are using fake plants)
Tools
- Paintbrushes
- Scissors
Instructions
- Paint your terra cotta pot with two coats of acrylic gesso, letting each coat dry in between. If you don't have any gesso, you can use white acrylic paint.
- Use thin washi tape to tape off sections of your plant pot. You do not need to tape the top part of your pot. Press the tape down firmly to minimize the paint leaking underneath.
- Paint each section with acrylic paint. Use a small brush and paint slowly and carefully. Let this first coat dry and then paint on a second coat.
- When your paint is completely dry, carefully peel off the tape. If some of the paint has leaked through, you can use a white paint pen for touch ups. If you don't have a paint pen, try using a small detail brush and white acrylic paint.
- Paint the top section of your plant pot with two coats of acrylic paint and let everything dry completely.
- Paint on two coats of Mod Podge to seal and protect everything. Let each coat dry completely. If you are going to be using this outside, you can use an outdoor Mod Podge.
- Fill your painted flower pot with rocks and a fake plant or try using a real succulent. If you are going to use a real plant, make sure to put a plant tray underneath to catch any water drips.


