
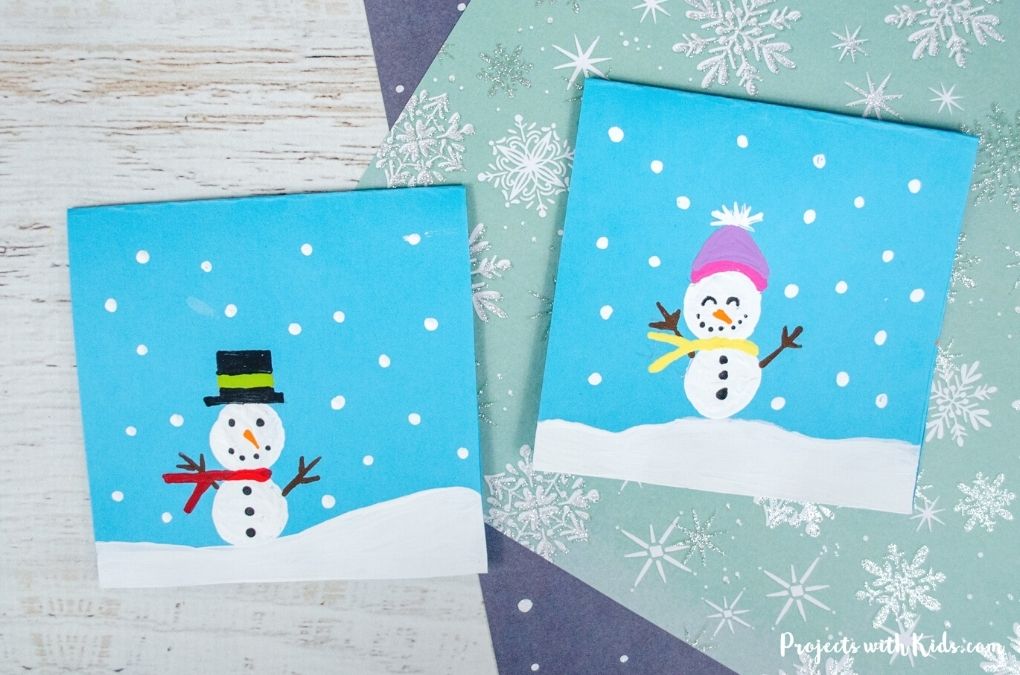
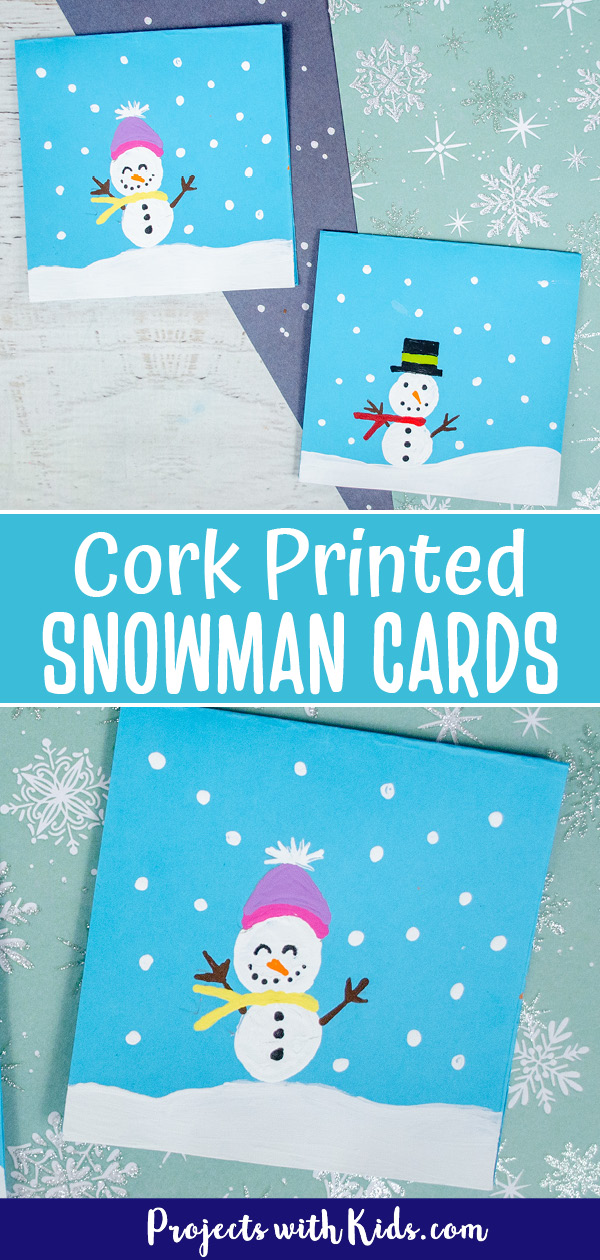
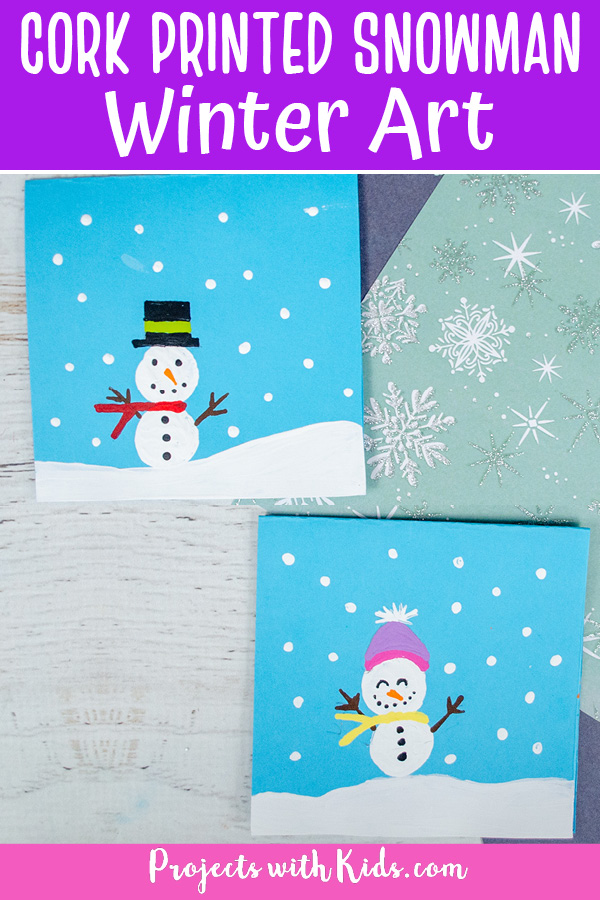
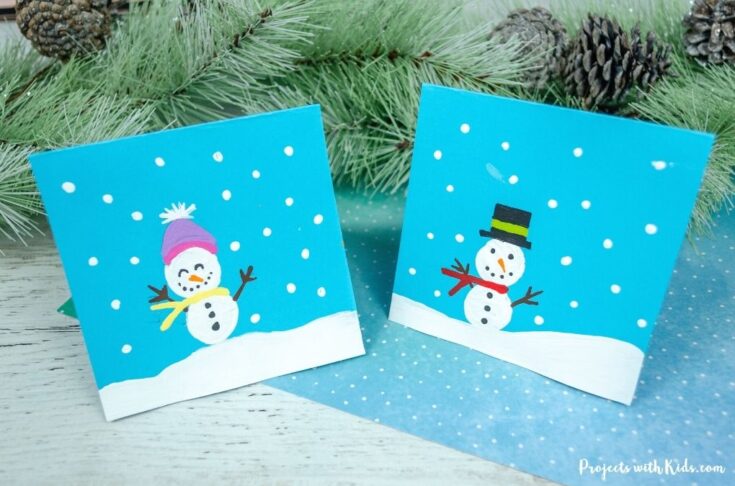
This cork printed snowman card is so cute and fun for kids to make! This idea can be used for handmade Christmas cards and tags or you can use it for a winter art project. Kids will love to dress up their snowman and put their own unique twist on this painting idea.
If you are looking for more winter project ideas take a look at my collection of beautiful winter art for kids to make!
Using a cork to make the snowman’s body makes it easy for kids to make a circle. A cork is a perfect size for these adorable mini snowmen. Kids could even make a whole snowman family!
We love snowman crafts! Take a look at this winter snow globe craft with chalk pastels and this egg carton snowman craft ornament for more fun ideas!
Create your own cork printed snowman card
This post contains affiliate links. As an Amazon Associate, I earn from qualifying purchases. If you would like more information please review my privacy & disclosure policy.
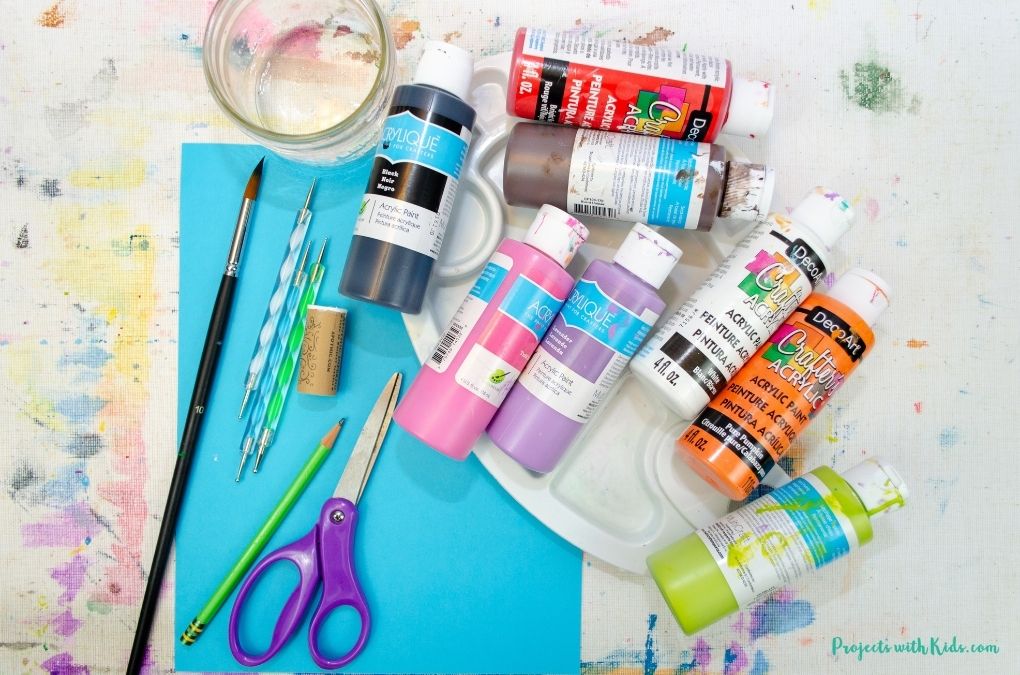
Supplies
- Blue cardstock
- Acrylic paint
- 1 cork
- Paintbrushes
- Dotting tools (optional)
- Pencil and eraser
- Paint palette and water dish
- Scissors
- Paper towels
Instructions to make your snowman painting
1. If you are going to be using this painting idea for cards or gift tags, cut your blue cardstock to size. Our cards measured 4.25 inches X 4.25 inches when folded.
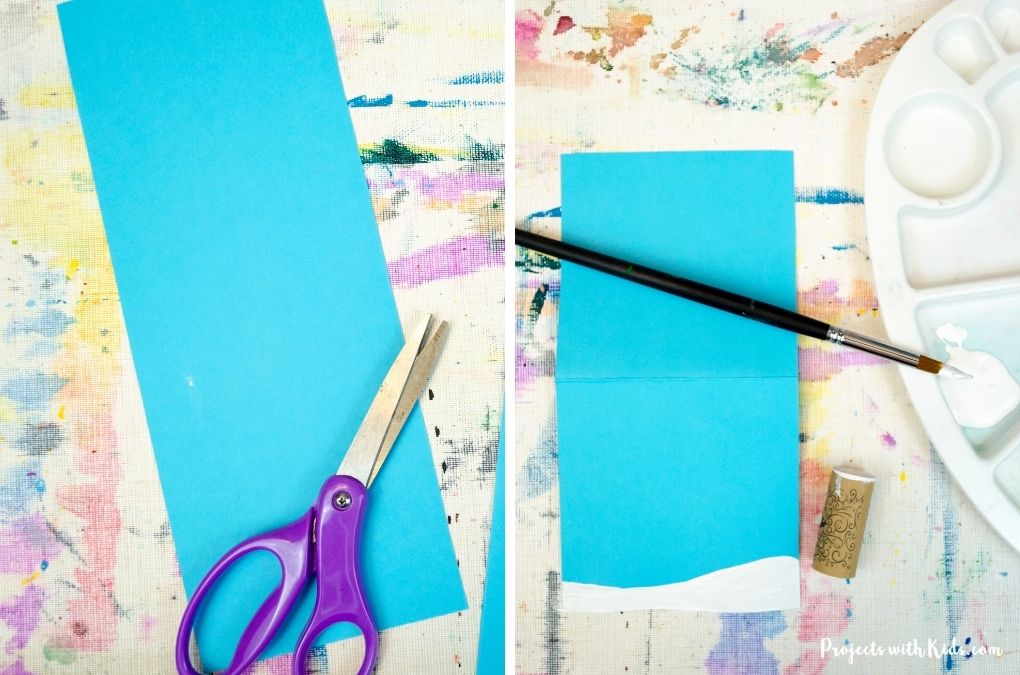
If you are making this into a winter art project, you can use any size you like depending on how many cork printed snowman kids want to make on their painting. A family of snowman would be cute!
2. Draw out a small hill of snow on the bottom of your card and paint it white using acrylic paint.
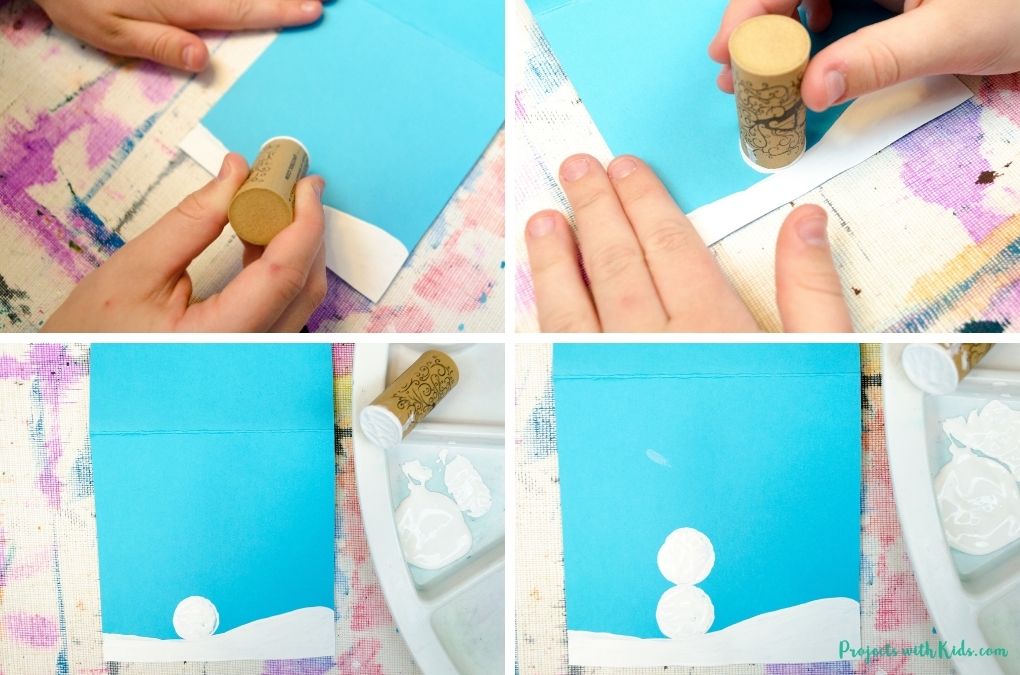
3. Dip a cork into white acrylic paint and press it down on your paper, lifting it up carefully. Remind kids not to move the cork around or the snowman will look smudgy.
Make one more cork print for the top of the snowman. Let everything dry before moving on to the next step.
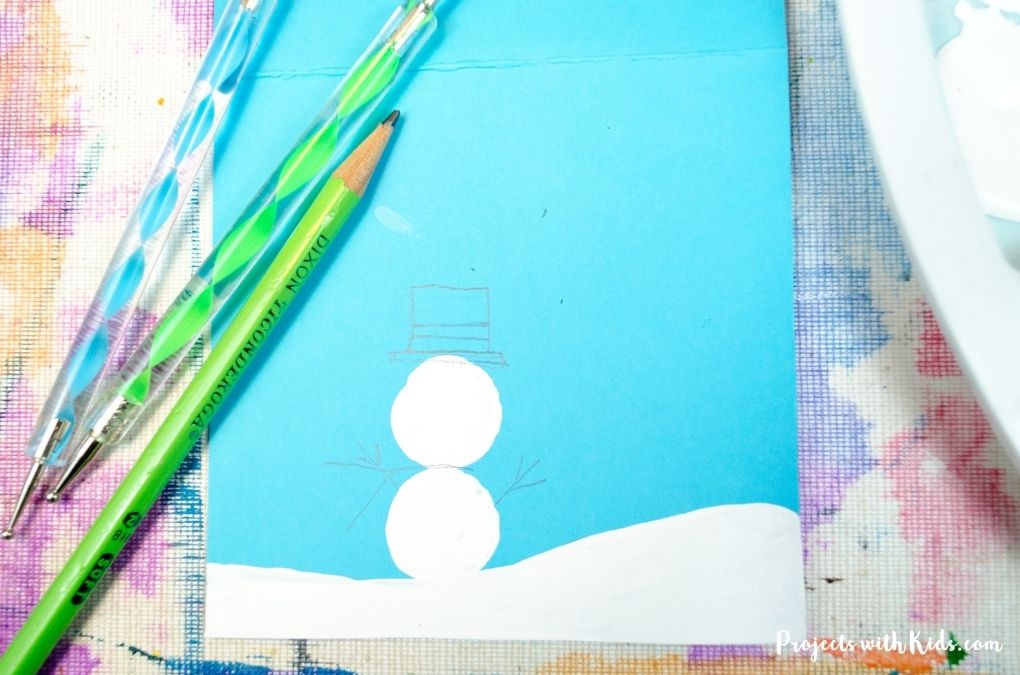
4. Draw on a hat, toque or earmuffs, branches for arms, and a scarf onto your snowman with a pencil. Kids can choose the type of hat they want to draw, a simple hat works best.
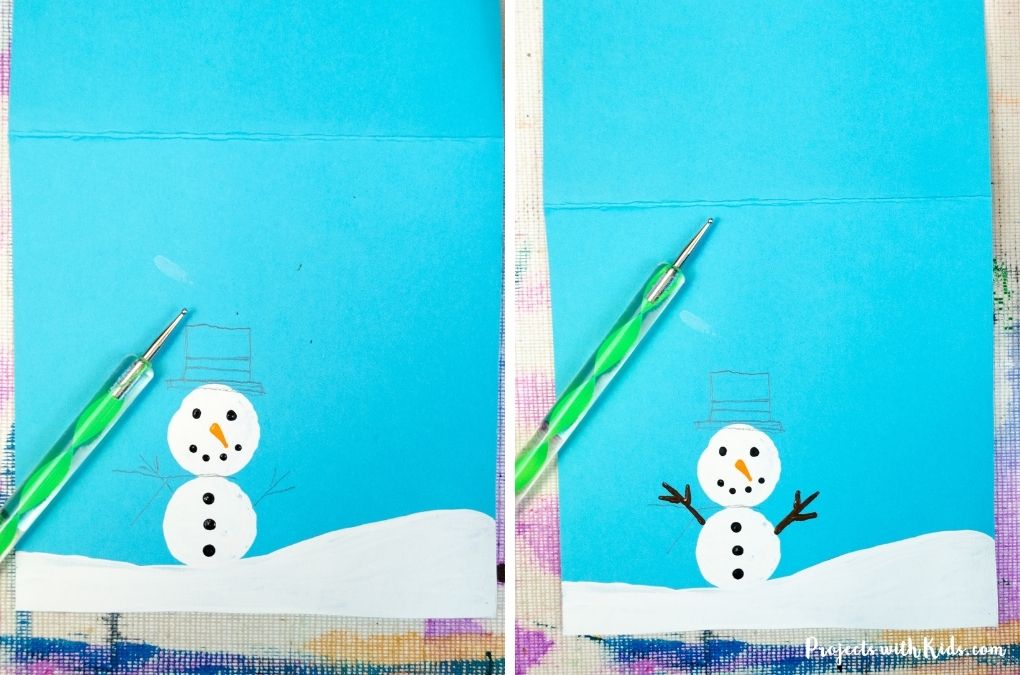
5. Use a dotting tool to paint in the snowman’s eyes, nose, mouth, arms, and buttons. I found that a dotting tool works really well for kids to add in these details. If you don’t have a dotting tool, you can use the end of a small paintbrush instead.
Simply dip the end of a paintbrush or dotting tool into the paint and carefully add in the snowman’s face and arms. Make sure to wipe off the end with a paper towel before switching colors. Let everything dry.
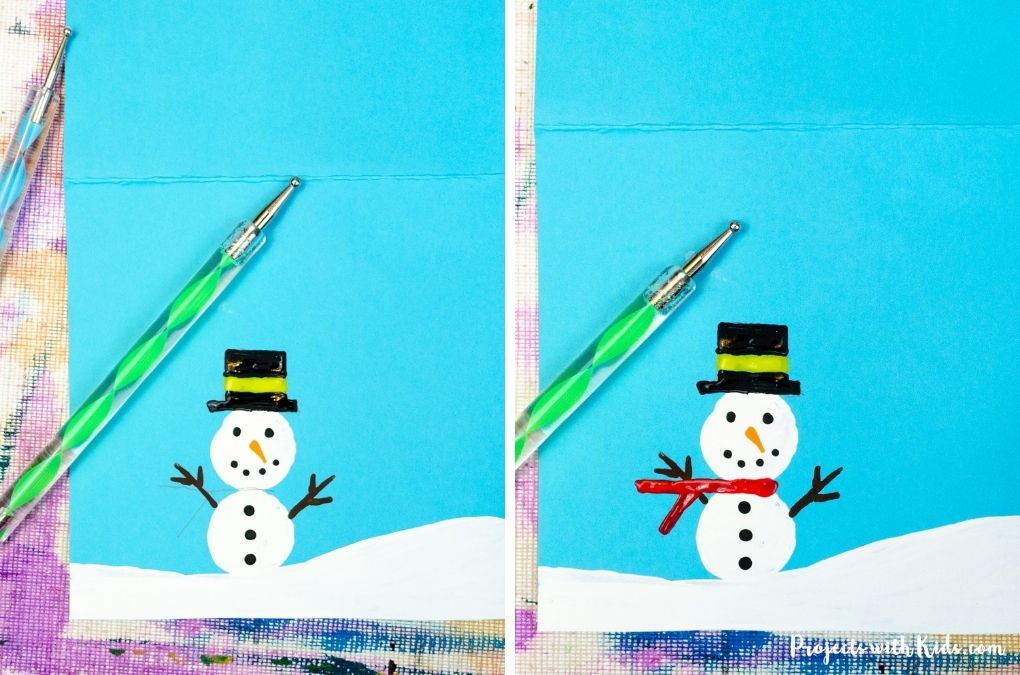
6. Paint in the hat (or earmuffs) and scarf on your snowman. Use a dotting tool or the end of a paintbrush for this step as well. Make sure everything is dry before moving on.
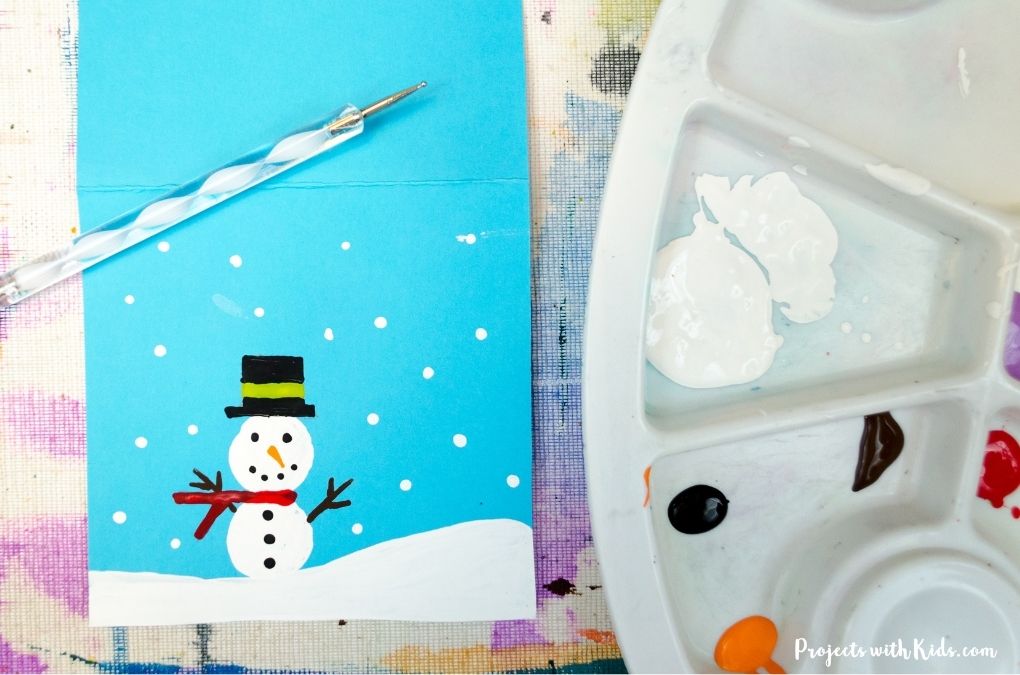
7. For the final step, dot on some snow with white paint.
Have kids sign and date the back of the card with a marker.

These snowman cards are so fun and cute, each one will be unique. Kids will want to make more than one! This painting idea makes a great handmade Christmas card idea or winter art project.
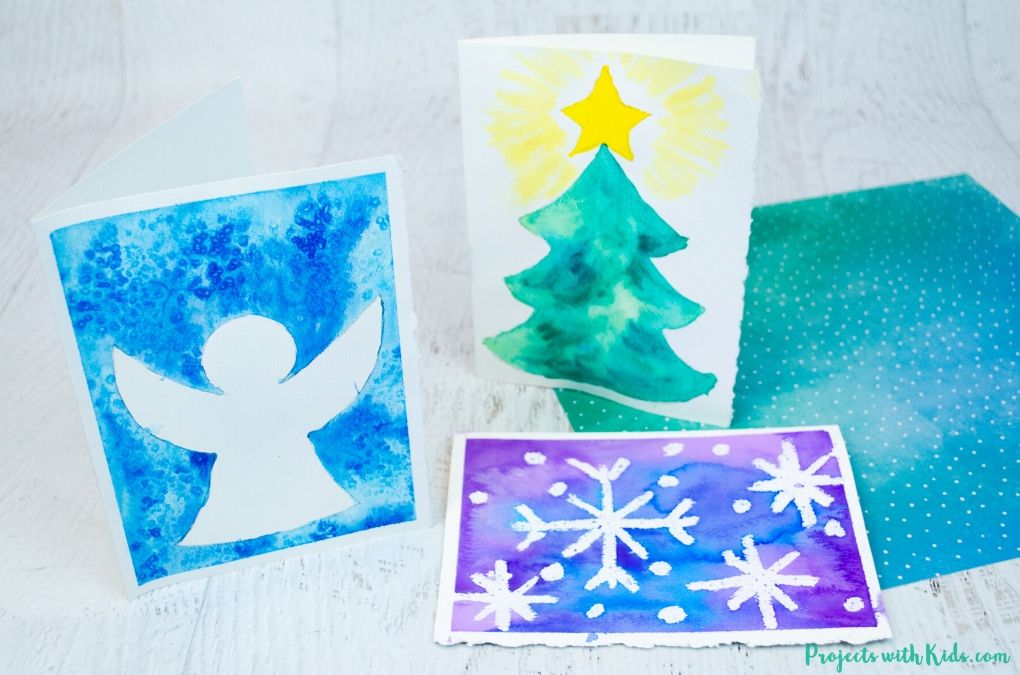
More Christmas card ideas kids will love
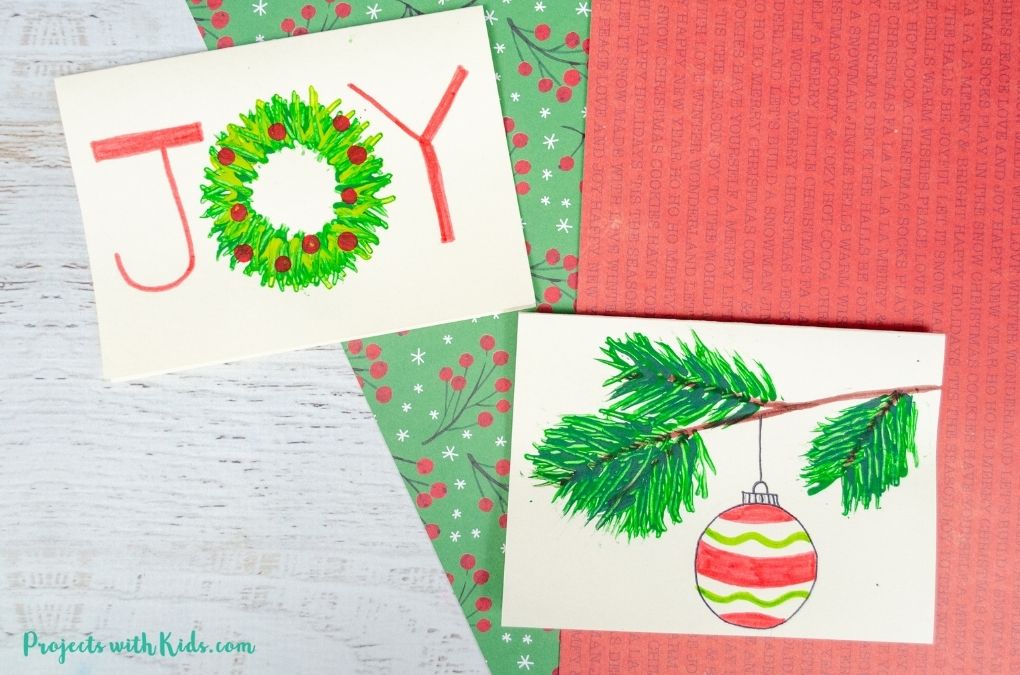
Easy Watercolor Christmas Cards
Follow me on Pinterest for more amazing project ideas.
Pin this painting idea for later
How to Make an Adorable Cork Printed Snowman Card
Make this adorable cork printed snowman card with kids using only a few simple supplies. This painting idea also makes a great winter art project!
Materials
- Blue cardstock
- Acrylic paint
- Pencil and eraser
- Paper towels
Tools
- 1 cork
- Paintbrushes
- Dotting tools (optional)
- Paint palette and water dish
- Scissors
Instructions
- First, cut your blue cardstock to size. Our cards measured 4.25 inches X 4.25 inches when folded. If you are making a winter painting, you do not need to fold your paper.
- Draw a small snow hill with a pencil at the bottom of your paper and paint it with white acrylic paint.
- Take a cork and dip it into white acrylic paint, press it onto the paper at the bottom where your snow hill is. Gently lift the cork off the paper to reveal the bottom of your snowman.
Make another cork print on top for the top of your snowman.
Let everything dry before moving on. - Use a pencil to draw on a hat, toque or earmuffs, branches for arms, and a scarf.
- Paint in the snowman's face details and the arms using a dotting tool. I have found a dotting tool is great for adding small details. If you don't have any dotting tools, try using the end of a small paintbrush.
Make sure everything is dry before moving on. - Paint in the hat or earmuffs and scarf on your snowman using a dotting tool. Kids can choose the colors they want, making each snowman unique!
- Add in the snow with white acrylic paint and a dotting tool to finish your snowman painting.
Have kids sign and date the back of the card or painting.


