These fork painted Christmas cards are just gorgeous! Using a fork to create the texture of the branches and wreath is a fun and easy process that kids will enjoy. You only need a few simple supplies for this Christmas art project that is perfect for kids to make for family and friends.
If you are looking for more Christmas projects for kids to make take a look at our collection of creative Christmas arts and crafts for more fun ideas!
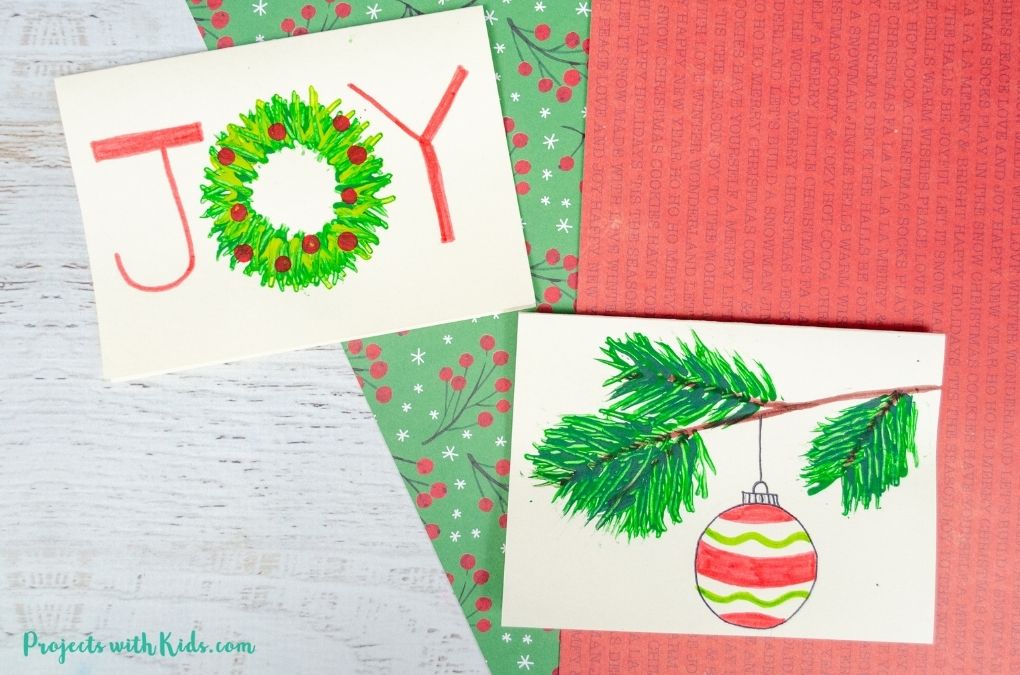
This is a fun handmade Christmas card idea that is great for older kids and tweens. Kids can make each card unique by drawing and coloring different designs for the Christmas ornament and printing the letters in their own style.
Fork painting is a fun process that kids enjoy, it creates different textures and designs in the paint and is a new and different way to explore creating art! Take a look at this Van Gogh inspired painting using forks for another fun idea.
Create your own fork painted Christmas cards
This post contains affiliate links. As an Amazon Associate, I earn from qualifying purchases. If you would like more information please review my privacy & disclosure policy.
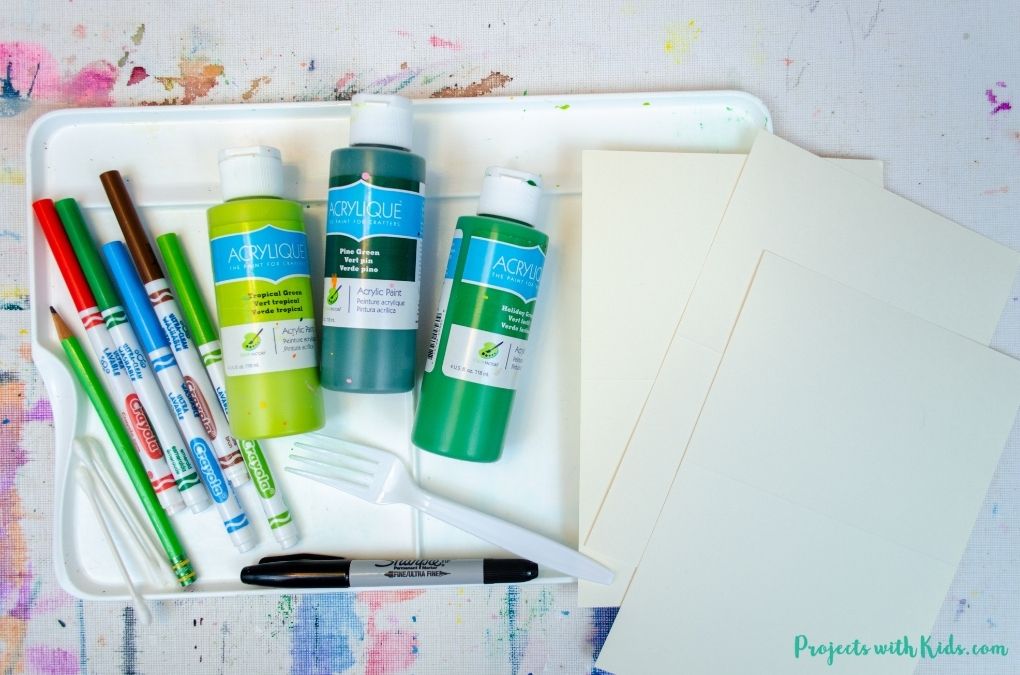
Supplies
- Acrylic Paint in bright green, light green, dark green, and red
- Markers
- Plastic fork
- Q-tip or the end of a small paintbrush
- Cardstock or pre-folded blank cards in white or cream
- Pencil & eraser
- Paint palette & water dish
How to make a fork painted wreath Christmas card
1. I used pre-made blank cards for this project, if you don’t have pre-made cards you can use cardstock and cut and fold them to the size you want. The cards I made were 4.5 inches by 6 inches.
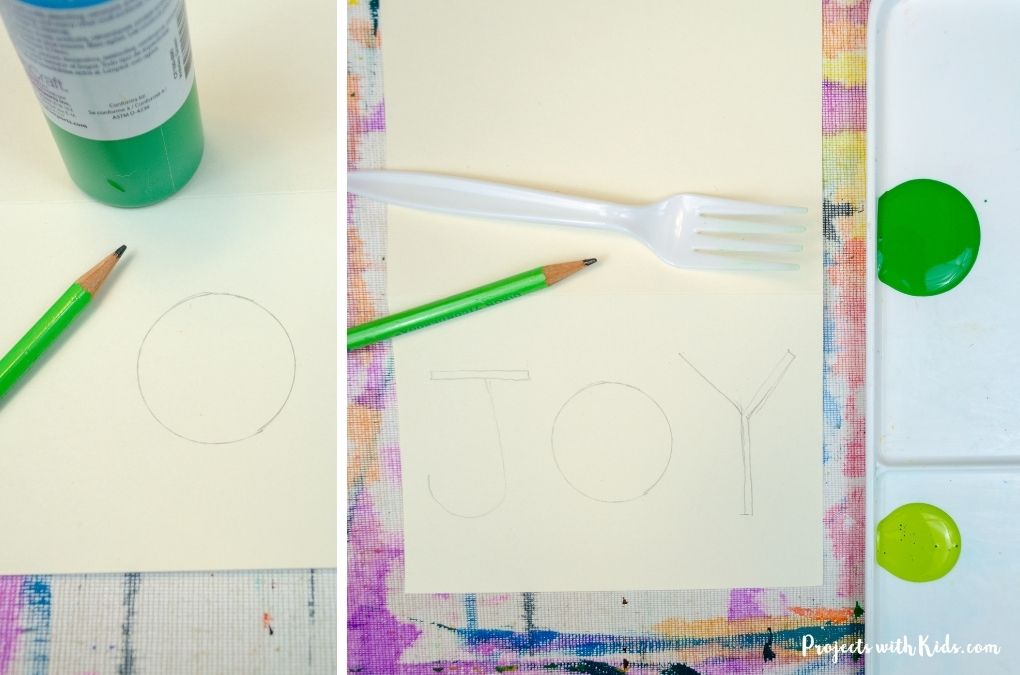
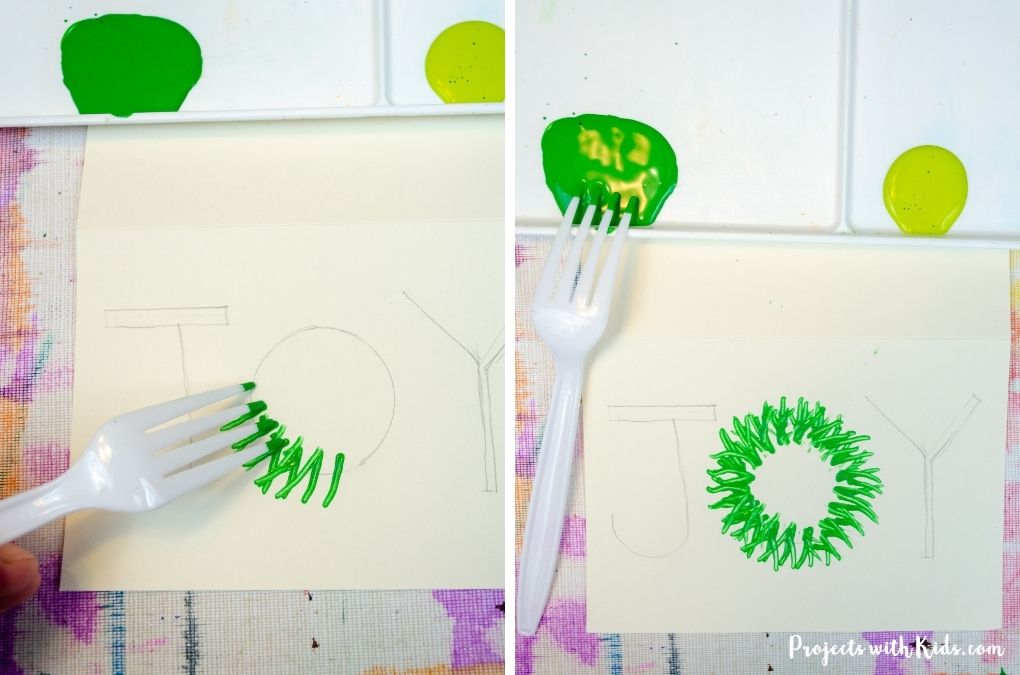
First, you will need to draw a circle for the wreath. Use a template such as a small paint bottle, plastic lid, or jar to make this easier for kids. Make sure that there is enough room to draw in the “J” and “Y” letters on either side of the circle to spell the word ‘joy”.
Have kids draw the letters in first before painting. Kids can use the example below for the letters or draw them in their own style.
2. You will need two shades of green for the wreath. A bright green and a lighter green. Start with the bright green, dip the ends of a plastic fork in the paint and start to paint the branches around the wreath.
Continue to paint around the wreath with the fork, dipping the fork in the paint as you go. I painted a couple of layers with my fork using the bright green to make it look really full.
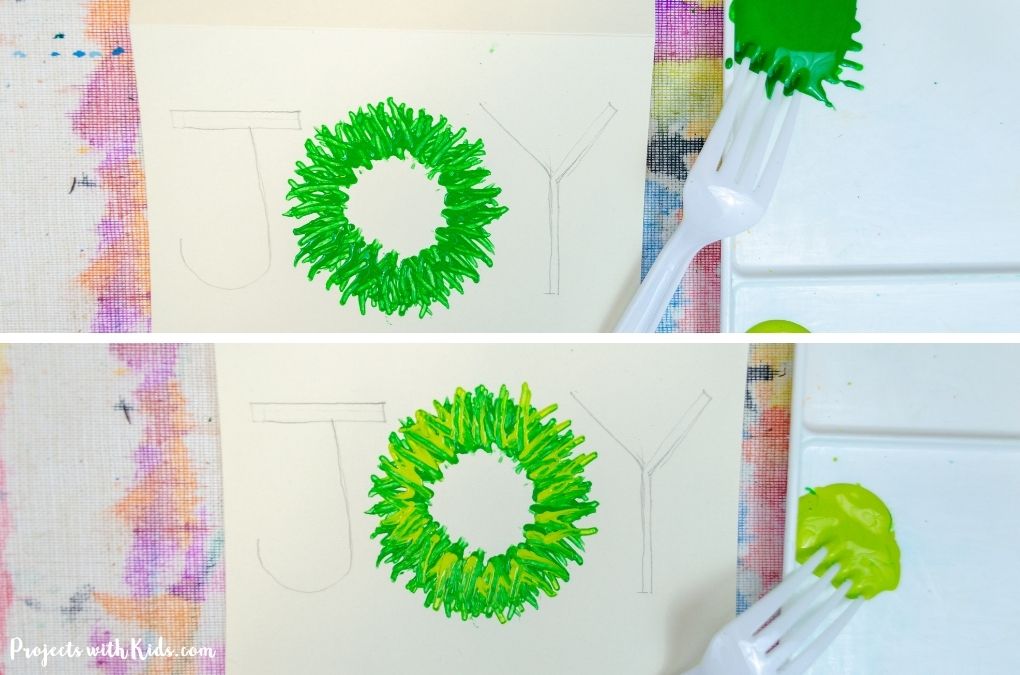
3. Paint in the lighter green color with a fork to add highlights. You do not have to wait for the first color to dry. It’s nice to have them blend a bit.
Dip the fork in the lighter green and paint around the wreath to add in the highlights. Let the paint dry completely before moving on.
4. Use a Q-tip or the end of a small paintbrush to paint in the bright red berries. Let this dry.
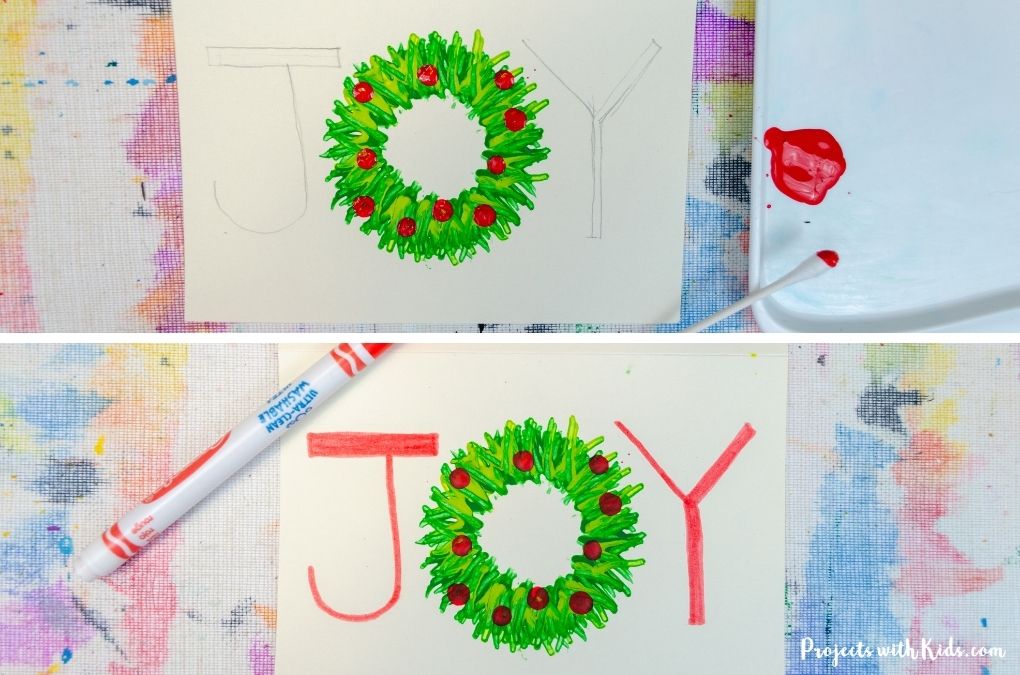
5. Finish off the card by coloring in the letters “J” and “Y” with a red marker.
Make a fork painted branch Christmas card
1. First, draw in the branches. Start with the main branch that the ornament will hang off of and then add in a few smaller branches.
Draw the string coming down for the ornament and then use a template to draw in the circle ornament. I used the same paint bottle for the circle template that I used for the wreath card. You could also use a plastic lid or jar.
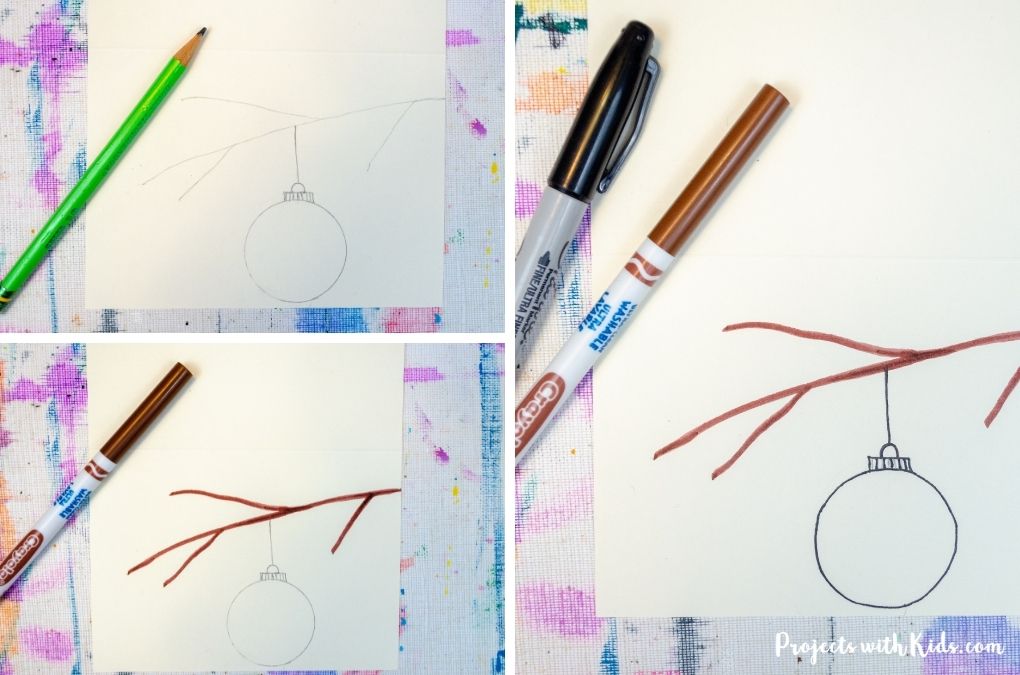
Add in the hook details on the ornament like in the photo example above.
2. Use a brown marker to trace over the branches and a black marker to trace over the string, and ornament.
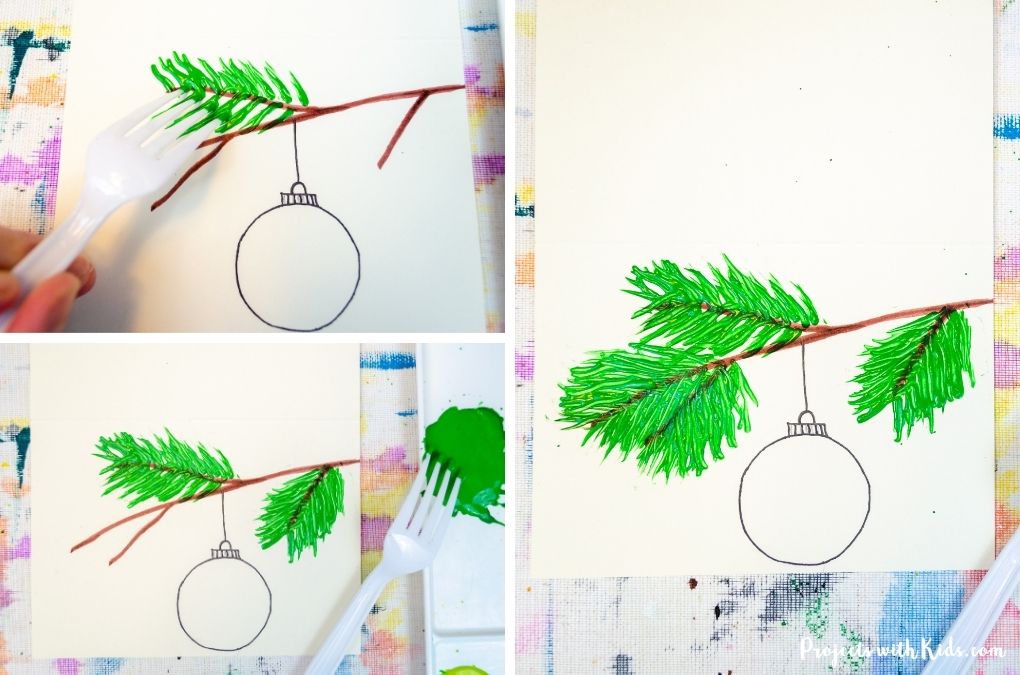
3. You will need two shades of green for the branches, a bright green and a darker green. Start with the bright green, dip your fork into the paint and start to paint on the branches.
Continue to paint on the branches using the bright green color, dipping the fork in the paint as you go. Kids will love exploring painting with a fork!
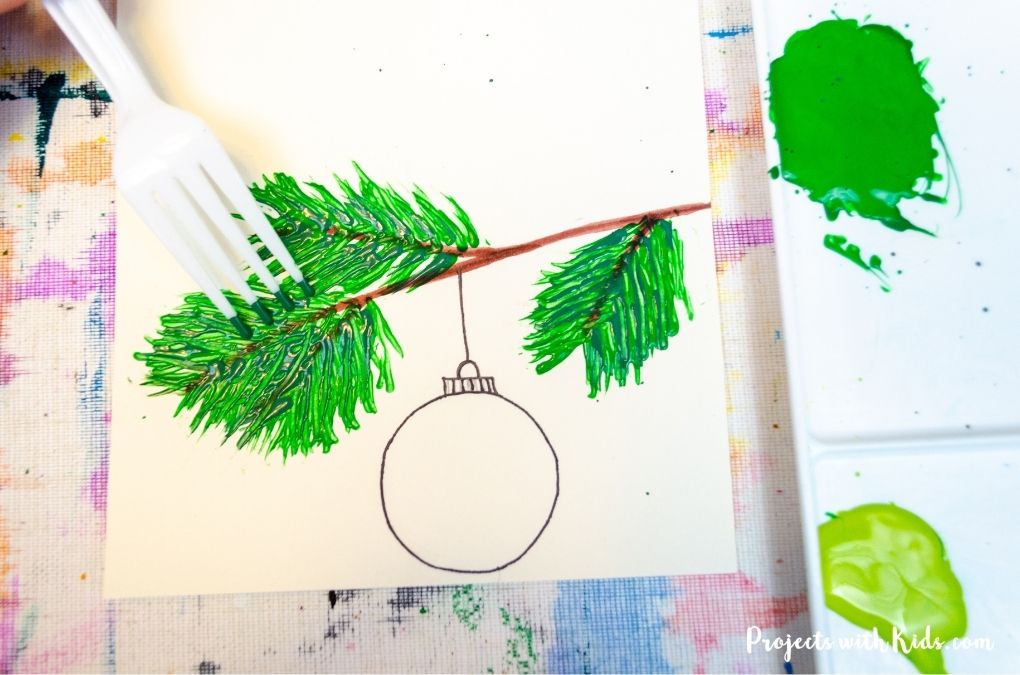
4. After kids are finished using the bright green paint, use the fork to paint in some darker green areas. You don’t have to wait for the bright green paint to dry, it’s nice to let the two colors blend slightly.
Let the paint dry completely before moving on.
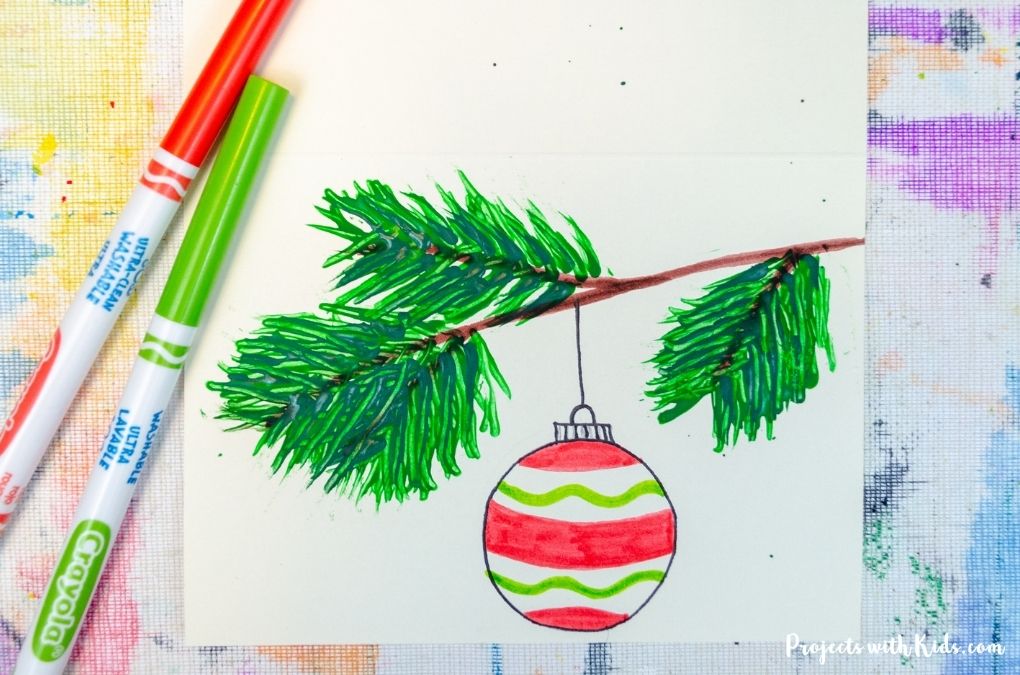
5. Finally, use markers to color in a design on the Christmas ornament. Kids can use the example above for their design or use their own ideas. A snowflake design would be pretty!
Have kids put their name and date on the back of the cards.

Kids will love painting with forks and making handmade Christmas cards for their friends and family this holiday season!
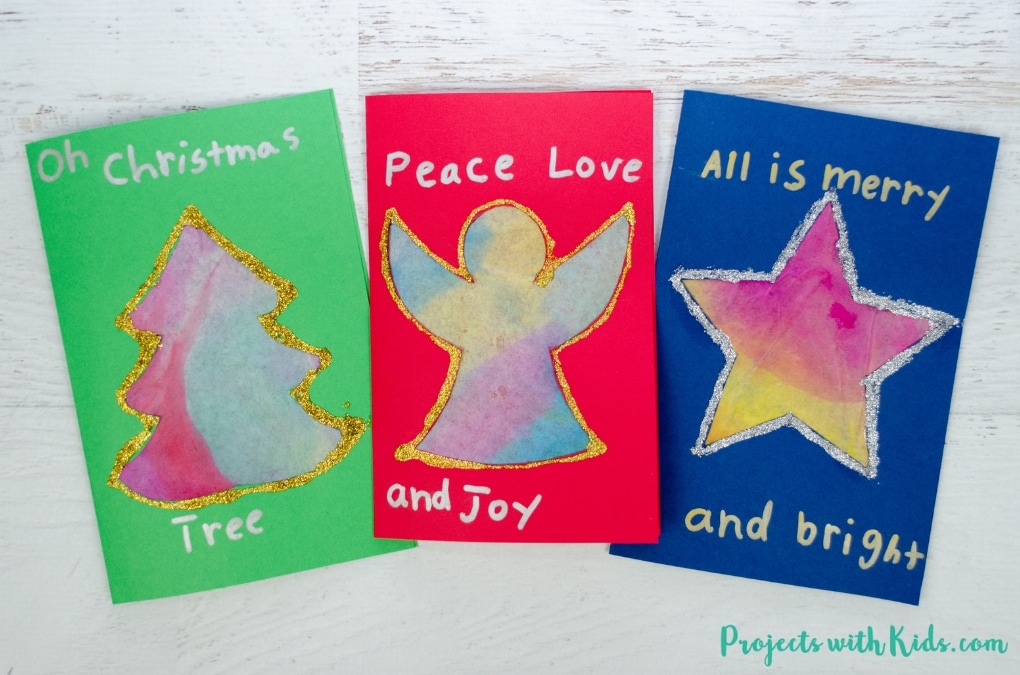
More handmade Christmas card ideas kids will love
Easy Watercolor Christmas Cards for Kids to Make

Colorful Kid Made Christmas Cards with Coffee Filters
Follow me on Pinterest for more amazing project ideas.
Pin this handmade card idea for later


Fork Painted Christmas Cards

Kids will love making these gorgeous fork painted Christmas cards with just a few simple supplies. A great Christmas craft and handmade card idea!
Materials
- Acrylic Paint in bright green, light green, dark green, and red
- Markers
- Q-tip or the end of a small paintbrush
- Cardstock or pre-folded blank cards
- Pencil & eraser
Tools
- Plastic fork
- Paint palette & water dish
Instructions
- For the wreath card, start by drawing a circle in the middle of the front of your card. Use a template to make this easier for kids. You can use a small paint bottle, plastic lid, or jar as a template.
- Draw in the "J" and "Y" on either side of the circle.
- Get your green paint ready, you will need a bright green and light green for the wreath. Dip a fork in the bright green paint and start to paint around the wreath. Use the photos above for examples.
Keep painting all the way around the wreath, dipping your fork in paint as you go. - Paint in the lighter green color with a fork to add in highlights.
- Once the wreath is completely dry, use a Q-tip or the end of a small paintbrush to dot on the berries in a bright red color.
- Finish off the wreath card by coloring in the letters with a red marker.
- To make the tree branch and ornament card, draw in the branches first. Then draw in the string hanging down and the circle ornament. I used the same paint bottle as a template for the circle that I did for the wreath card.
- Use a brown marker to trace over the branches and a black marker to trace the string and circle ornament.
- You will need two shades of green acrylic paint for this card, a bright green and dark green. Start by dipping your fork into the bright green paint and paint on the branches. Continue painting on all of the branches, dipping the fork in the paint as you go.
- Once you are done with the bright green, use the fork to paint in some darker green areas letting the two colors blend together slightly.
- After the paint has dried, use markers to draw on a design on the hanging ornament to finish off the card.